The Secret 3D Toy Hack That Makes Custom Dog Treats Sell Out In Minutes!
Insider Secret: The commercial dog treat industry is built on a foundation of cheap fillers, artificial colors, and brilliant marketing. But you don’t have to play their game anymore.
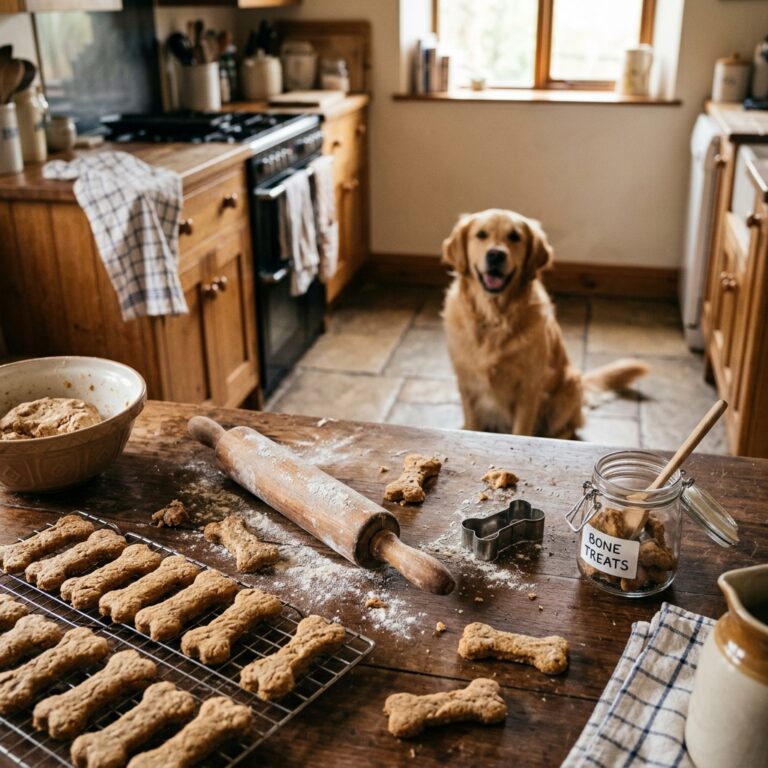
Welcome back, pack leaders. It is your resident Canine Nutrition Hacker here, and today we are diving deep into a loophole that is completely disrupting the boutique dog treat market. If you have ever walked into a high-end pet bakery and scoffed at the eight-dollar price tag for a single, fancy-looking dog biscuit, you are in the right place. We are going to talk about a revolutionary method to create stunning, highly textured, professional-grade dog treats right in your own kitchen. I am talking about the secret 3D toy hack. This method is allowing savvy dog owners to bypass the junk-filled commercial treats, take absolute control over their dog’s nutrition, and for those with an entrepreneurial spirit, create custom treats that literally sell out in minutes at local farmer’s markets.
Before we get our hands dirty, let us lay down the ground rules. SAFETY DISCLAIMER: I am a forensic nutrition hacker and a savvy dog parent, not a veterinarian. While the ingredients we discuss are generally recognized as safe and highly beneficial, every dog is unique. Always introduce new foods slowly and consult your vet, especially if your dog has specific health conditions or severe allergies. Furthermore, when creating DIY molds, we will only be using 100% food-grade, non-toxic materials. Safety always comes first.
So, why are we hacking the system? Because if you look at the back of a typical commercial dog treat bag, you are going to see a horror story of ingredients. We are talking about corn gluten meal, unnamed meat by-products, high fructose corn syrup, and artificial preservatives like BHA and BHT. These are ingredients that have absolutely zero business being in your dog’s body. They are cheap fillers designed to maximize corporate profit margins, not your dog’s health. The only thing these commercial treats have going for them is that they look good. They are extruded into fun shapes, dyed with artificial colors, and packaged in shiny bags. But what if I told you that you could replicate that professional, high-end visual appeal without sacrificing one ounce of nutritional integrity? That is exactly what the 3D toy hack achieves. Let us break down exactly how you can turn your kitchen into a high-end, filler-free canine bakery.
The Ugly Truth About Commercial Treat Shapes
Let us put on our forensic scientist hats and analyze the psychology of the pet store aisle. Why do we buy treats shaped like little bones, mailmen, or toothbrushes? Because humans buy with their eyes. The commercial pet food industry knows this all too well. They invest millions of dollars into industrial extrusion machines and custom molds to create treats that appeal to you, the human buyer. Your dog does not care if a treat is shaped like a fire hydrant; they care about the smell, the taste, and the texture. However, to get those perfect, uniform shapes on an industrial scale, manufacturers have to use doughs that are heavy in binding agents. This brings us to the dreaded First 5 Ingredients Truth.
Pick up a bag of standard, cheap grocery store dog treats. Look at the first five ingredients. You will almost always see something like this: Wheat Flour, Water, Meat and Bone Meal, Sugar, and Animal Fat (preserved with BHA). Notice what is missing? Real, high-quality, named protein. Notice what is abundant? Wheat flour and sugar. These ingredients act as the glue that holds those cute industrial shapes together. They are essentially feeding your dog highly processed junk food just so the treat looks nice in your hand. Wheat and corn are notorious for causing inflammation and triggering allergies in sensitive dogs. Sugar, often disguised as corn syrup or cane molasses, leads to obesity, dental decay, and metabolic issues. We are paying a premium for garbage nutrition simply because it is pressed into a fun shape.
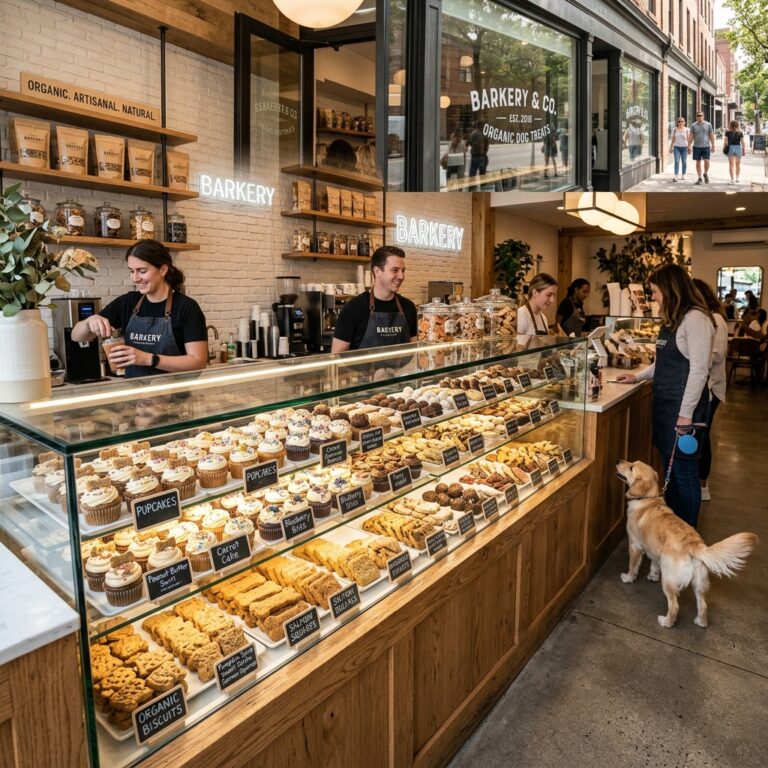
The Boutique Bakery Alternative (And Its Flaws)
Now, you might think the solution is to buy from boutique dog bakeries. While these treats are often significantly healthier, relying on ingredients like oat flour and real peanut butter, they come with a massive markup. You are paying for the baker’s time, overhead, and aesthetic skills. A single decorated cookie can cost upwards of five dollars. If you are training a dog or just want to spoil them daily, this is financially unsustainable for the average savvy owner. This is the exact problem the 3D toy hack solves. It bridges the gap between the beautiful, textured appeal of commercial and boutique treats, and the pristine, filler-free nutrition of homemade food, all while keeping your budget entirely intact.
The Secret 3D Toy Hack Explained
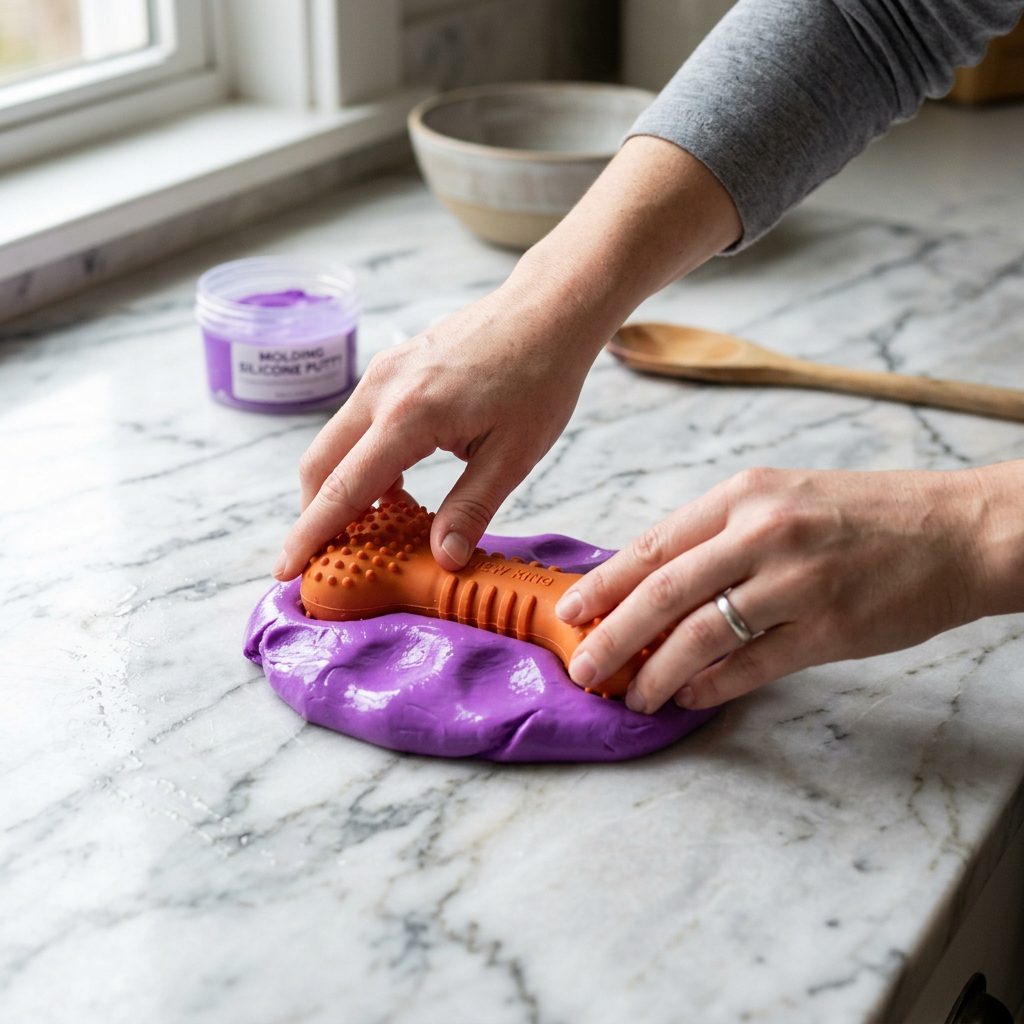
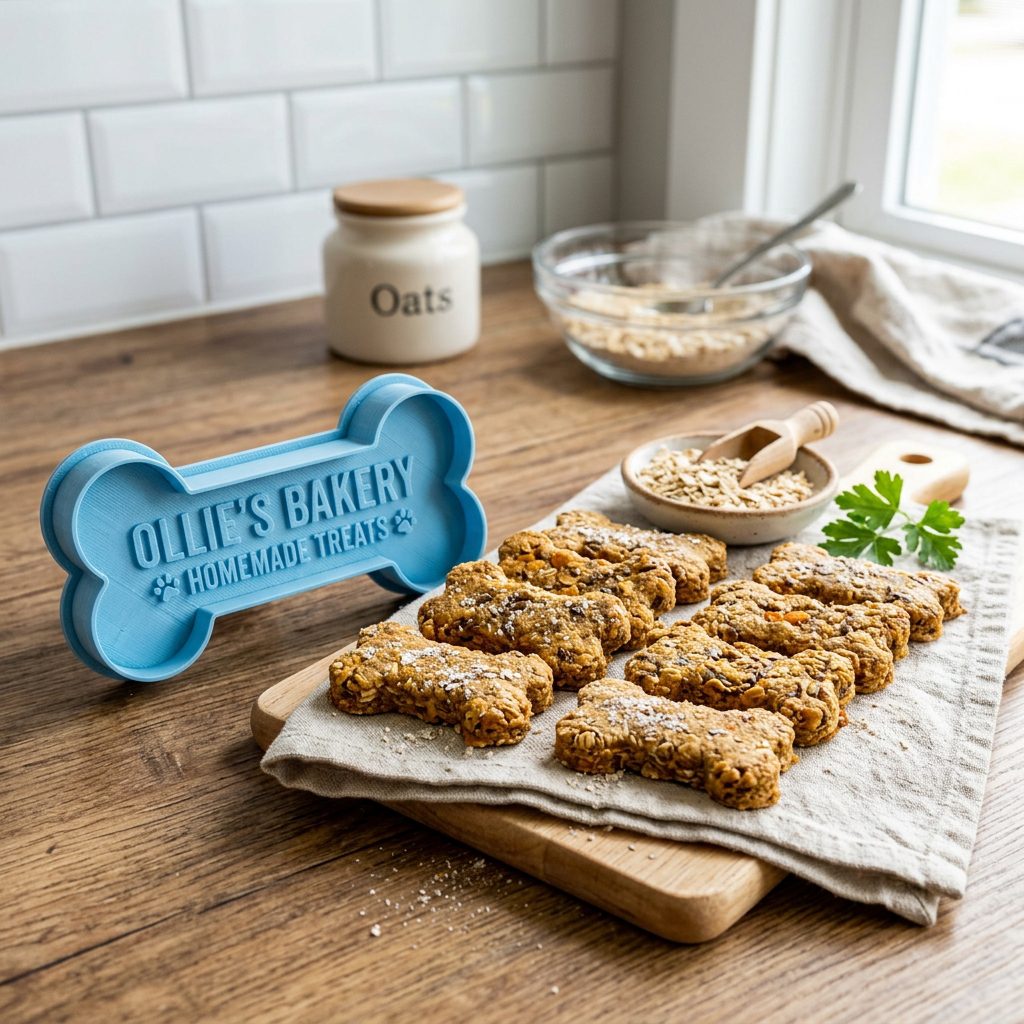
Here is the insider secret that is changing the game. You do not need to buy expensive, specialized baking molds to create incredible looking treats. You can make your own custom molds using a simple, two-step process involving food-grade silicone putty and a brand new, deeply textured dog toy. Yes, you read that right. We are using dog toys to make dog treats.
Step-by-Step: Creating Your Custom Mold
- Source the Master Shape: Go to your local pet store and find a brand new, hard rubber or nylon dog toy with an incredible 3D texture. Think of toys with deep ridges, raised bumps, or intricate geometric patterns. The more texture, the better the final treat will look. You can also use clean 3D printed objects made from non-toxic PETG filament if you have access to a 3D printer.
- Sanitize Everything: This is non-negotiable. Take your new toy and wash it meticulously with hot, soapy water. If it is dishwasher safe, run it through a sanitizing cycle. You want zero factory residue on this item.
- The Magic Ingredient: Food-Grade Silicone Putty: Purchase a high-quality, 100% food-grade silicone mold-making putty. This usually comes in two parts (Part A and Part B). When you mix them together, a chemical reaction occurs that cures the putty into a flexible, heat-resistant rubber. Make absolutely sure the packaging explicitly states it is food safe and oven safe.
- Mix and Press: Take equal parts of Putty A and Putty B. Knead them together rapidly until the color is uniform. You only have a few minutes of working time. Roll it into a smooth ball, flatten it slightly on a clean counter, and firmly press your sanitized 3D toy into the putty. You want to capture all those amazing textures and ridges.
- Cure and Reveal: Let the putty sit undisturbed for the time specified on the package (usually 15 to 30 minutes). Once cured, it will feel like flexible rubber. Gently pop the toy out. You now have a flawless, highly detailed, custom 3D baking mold that can withstand oven temperatures up to 400 degrees Fahrenheit.
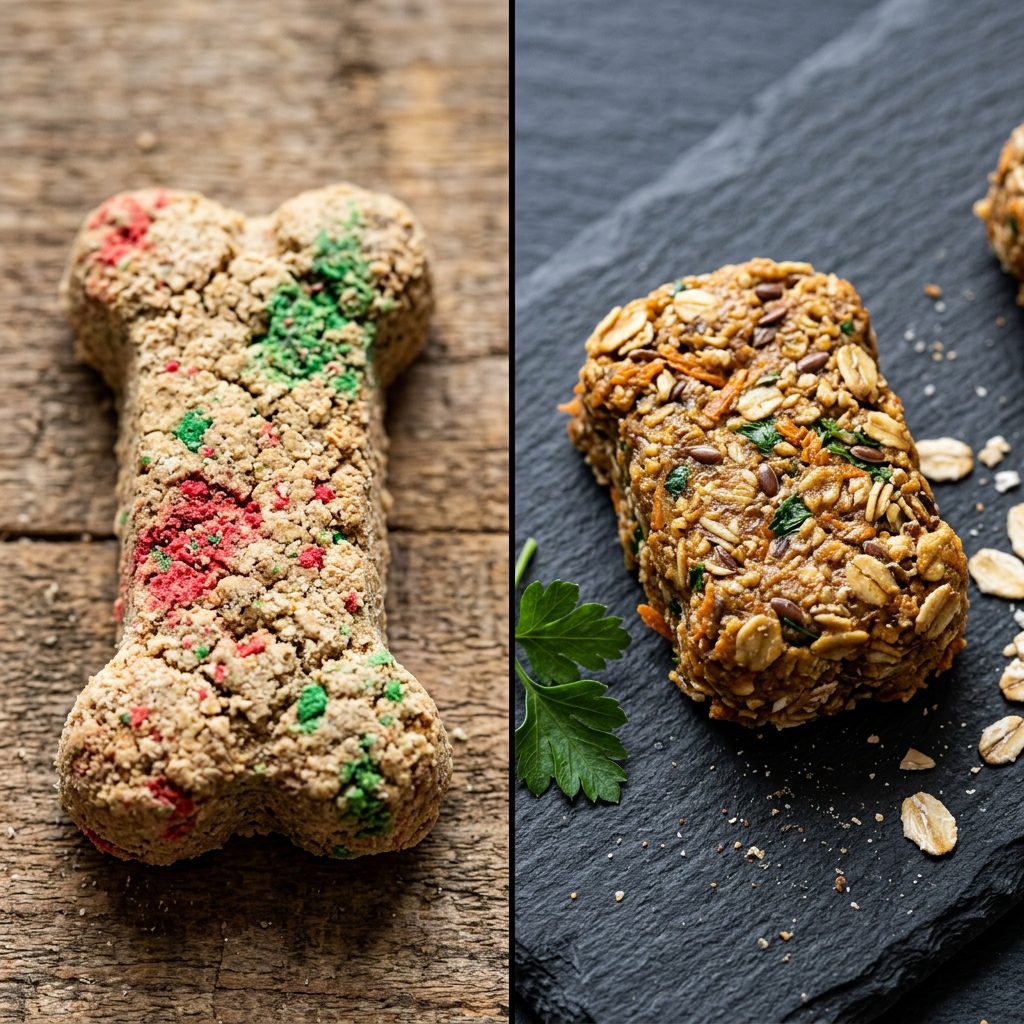
Why is this hack so powerful? Because you can create shapes and textures that do not exist in the baking aisle. You can press a textured chew ring into the putty to make ring-shaped treats that help clean teeth. You can use 3D printed letter stamps to press your dog’s name into the mold. When you bake your healthy dough in these custom molds, the treats come out looking like they were manufactured in a million-dollar facility. If you are selling these at a farmer’s market, the visual appeal is what makes people stop at your table. When they realize the treats are also incredibly healthy, they buy every bag you have.
The Problem Solver: A Filler-Free, High-Profit Recipe
Now that you have your custom, high-end molds, you need a dough that is worthy of them. We are not going to use cheap wheat or corn. We are going to use functional, hero ingredients that support canine health, soothe sensitive stomachs, and bake perfectly into our detailed 3D molds. This recipe is what I call The Problem Solver. It is naturally gluten-free, packed with fiber, and uses novel proteins and healthy fats.
Hero Ingredients vs. Enemy Ingredients
- Enemy Ingredient: Wheat Flour. Triggers itching, yeast infections, and digestive upset in many dogs.
- Hero Ingredient: Organic Oat Flour. Easily digestible, great for sensitive stomachs, and provides a beautiful, stable binding for our dough.
- Enemy Ingredient: Artificial Binders and Syrups. Causes blood sugar spikes and weight gain.
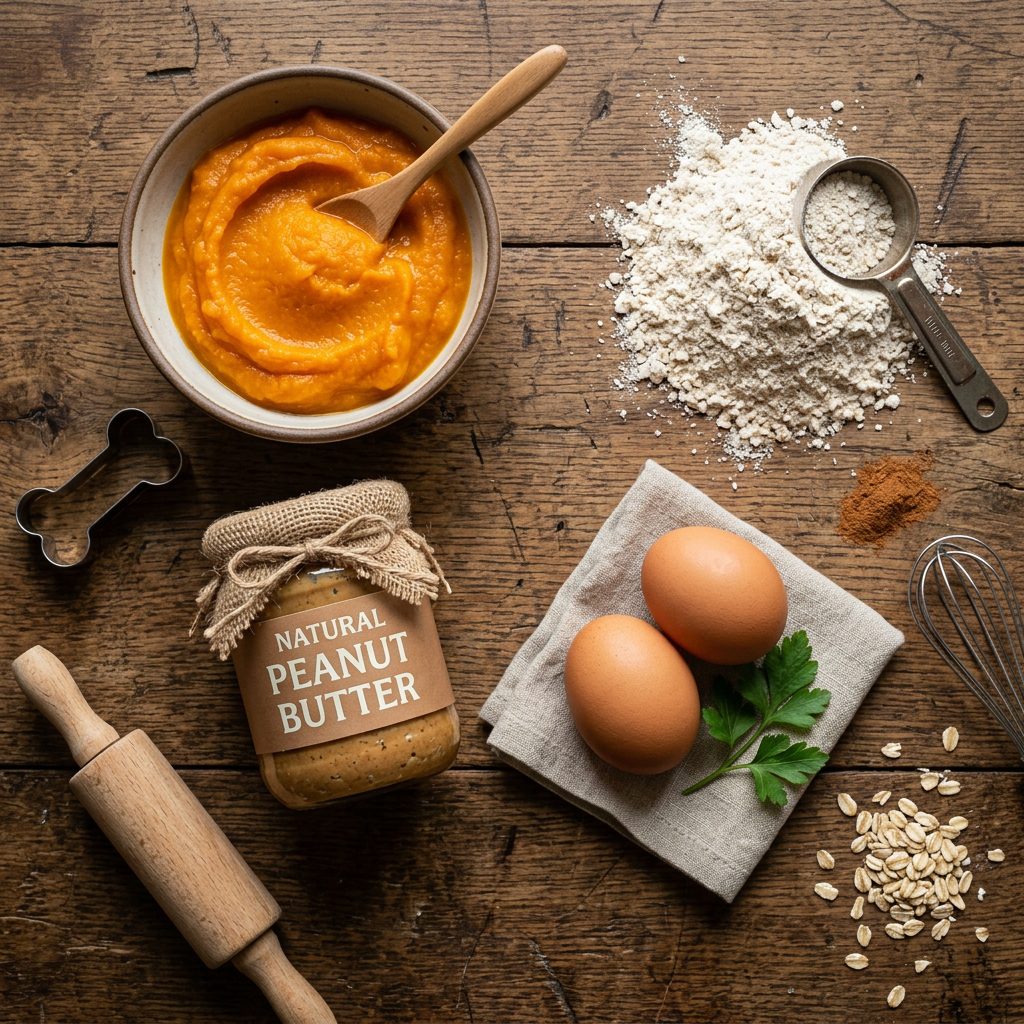
- Hero Ingredient: Pure Pumpkin Puree. Nature’s digestive miracle. High in fiber, low in calories, and acts as a fantastic natural binder for the dough.
- Enemy Ingredient: Generic Animal Fat. Often rancid and sourced from questionable origins.
- Hero Ingredient: Xylitol-Free Peanut Butter. Provides healthy fats, protein, and a scent that dogs go absolutely crazy for. CRITICAL WARNING: You must check the label of your peanut butter. Xylitol (sometimes labeled as birch sugar) is highly toxic and fatal to dogs. Only use peanut butter where the only ingredients are peanuts and maybe a little salt.
The Hacker’s Custom Mold Recipe
This dough is designed to hold intricate 3D textures without puffing up and losing its shape in the oven. It is a dense, highly nutritious dough.
- Preheat your oven to 325 degrees Fahrenheit. You want a lower, slower bake to dry the treats out so they last longer without artificial preservatives.
- In a large bowl, combine 1 cup of pure pumpkin puree (not pumpkin pie filling!) and 1/2 cup of natural, xylitol-free peanut butter. Mix until completely smooth.
- Add 2 large eggs. Eggs act as a vital protein source and help bind the dough so it captures the 3D details of your mold.
- Gradually mix in 2.5 to 3 cups of organic oat flour. Start with 2.5 cups and knead the dough with your hands. You want a consistency similar to Play-Doh—firm, not sticky, and able to hold a shape perfectly. If it is too sticky, add the remaining half cup of oat flour.
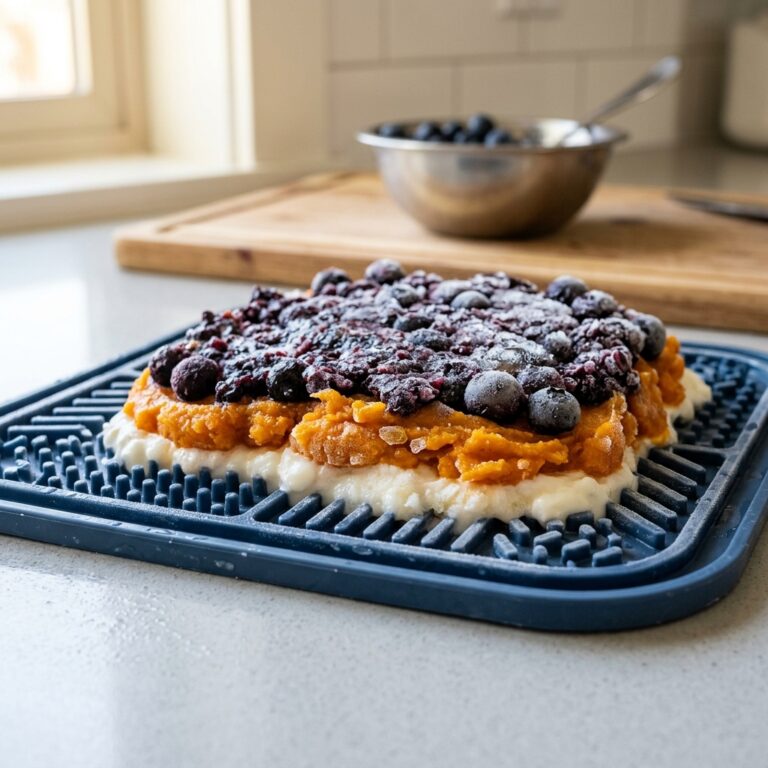
- Pinch off small pieces of the dough and press them firmly into your custom 3D silicone molds. Make sure you press down hard so the dough fills every tiny ridge and texture of the mold.
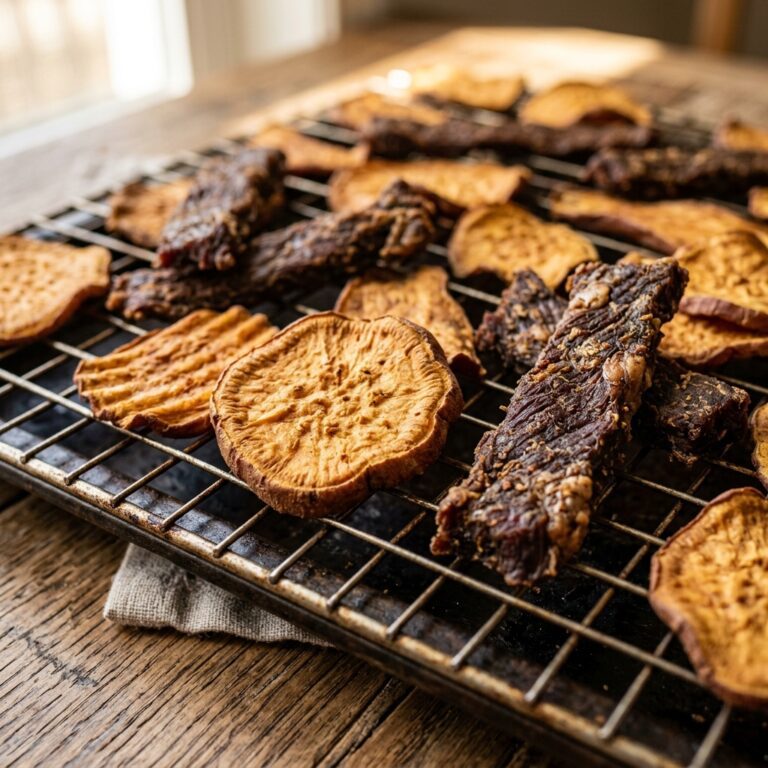
- Bake for 25 to 30 minutes. Once done, turn the oven off and leave the treats inside as the oven cools. This dehydrates them further, extending their shelf life naturally.
Pop them out of the molds, and you will be staring at a batch of treats that look like they cost a fortune, but are packed with pristine, gut-healing nutrition.
The Real Cost Breakdown: DIY vs. Store-Bought
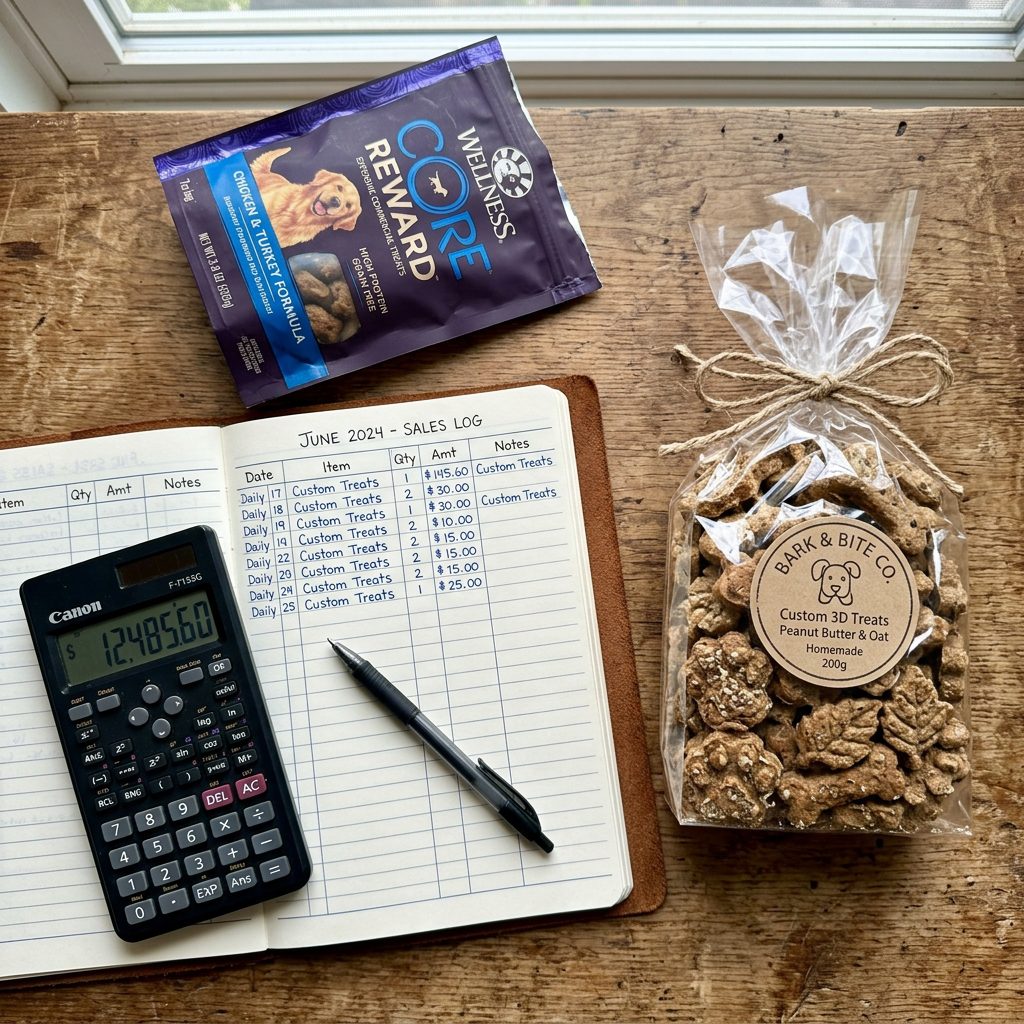
Let us talk numbers. As a nutrition hacker, I do not just want to improve your dog’s health; I want to protect your wallet. The pet industry relies on you not doing the math. When you buy a premium bag of treats, you are paying for marketing, packaging, shipping, and retail markup. Let us do a forensic cost analysis comparing a popular store-bought premium treat with our DIY 3D mold treats. We will calculate this based on a standard 16-ounce yield.
| Metric | Store-Bought Premium Treats | DIY Custom 3D Mold Treats |
|---|---|---|
| Primary Ingredients | Wheat, Glycerin, Meat Meal | Oat Flour, Pumpkin, Peanut Butter |
| Visual Appeal | Generic Extruded Shapes | Bespoke 3D Textures & Designs |
| Estimated Cost (16 oz batch) | $14.00 – $18.00 | $3.50 – $4.50 |
| Cost Per Ounce | ~$1.00 | ~$0.25 |
| Profit Margin (If Selling at $12/bag) | N/A | Over 60% |
Look at those numbers. You are saving roughly 75% by making these yourself, and you are providing vastly superior nutrition. The initial investment is minimal. A tub of food-grade silicone putty costs about $20, and a textured dog toy might cost $10. For $30, you have a reusable, custom mold infrastructure that will last for hundreds of baking cycles. If you decide to turn this into a side hustle, the profit margins are staggering. Because your treats look incredibly unique thanks to the 3D toy hack, you can command premium boutique prices at local markets. Customers will gladly pay $10 to $12 for a beautifully packaged bag of treats that look this good and feature a clean, five-ingredient label. You are literally turning oat flour and pumpkin into high-margin gold.
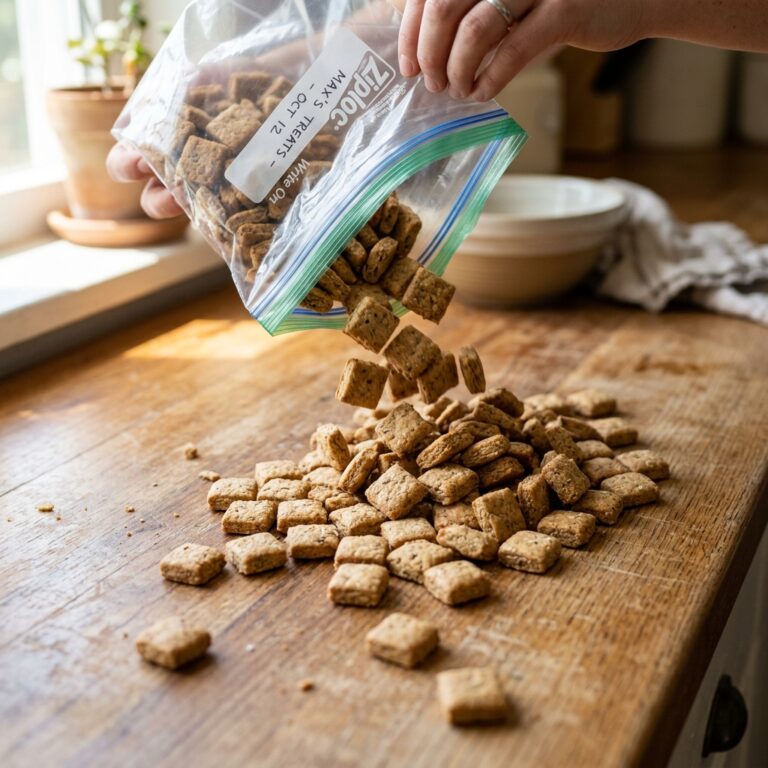
Batching & Storing: The Hacker’s Workflow
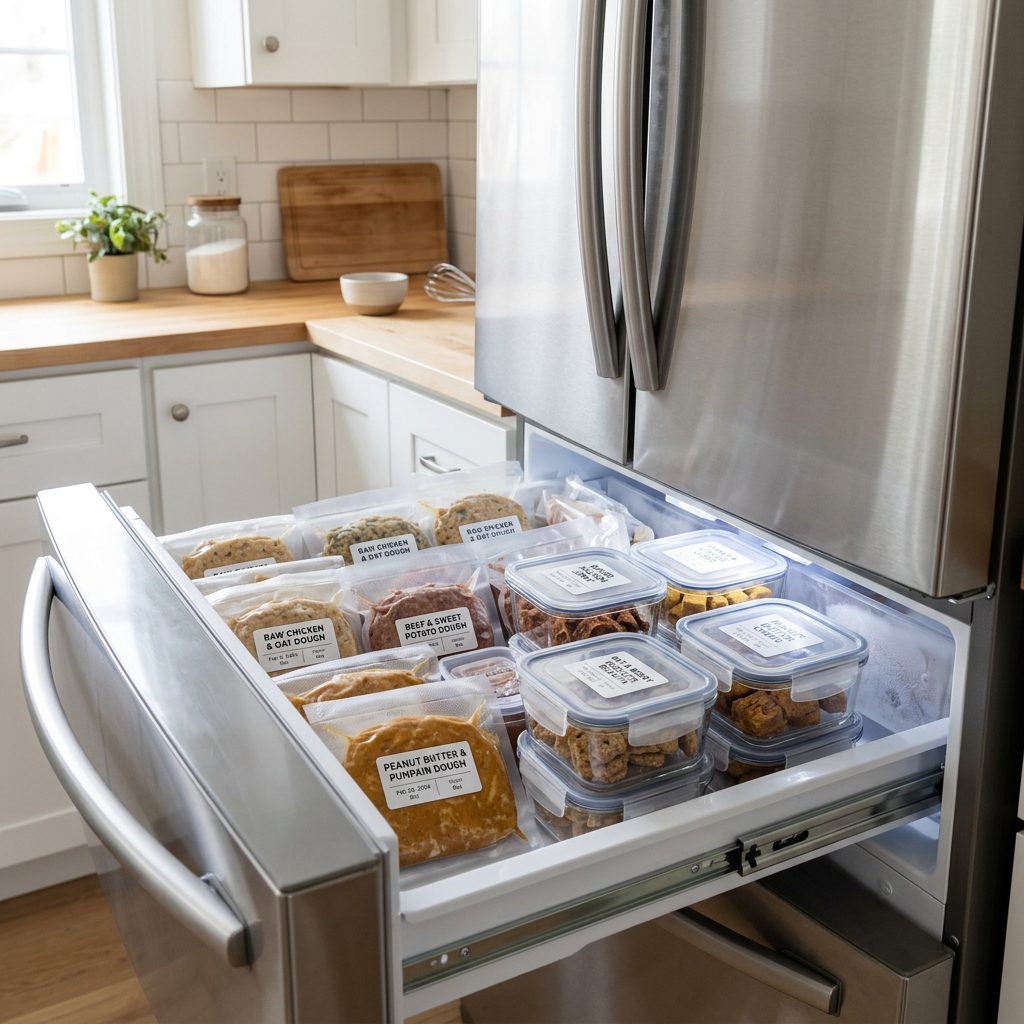
One of the biggest challenges with homemade, filler-free dog treats is shelf life. Because we are aggressively avoiding artificial chemical preservatives like BHA, BHT, and ethoxyquin, our fresh treats will not sit on a shelf for two years like the commercial junk. But do not worry, I have a workflow that makes this effortless. It is all about batching and proper storage.
The Dehydration Secret
Moisture is the enemy of shelf life. The reason commercial treats stay soft and chewy forever is because they are pumped full of glycerin and artificial humectants. For our homemade treats, we use the dehydration method. As mentioned in the recipe, leaving the treats in the oven as it cools draws out excess moisture. If you want them to last even longer, you can place the baked treats in a food dehydrator at 130 degrees Fahrenheit for a few hours. A perfectly dry, crunchy treat will last in an airtight container in the pantry for up to three weeks.
Freezing the Dough
If you are a busy dog owner, you do not want to be mixing dough every week.
Hacker Tip: Make a massive quadruple batch of the dough. It freezes beautifully.
Take your extra dough, roll it into logs, wrap it tightly in plastic wrap, and put it in a freezer-safe bag. It will last in the freezer for up to three months. When you are running low on treats, simply pull a log out, let it thaw in the fridge overnight, press it into your custom 3D silicone molds, and bake. You get fresh, high-quality treats with zero prep time.
Packaging for Profit
If you are using this 3D hack to sell treats, presentation is everything. Buy high-quality, clear gusseted bags so the intricate 3D textures of your treats are fully visible. The visual appeal is your biggest selling point. Create a clean, minimalist label that proudly lists your simple, wholesome ingredients. Always check your local cottage food laws and AAFCO regulations regarding the sale of pet treats in your state. Most states require a guaranteed analysis (protein, fat, fiber, moisture percentages) on the label if you are selling them commercially. You can easily get your treats tested at an agricultural lab for a small fee. Once you are compliant, set up a table at your local farmer’s market, put out some free samples, and watch as your custom, 3D-hacked treats sell out in minutes.
Conclusion
There you have it, pack leaders. You are now armed with the secret 3D toy hack. You have the knowledge to bypass the deceptive marketing of the commercial pet food industry, expose their cheap fillers, and take absolute control over what goes into your dog’s body. By utilizing food-grade silicone putty and textured toys, you can create bespoke, professional-grade treats that rival the most expensive boutique bakeries in the world, all for pennies on the dollar. Whether you are doing this to soothe a sensitive stomach, spoil your best friend with pristine nutrition, or launch a highly profitable side hustle, this hack is a total game-changer. Stop settling for overpriced junk food. Get into the kitchen, start hacking your dog’s nutrition, and watch how much they thrive. Until next time, keep reading those labels and keep demanding better for your dogs!