Looks Expensive, Costs Pennies: 7 Genius Dog Bakery Packaging Hacks
Let’s be real: we’ve all been there. You walk into a high-end pet boutique and see a tiny bag of ‘artisanal’ biscuits sitting under a spotlight with a $22 price tag. You flip it over, and what do you see? Wheat flour, sugar, and a whole lot of ‘marketing.’ As a Canine Nutrition Hacker, that drives me absolutely wild. You’re paying for the ribbon, not the ribeye.
But here’s the thing—as savvy dog owners, we know that quality nutrition is what actually matters. We’re the ones baking grain-free, liver-rich, superfood-packed treats in our own kitchens. The problem? When we give them as gifts or sell them at local markets, they often end up in a ziplock bag that looks, well, a bit sad. You’ve got the 5-star ingredients, but you’re missing the 5-star presentation.
I’m going to show you how to close that gap. You don’t need a thousand-dollar branding budget to make your treats look like they belong on the shelves of a SoHo pet loft. We are going to use insider packaging hacks that cost literal pennies but scream ‘premium luxury.’ We’re talking about high-impact, low-cost strategies that let the quality of your ingredients shine while making your brand (even if it’s just ‘Mom’s Kitchen’) look untouchable. Let’s dive into the secrets of the trade.
The Psychology of the ‘Premium’ Look
Before we get into the physical hacks, you need to understand why some packaging looks ‘cheap’ and other packaging looks ‘expensive.’ In the world of high-end dog bakeries, less is almost always more. Cheap brands try too hard; they use neon colors, cartoonish fonts, and plastic bags that crinkle loudly. Expensive brands use textures, earthy tones, and minimalism.
When a customer (or a friend) sees a treat packaged in natural materials, their brain immediately associates it with ‘organic,’ ‘small-batch,’ and ‘healthy.’ By switching from plastic to paper, you are subconsciously telling them that the treats inside are free from artificial preservatives. It’s a visual shorthand for quality.
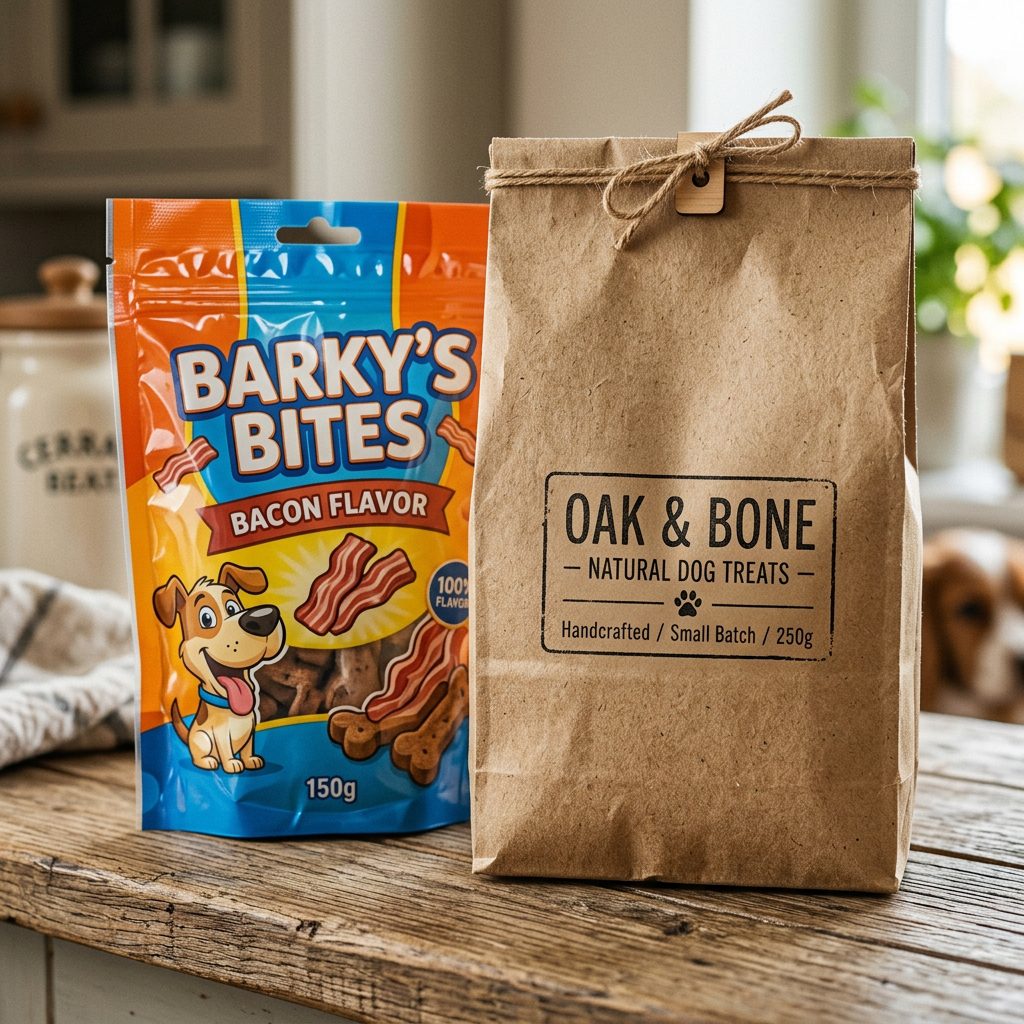
Hacker Tip: Avoid ‘Pet Store Blue’ and ‘Neon Yellow.’ Stick to a palette of white, cream, kraft brown, and charcoal grey. These colors are synonymous with luxury human food brands, and that association carries over to the pet world perfectly.
To give you an idea of the cost difference we’re aiming for, look at this breakdown of professional vs. hacker packaging:
| Packaging Element | Professional Custom Cost | Hacker Hack Cost |
|---|---|---|
| Custom Printed Boxes | $2.50 – $4.00 each | $0.15 each |
| Gold Foil Labels | $1.20 per label | $0.08 per label |
| Branded Ribbon | $0.50 per foot | $0.02 per foot |
| Total Per Unit | $4.20 – $5.70 | $0.25 – $0.35 |
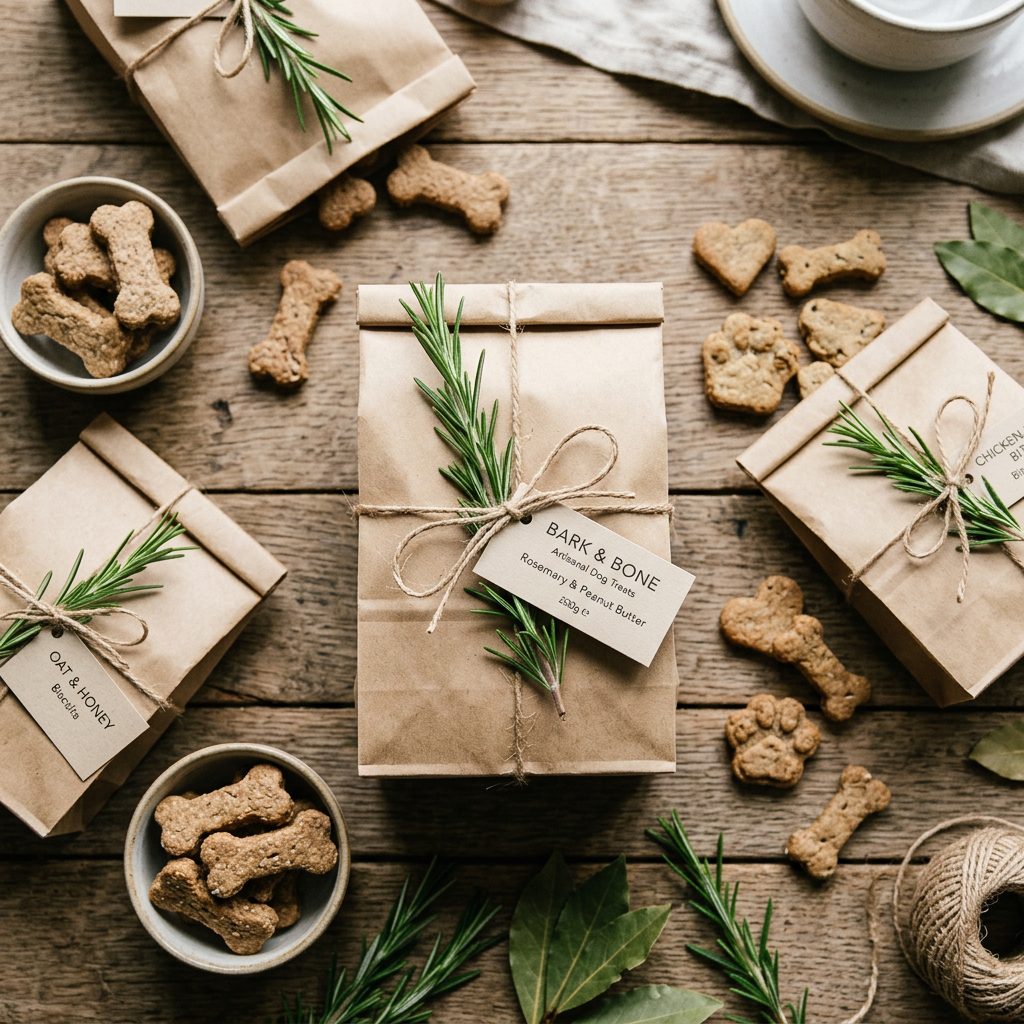
Hack 1: The Kraft Paper Revolution
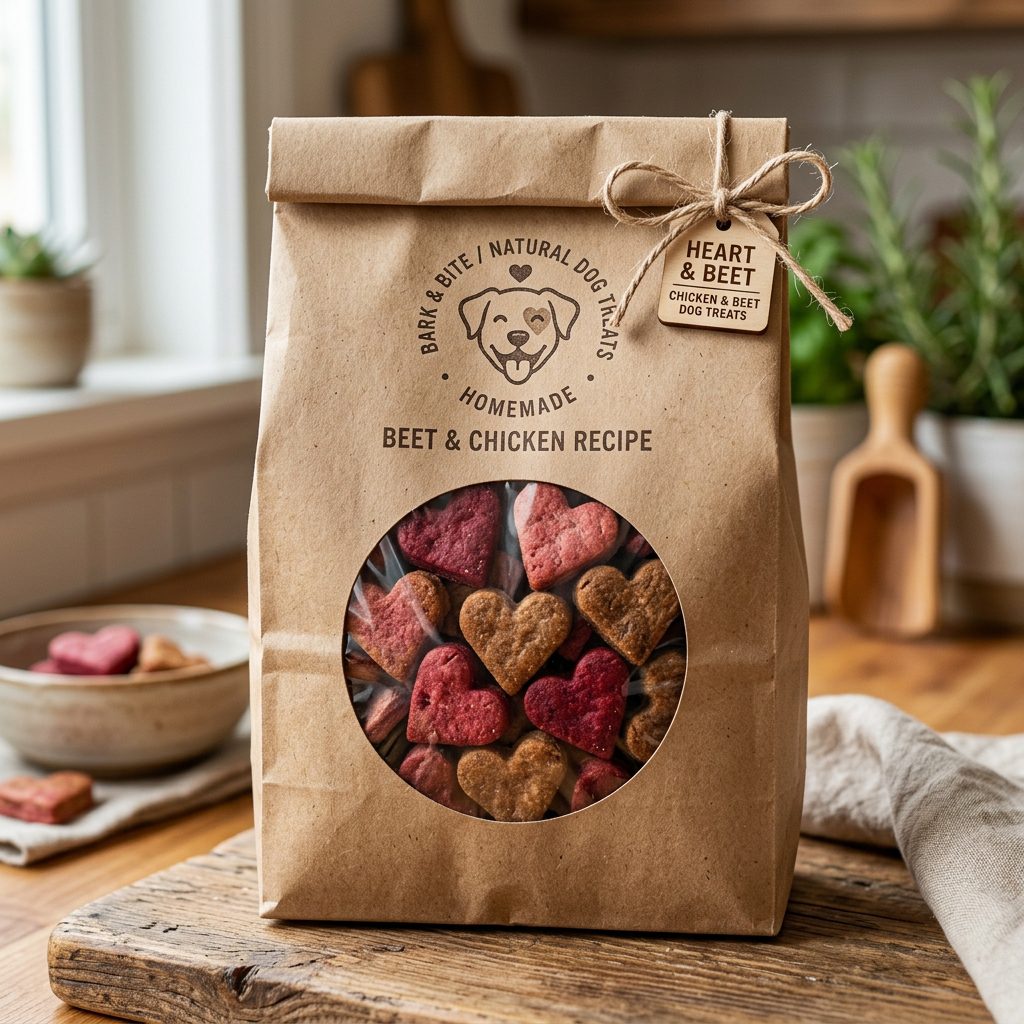
The Power of the Window Bag
If you want to look expensive, you have to show off the product. High-quality dog treats—especially those made with real meat, blueberries, or turmeric—have beautiful, natural colors. Don’t hide them! Use kraft paper bags with a clear PLA window. These bags are biodegradable, grease-resistant (essential if you use healthy fats like coconut oil), and cost next to nothing when bought in bulk.
Why It Works
- Transparency: It shows you have nothing to hide. You aren’t masking ‘kibble dust’ with opaque plastic.
- Texture: The matte finish of kraft paper feels premium in the hand compared to slippery plastic.
- Eco-Friendly Vibes: Savvy owners care about the planet as much as their pups.
Instead of buying ‘dog-specific’ bags, search for ‘bakery window bags’ or ‘coffee bags’ on wholesale sites. The ‘pet’ label often adds a 30% markup for no reason. That’s money you should be spending on grass-fed collagen or organic pumpkin puree.
Hack 2: Custom Stamping vs. Professional Printing
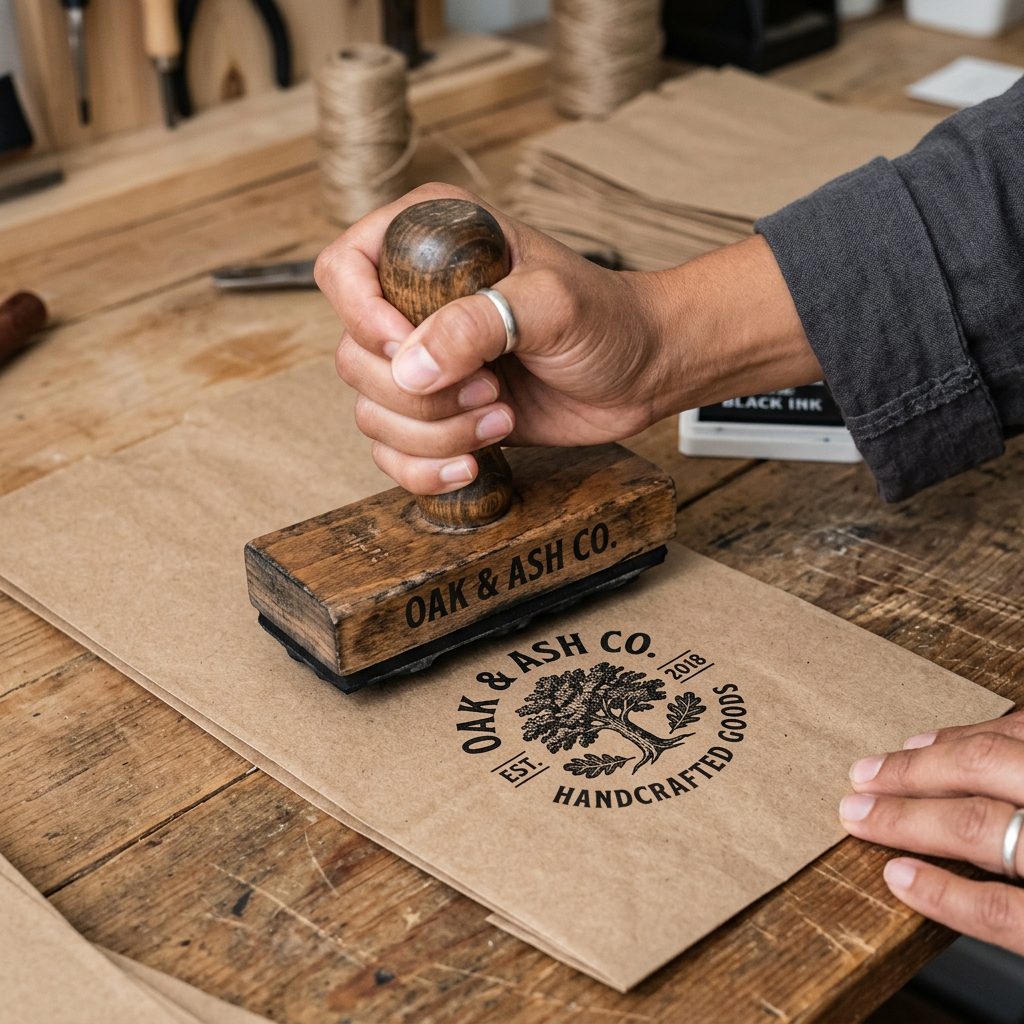
The ‘Hand-Stamped’ Aesthetic
One of the biggest expenses for a new dog bakery is custom-printed packaging. Minimum order quantities (MOQs) are usually in the thousands. Here is the secret: Buy a high-quality custom rubber stamp for $25 and stamp your bags yourself.
A hand-stamped logo looks intentional and ‘artisanal.’ It tells the buyer that a human being actually touched this bag. In a world of mass production, that human touch is a luxury feature. You can change your ‘flavor’ stamp or ‘seasonal’ stamp for just a few dollars, whereas changing a printed bag design would cost hundreds.
Choosing Your Ink
Don’t just use standard office ink. Use archival-quality pigment ink in ‘Stazon’ black or a deep forest green. It won’t smudge on the paper, and the color will stay crisp and professional even if the bag gets a little damp from the treats’ moisture.
Hacker Tip: Stamp the bags *before* you fill them. It sounds obvious, but trying to stamp a bag full of lumpy biscuits is a recipe for a branding disaster.
Hack 3: The ‘Farm-to-Bowl’ Glass Jar
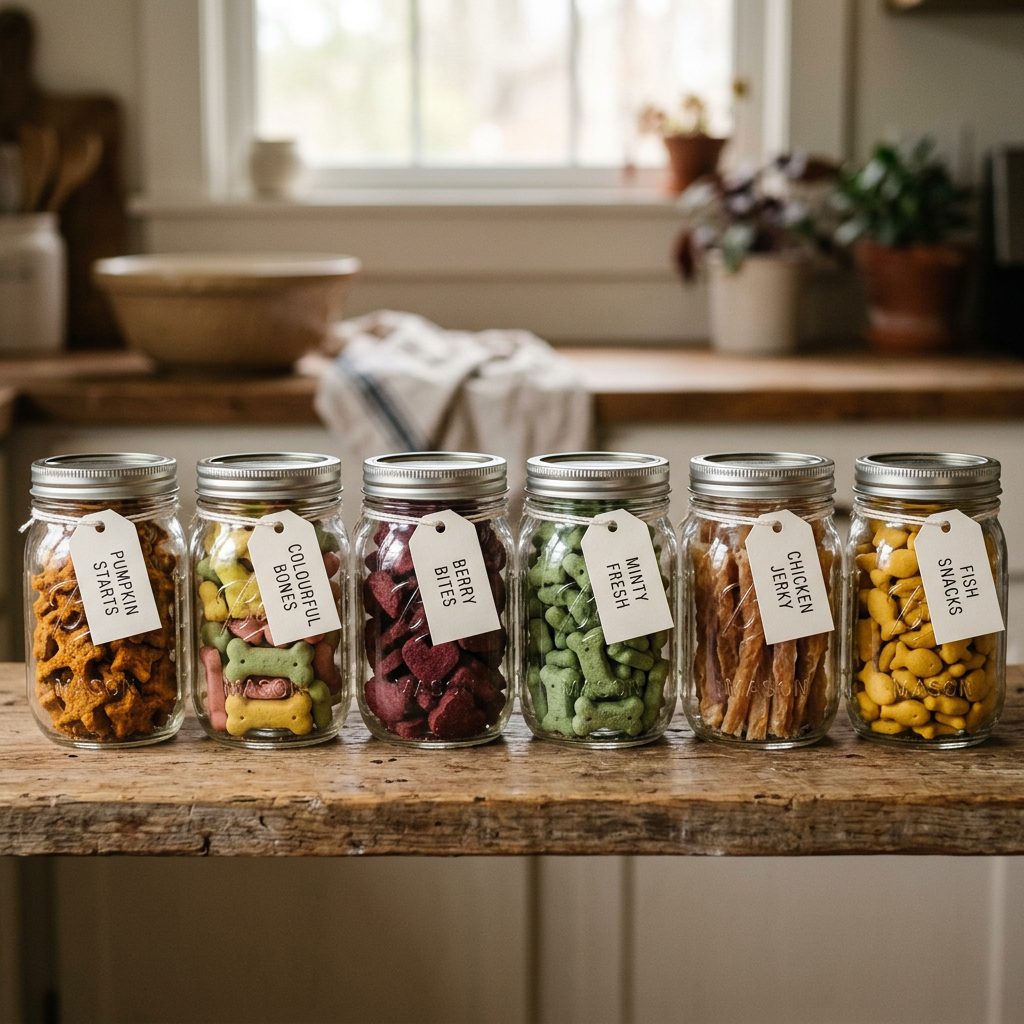
Upcycling for the Win
Nothing says ‘elite’ like a glass jar. If you are doing local deliveries or gifting to friends, skip the bags entirely. Go to a local thrift store or buy bulk straight-sided apothecary jars. A jar filled with dehydrated sweet potato chews looks like a piece of home decor.
But here is the real hacker move: The Mason Jar Exchange. If you are selling your treats, offer a $1 discount on the next purchase if the customer returns the glass jar. This does three things:
- It builds incredible customer loyalty.
- It lowers your long-term packaging costs to near zero.
- It reinforces your brand as a sustainable, community-focused business.
| Jar Type | Bulk Cost (New) | Thrift/Upcycle Cost | Visual Impact |
|---|---|---|---|
| Mason Jar (16oz) | $1.10 | $0.25 | High / Rustic |
| Apothecary Jar | $2.50 | $0.75 | Very High / Boutique |
| Recycled Sauce Jar | $0.00 | $0.00 | Medium / Eco-Chic |
Hack 4: Biodegradable Cellophane & Baker’s Twine
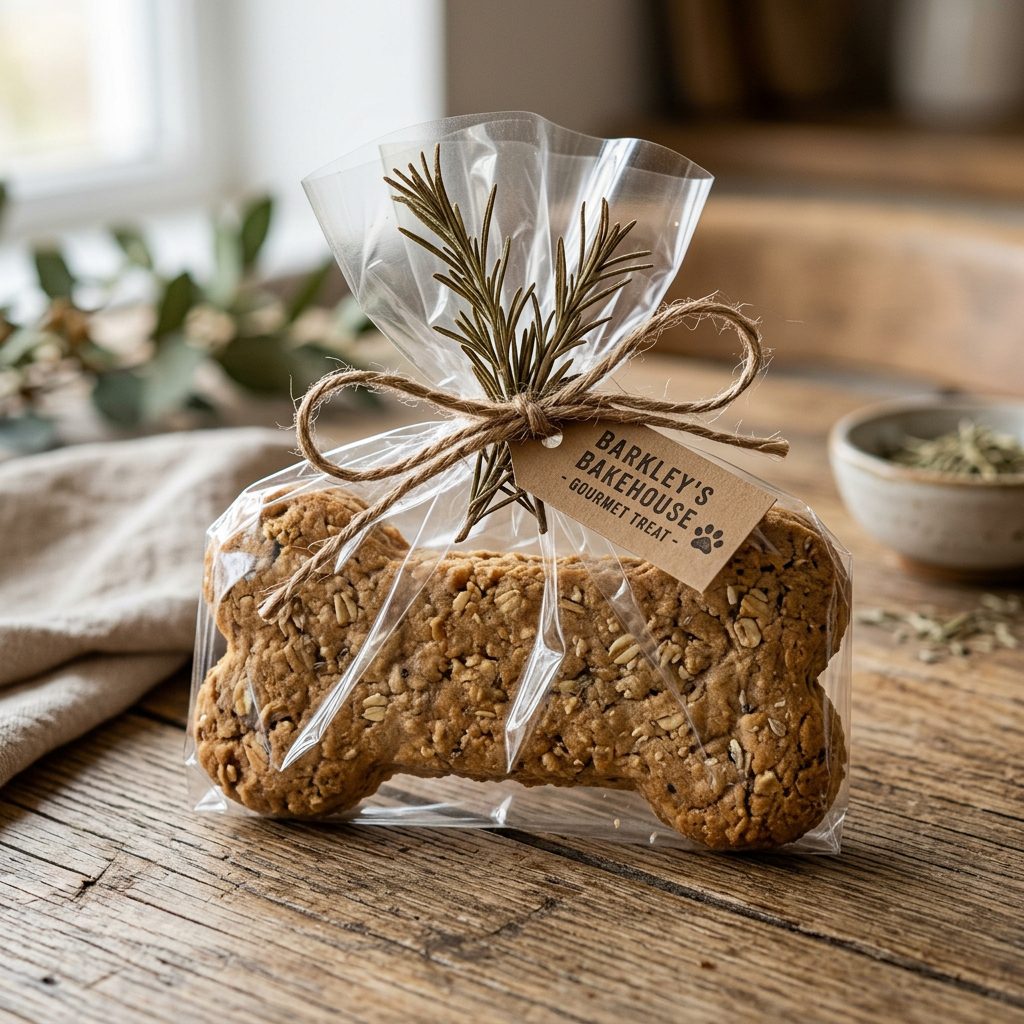
The Gift-Wrap Secret
If you’re making ‘pup-cakes’ or larger cookies, bags don’t always work. You need cellulose film (not plastic wrap!). Cellulose is made from wood pulp, it’s compostable, and it has a much higher ‘crinkle’ factor that feels expensive. Wrap your treat, gather the top, and tie it with cotton baker’s twine or jute cord.
The ‘Sprig’ Strategy
To take this from ‘pennies’ to ‘premium,’ tuck a small sprig of dried lavender or rosemary into the twine. It costs fractions of a cent if you grow it in a pot on your windowsill, but it adds a sensory experience (the smell!) that customers will never forget. It’s the ultimate ‘insider’ trick for high-end presentation.
Hacker Tip: Use ‘Natural’ or ‘Black and White’ twine. Avoid the multi-colored ‘birthday party’ twine, which can make your professional treats look like a school bake sale project.
Hack 5: Handwritten Nutritional Transparency
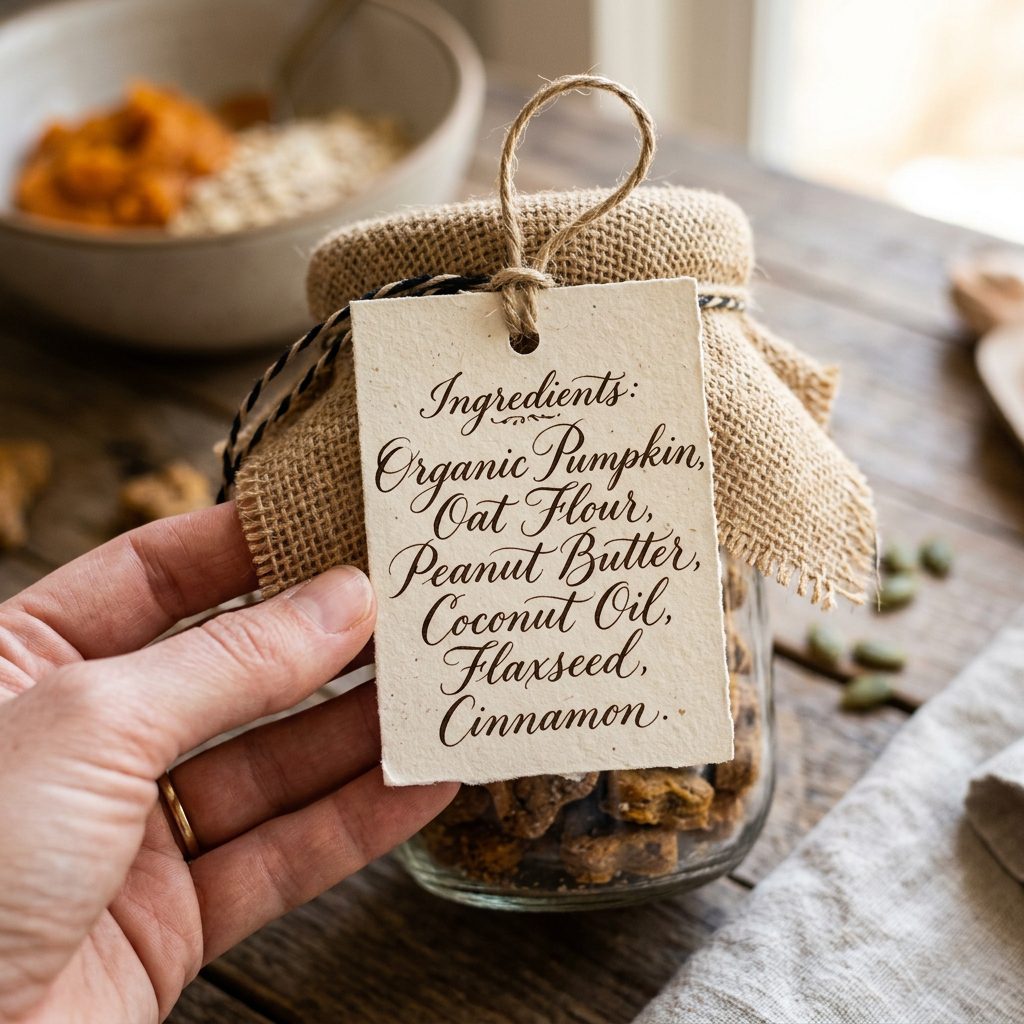
Building Trust Through Labels
As a Nutrition Hacker, you know that the Ingredient List is the most important part of the package. Most big brands hide their ingredients in tiny 6pt font on the bottom. We are going to do the opposite. We are going to make the ingredients the star of the show.
Use a matte white or neon-free yellow cardstock tag. On the front, write the name of the treat. On the back, hand-write (or use a clean, typewriter-style font) the ingredients.
- Highlight the Hero: Instead of just ‘Beef,’ write ‘Pasture-Raised Beef Liver.’
- Explain the ‘Why’: Add a tiny note like ‘Great for shiny coats!’ or ‘Easy on sensitive tummies.’
- The Batch Number: Write a batch number (e.g., #0042) on the corner. This implies small-batch exclusivity.
This level of transparency is what people pay for. When they see a handwritten list of 4-5 real food ingredients, they aren’t just buying a treat; they’re buying peace of mind.
Hack 6: The ‘Freebie’ Micro-Bag
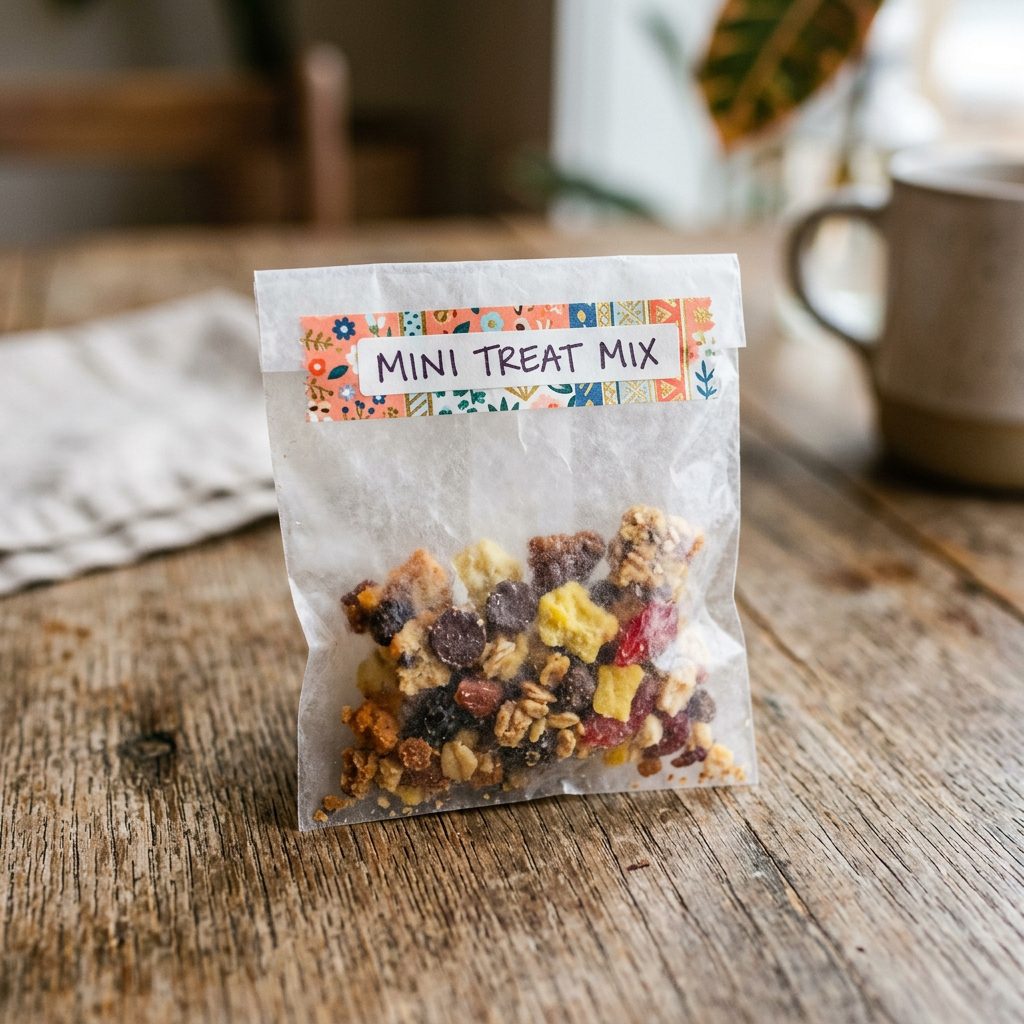
The Marketing Power of Scraps
Whenever you bake, you have ‘scraps’—the edges of the dough that didn’t quite make it into a perfect bone shape. Do not throw these away! These are your ‘Loyalty Builders.’
Purchase the smallest possible glassine envelopes (the kind used for seeds or stamps). Put 2-3 scraps inside, seal it with a tiny piece of washi tape, and write ‘FOR THE ROAD’ or ‘SNEAK PEEK’ on the front. Toss one of these into every order or gift. It costs you nothing but the price of a tiny paper envelope (about $0.03), but it makes the recipient feel like they are getting a VIP ‘gift with purchase.’ This is a classic luxury brand tactic used by high-end skincare companies, and it works just as well for dog treats.
Hack 7: Seasonal Accents from Nature
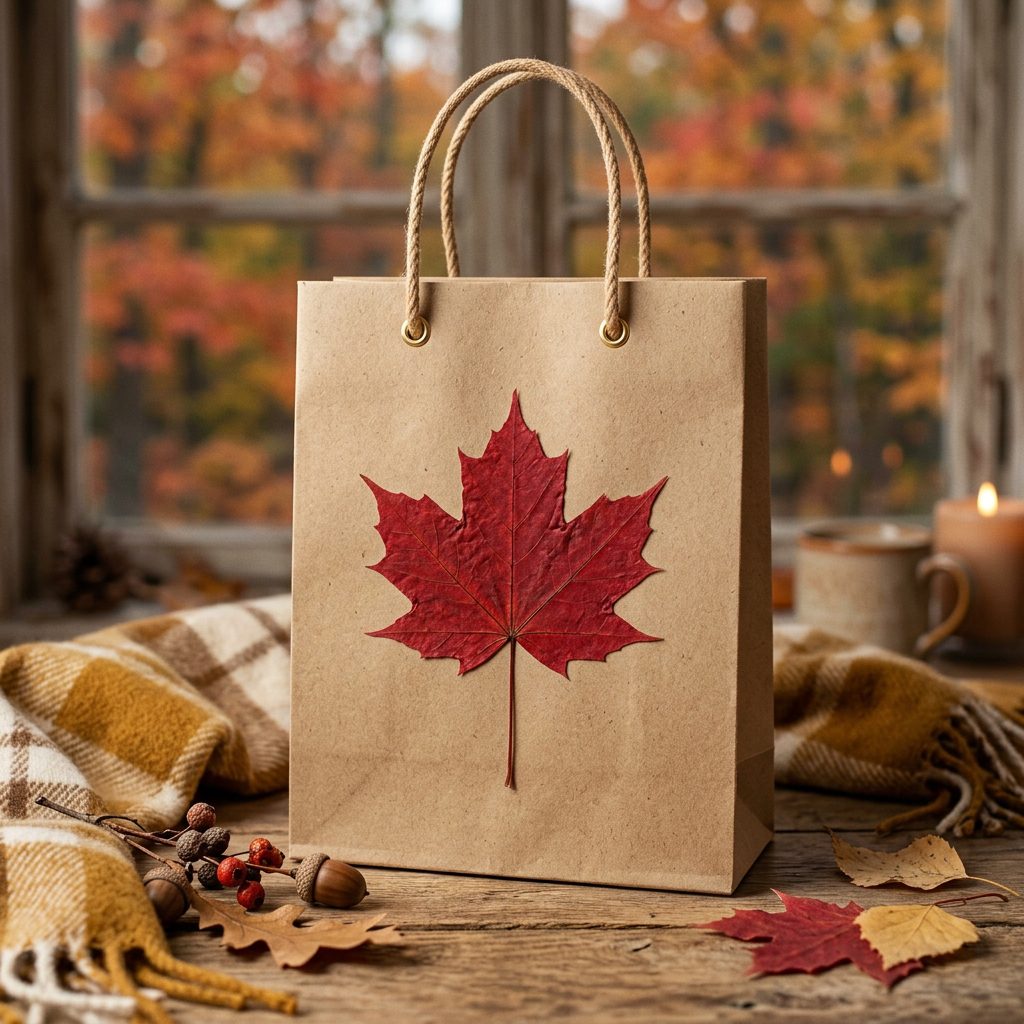
Zero-Cost Seasonal Branding
Stop buying plastic seasonal decorations. They look cheap and they’re bad for the environment. Instead, use what’s outside. For autumn, a single pressed maple leaf taped to the front of a bag looks stunning. In winter, a small pinecone or a bit of cedar greenery tied to the twine. In spring, a pressed wildflower.
This ‘Found Packaging’ approach is the height of the ‘Cottagecore’ aesthetic, which is currently dominating the high-end pet market. It shows that your brand is in tune with nature—exactly what we want people to think about our nutrition-focused treats.
Hacker Tip: If you use fresh greenery, ensure it is dog-safe. Avoid things like holly or yew. Stick to rosemary, mint, or dried rose petals to be 100% safe.
Conclusion
You don’t need a massive budget to make your dog treats look like a million bucks. By focusing on minimalism, natural textures, and transparency, you can create packaging that reflects the high-quality nutrition you’ve worked so hard to provide. Remember, the ‘Savvy Dog Owner’ isn’t fooled by flashy plastic—they are looking for the heart and soul behind the product.
Use these 7 hacks to elevate your presentation, save your pennies for better ingredients, and show the world that real nutrition can be just as beautiful as it is healthy. Now, get out there, start stamping, and let those healthy treats shine!