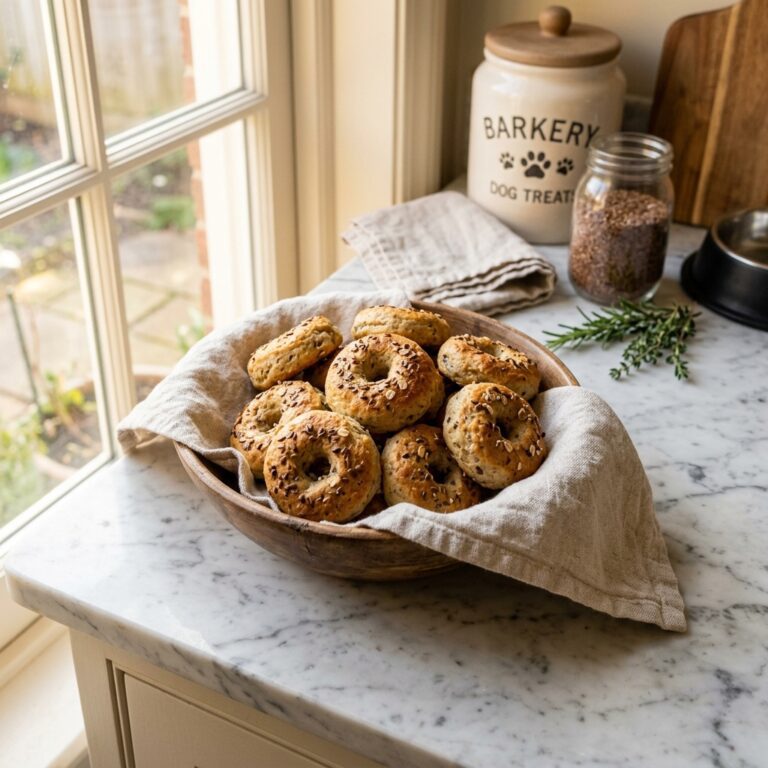
Insanely Cute! Step-By-Step Dog Cookie Decorating Tutorial For Beautiful Bakery-Style Treats!
The Dog Bakery Industrial Complex: Why You’re Overpaying
Let’s get real for a second. You walk into a high-end dog boutique, and there they are: those perfectly piped, colorful, ‘gourmet’ cookies that look good enough for a human to eat. You see the price tag—$5.50 for a single biscuit—and your wallet winces. As a savvy dog owner, you want your pup to live their best life, but you also know that ‘gourmet’ is often just marketing speak for ‘white flour and artificial dyes.’ I’m the Canine Nutrition Hacker, and today, I’m pulling back the curtain. We aren’t just making treats; we are engineering high-quality, bakery-style masterpieces that cost a fraction of the price and skip the metabolic-wrecking fillers. Most commercial ‘iced’ treats use high-fructose corn syrup or ‘yogurt coatings’ that are actually 90% sugar and palm oil. We’re going to do better. We’re going to use forensic-level ingredient selection to create treats that are beautiful, shelf-stable, and actually provide nutritional value to your dog. Get your piping bags ready, because we’re about to disrupt the dog treat industry from your kitchen counter.
The Forensic Foundation: Choosing the Right Base
Stop Using Empty-Calorie Fillers
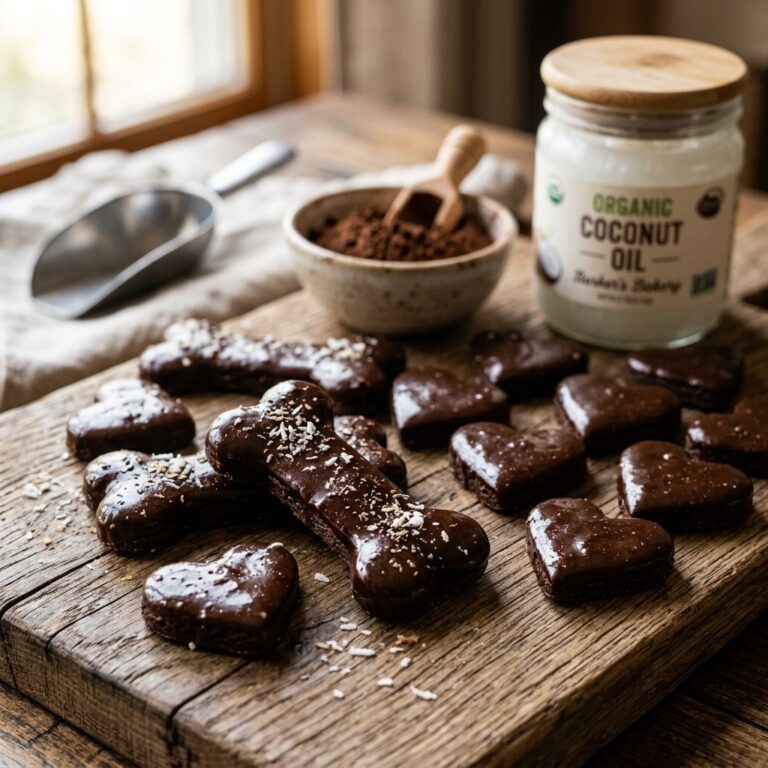
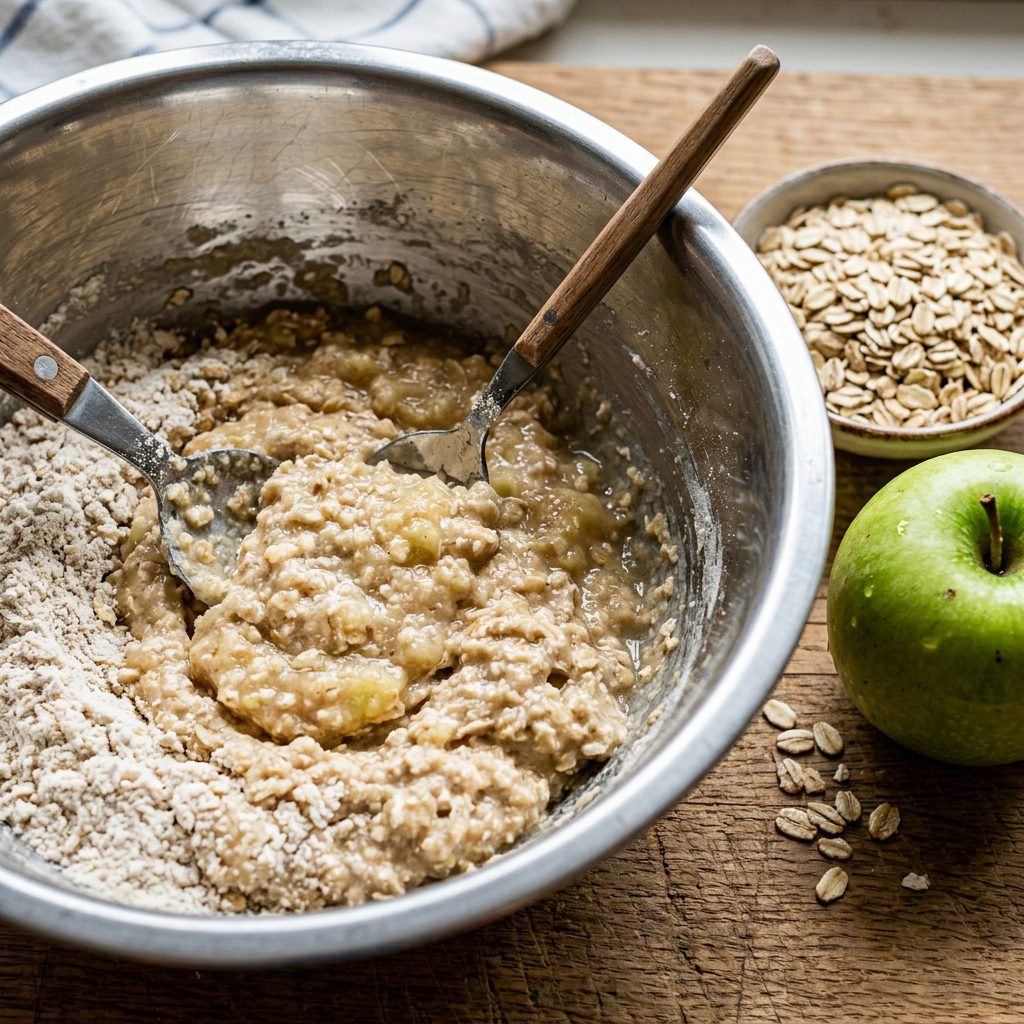
Before we can decorate, we need a canvas. Most store-bought treats use ‘wheat flour’—which is often just highly processed white flour stripped of nutrients. As a nutrition hacker, I demand more. We want a biscuit that is hard enough to provide dental mechanical scraping but nutritious enough to count as a snack. Oat flour and Garbanzo bean flour are my top picks. They offer a lower glycemic index and more protein than standard wheat. For our base, we avoid the ‘Big Three’ fillers: corn, soy, and excessive salt. Here is the ‘Hacker Ratio’ for the perfect decorating base: 2 parts flour, 1/2 part liquid (water or low-sodium broth), and 1/4 part healthy fat (like unsweetened applesauce or a touch of coconut oil). Mix until it’s the consistency of playdough. If it’s too sticky, the icing will bleed; if it’s too dry, the cookie will crumble under the weight of your art.
Insider Secret: Bake your cookies at a lower temperature (300°F) for a longer time. This dehydrates the biscuit completely, ensuring a ‘crunch’ that lasts for weeks without the need for chemical preservatives like BHA or BHT.
The ‘Icing’ Investigation: Cracking the Code on Dog-Safe Frosting
The Myth of Royal Icing
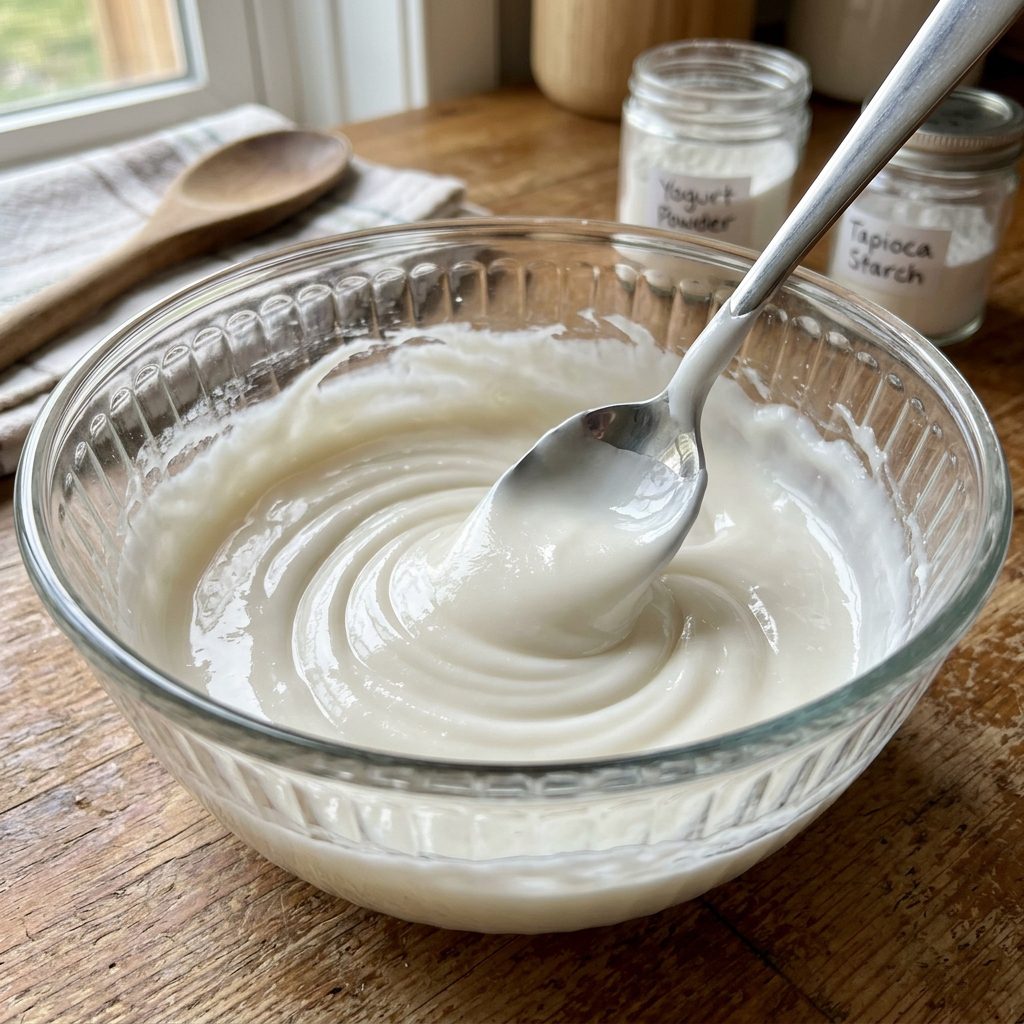
Traditional royal icing is made of egg whites and massive amounts of powdered sugar. Never give this to your dog. Sugar is a primary driver of canine obesity and inflammation. So, how do the pros get that hard, shiny finish? The secret is Tapioca Starch and Dehydrated Yogurt Powder. When mixed with a tiny bit of water and a natural binder like honey (in very small amounts) or agave, tapioca starch creates a paste that dries to a hard, matte finish. It won’t melt at room temperature, and it won’t spike your dog’s insulin levels like a sugar-bomb would.
Hacker Tip: If you want a ‘flooded’ look, add 1/2 teaspoon of water at a time until the icing reaches the consistency of heavy cream. For detail work or lettering, keep it thick like toothpaste.
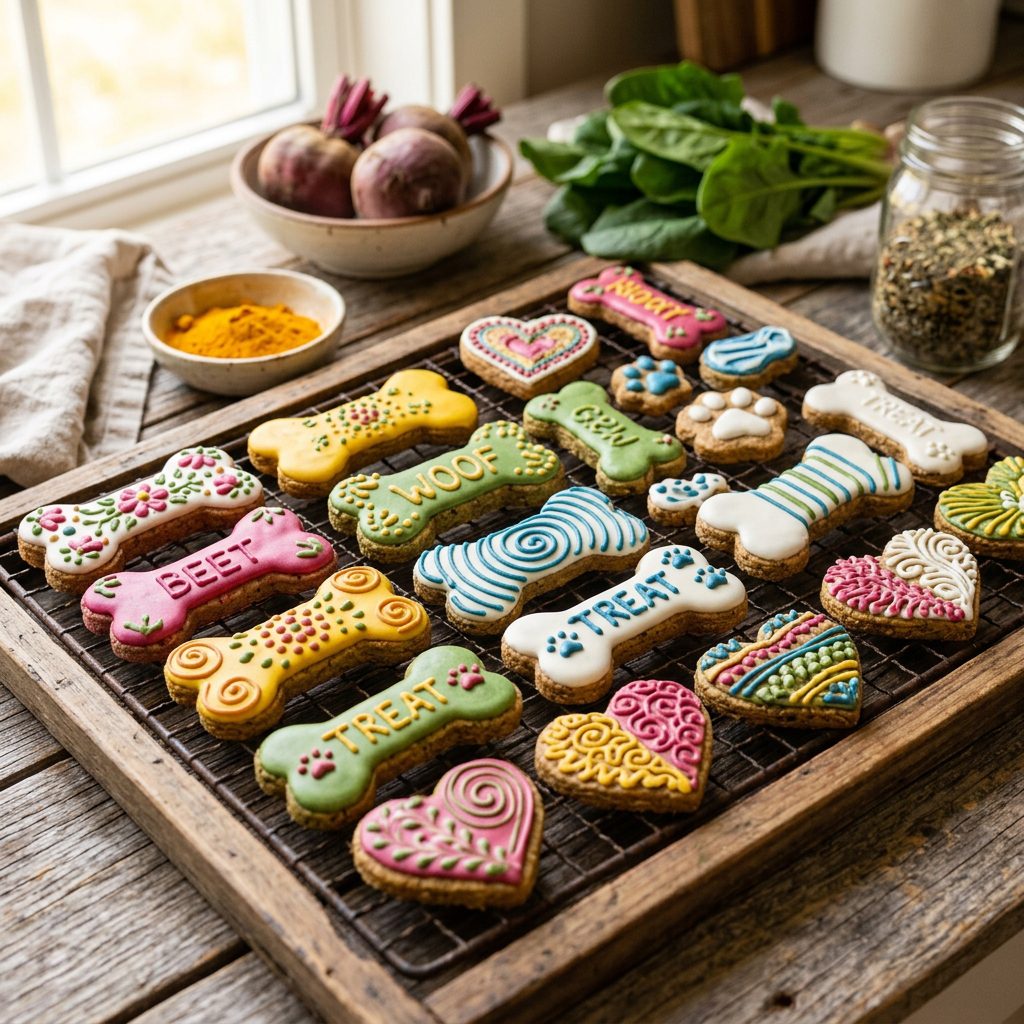
Nature’s Palette: Exposing the Danger of Artificial Dyes
The Forensic Look at Red 40 and Yellow 5
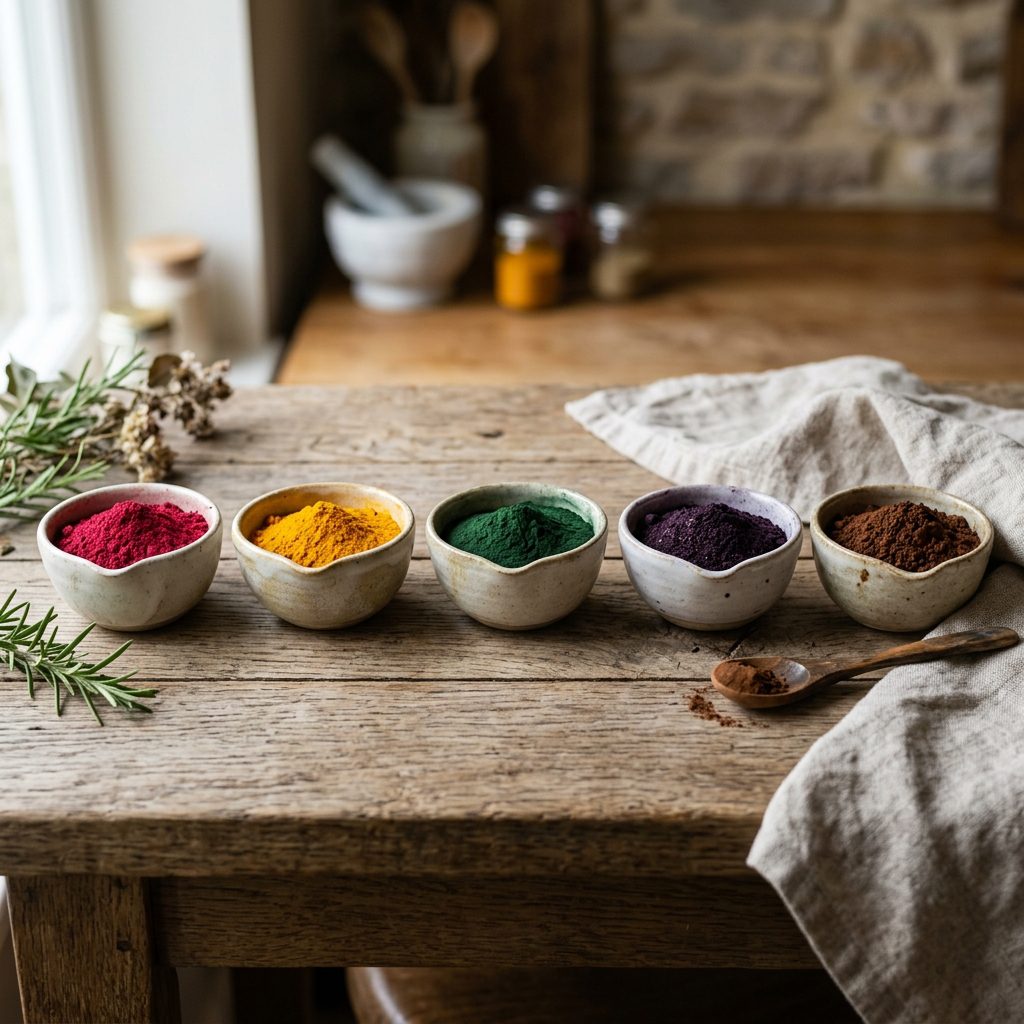
Check the label on those bright pink boutique treats. You’ll often see ‘Artificial Color added.’ These synthetic dyes have been linked to hyperactivity and even more serious health issues in some studies. We don’t need them. My ‘Hacker Palette’ uses concentrated plant powders. Not only are they safe, but they add a micro-boost of antioxidants.
- Deep Red/Pink: Beet Powder (High in manganese and folate).
- Golden Yellow: Turmeric (The ultimate anti-inflammatory, just add a pinch of black pepper to the dough to activate the curcumin).
- Vibrant Green: Spirulina or Wheatgrass powder (Chlorophyll-rich).
- Soft Purple: Dehydrated Blueberry powder.
- Deep Brown: Carob Powder (The safe, caffeine-free alternative to chocolate).
The Safe Chef Guide: DIY vs. Store-Bought Economics
SAFETY DISCLAIMER
I am a dedicated dog owner and nutrition researcher, not a veterinarian. These treats are intended as supplemental snacks and should not exceed 10% of your dog’s daily caloric intake. Always introduce new ingredients slowly to check for allergies, especially when using novel powders like spirulina.
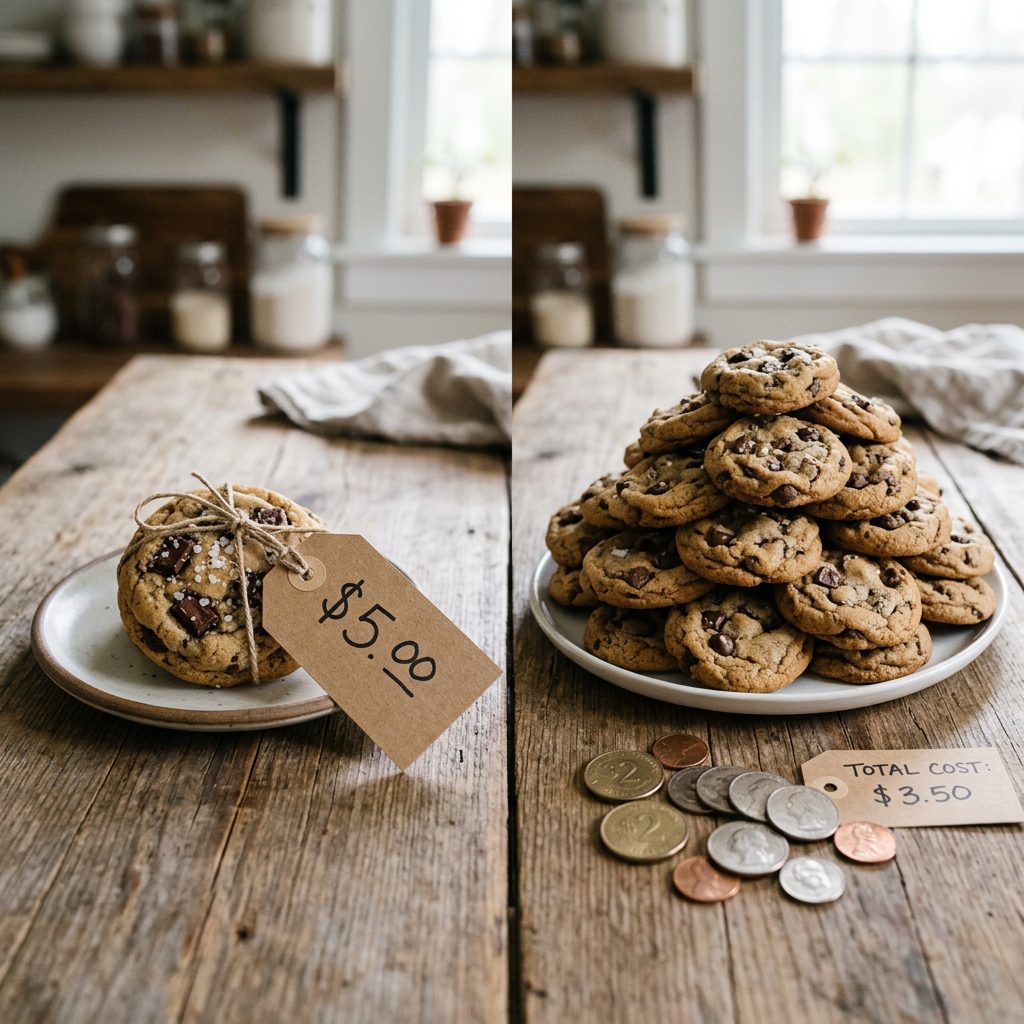
The Real Cost Breakdown
Why are you paying a 2000% markup? Let’s look at the forensic accounting of a single batch of 24 decorated cookies.
| Expense Item | Boutique Bakery (24 Cookies) | Hacker DIY (24 Cookies) |
|---|---|---|
| Base Ingredients | $12.00 (Estimated) | $1.50 (Bulk Oats/Applesauce) |
| Icing & Colors | $8.00 (Estimated) | $2.00 (Tapioca/Beet Powder) |
| Labor/Markup | $80.00+ | $0.00 (Your Love) |
| Total Cost | $100.00+ | $3.50 |
| Cost Per Cookie | $4.16 | $0.14 |
By doing this yourself, you are saving $4.02 per cookie. Over a year of treats, that’s enough to pay for a high-end orthopedic dog bed or a year’s worth of premium supplements.
Step-By-Step Decorating: The ‘Pro’ Techniques
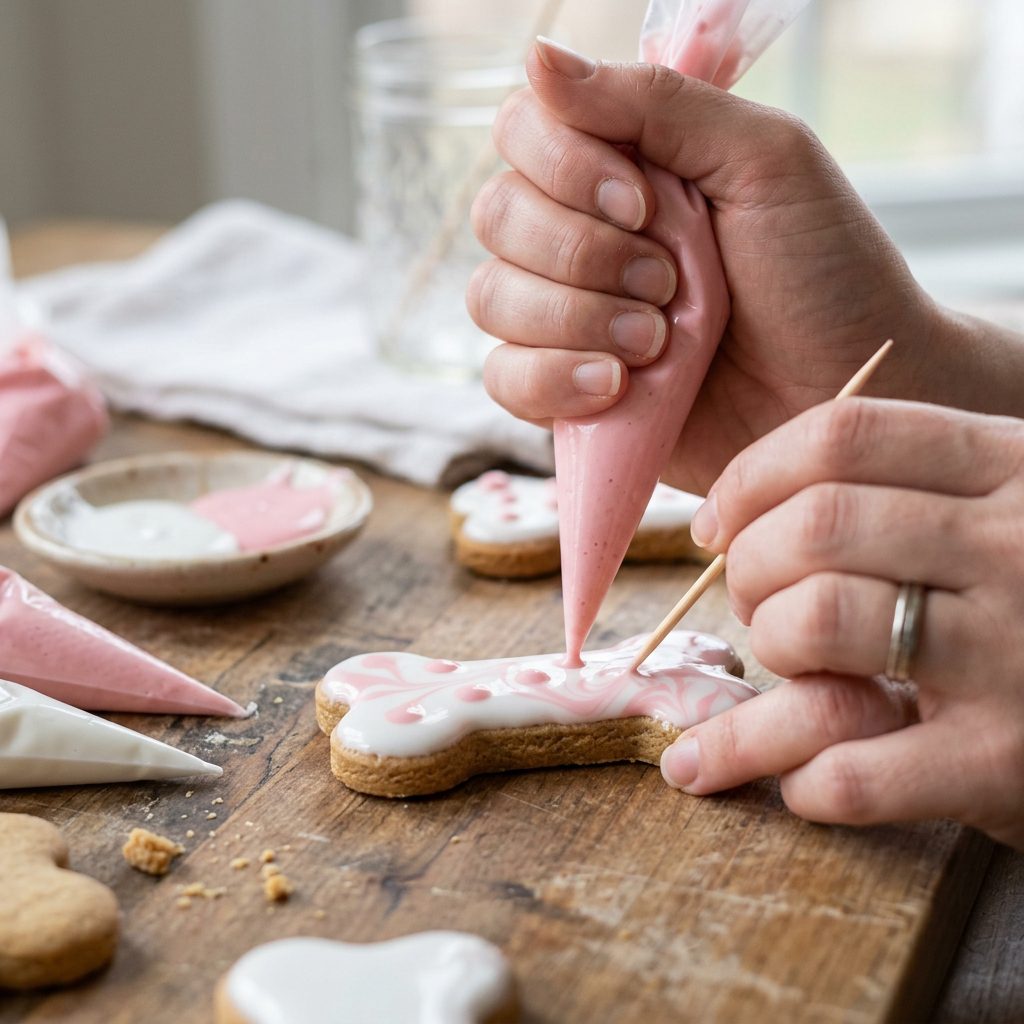
1. The Outline and Flood
Using a small round tip (or just snip a tiny corner off a sandwich bag), outline the edge of your cookie with thick icing. Let it set for 2 minutes. Then, thin out your icing slightly and ‘flood’ the center. Use a toothpick to pop any tiny air bubbles. This creates that smooth, professional ‘bakery’ surface.
2. The Wet-on-Wet Technique
While the flood icing is still wet, drop small dots of a contrasting color (like beet-red on white) onto the cookie. Take a toothpick and drag it through the dots to create hearts or marble swirls. This looks incredibly fancy but takes zero extra effort.
3. Precision Lettering
For names or ‘Happy Birthday’ messages, ensure your icing is very stiff. If it slumps, add more tapioca starch. Hold the bag at a 90-degree angle and ‘pull’ the icing string as you write, rather than dragging the tip against the cookie. This creates clean, raised lines.
4. Dehydration is Key
Once decorated, put the cookies back into a turned-off oven that is still warm, or use a food dehydrator on the lowest setting for 2 hours. This ‘sets’ the icing so it doesn’t get tacky or stick to other cookies in the jar.
Batch Cooking & Storage Hacks
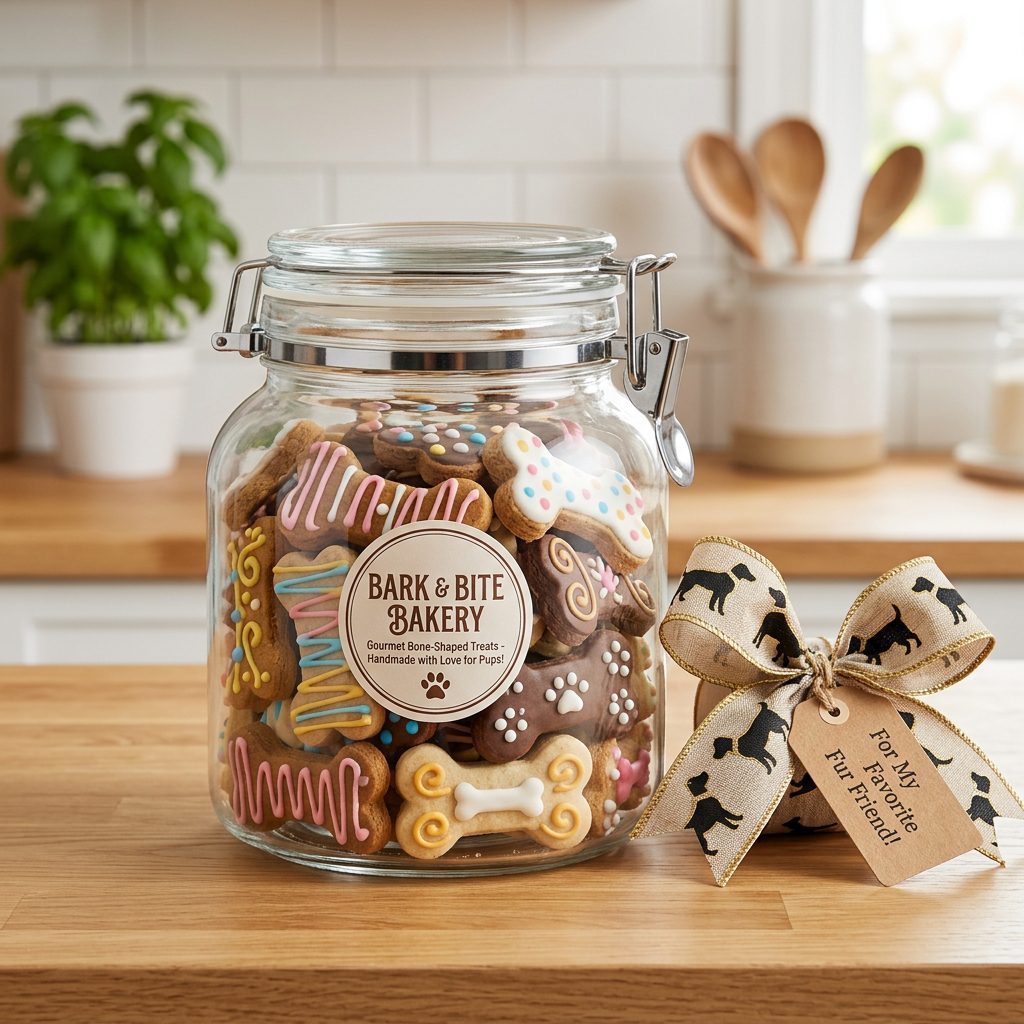
Preserving the Crunch
Because we aren’t using industrial preservatives, we have to be smart. Moisture is the enemy. A ‘soft’ cookie is a moldy cookie waiting to happen. Forensic Tip: Store your decorated treats in a glass jar with a silica gel packet (the kind you find in new shoes or bags—just make sure it’s tucked under a false bottom where the dog can’t get it). These cookies will stay fresh and ‘snap-hard’ for up to 3 weeks at room temperature. For longer storage, freeze the undecorated bases and thaw/decorate as needed. Never store decorated cookies in the fridge; the humidity will turn your beautiful icing into a sticky, weeping mess.
Conclusion
You’re Now a Canine Confectionary Hacker
There you have it. You’ve just bypassed the ‘gourmet’ markup and mastered the art of the bakery-style treat. By using tapioca starch instead of sugar, beet powder instead of Red 40, and oat flour instead of white flour, you’ve created a snack that is as healthy as it is beautiful. Your dog doesn’t care about the intricate piping, but they *do* care about the crunch and the flavor—and you care about their longevity and your budget. You’ve just saved yourself a small fortune while becoming the most ‘extra’ dog parent on the block. Now, go share your creations (and your savings) with the world. Stay savvy!