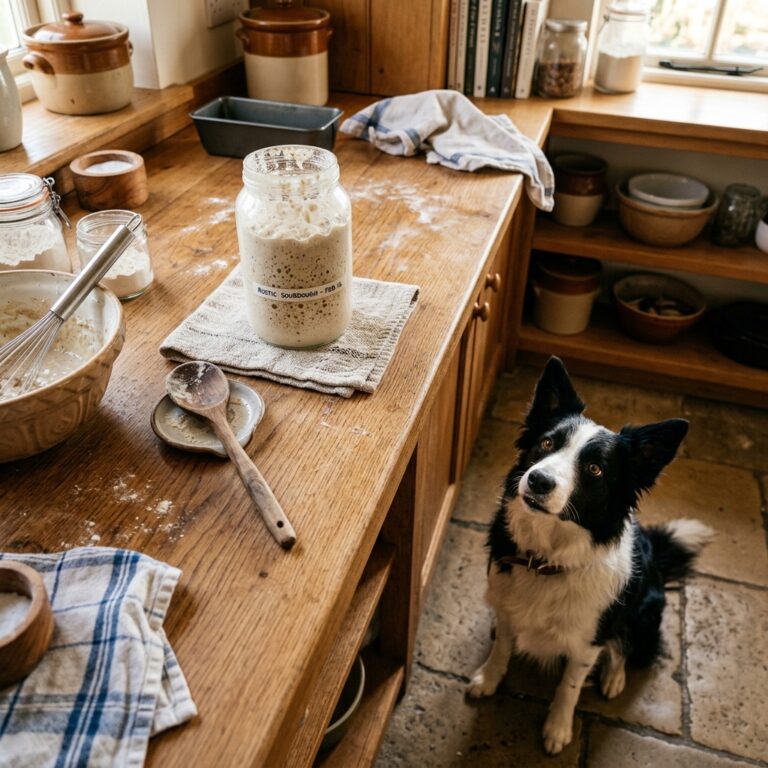
The Yeast-Free Miracle Treat That Stops Dog Paw Licking For Good
If you are reading this, you probably know the sound. It is two in the morning, the house is completely silent, and suddenly it begins. That relentless, wet, rhythmic slurp, slurp, slurp coming from the end of the bed. You turn on the light, and there is your furry best friend, obsessively going to town on their paws as if they are trying to find the center of a Tootsie Pop. When you lean in to stop them, you are hit with it: the undeniable, pungent smell of stale corn chips. Sound familiar? As a savvy dog owner, you have probably tried everything from expensive medicated wipes to cone-of-shame collars, only to watch the licking resume the second you turn your back. I am here to tell you that you are not crazy, and you are not a bad pet parent. You are just fighting the wrong battle. Medical Disclaimer: I am a canine nutrition hacker, not a veterinarian. The information provided here is based on extensive nutritional research and personal experience. Always consult your holistic or integrative vet before making major dietary changes, especially if your dog has underlying health conditions. The truth is, that constant licking and that Frito-feet smell are massive red flags for a systemic yeast overgrowth. And the treats you are buying at the big-box pet store? They are likely throwing gasoline on the fire. Today, we are going completely rogue. We are going to expose the hidden fillers in the commercial treat industry, break down exactly what feeds this fungal nightmare, and I am going to hand you the blueprint for The Yeast-Free Miracle Treat. This is not just a recipe; it is a targeted, nutritional weapon designed to starve yeast, soothe inflammation, and give you back your peaceful nights. Grab your reading glasses, because we are about to become forensic scientists on your dog’s pantry.
The Root Cause: Why Your Dog’s Paws Smell Like Corn Chips
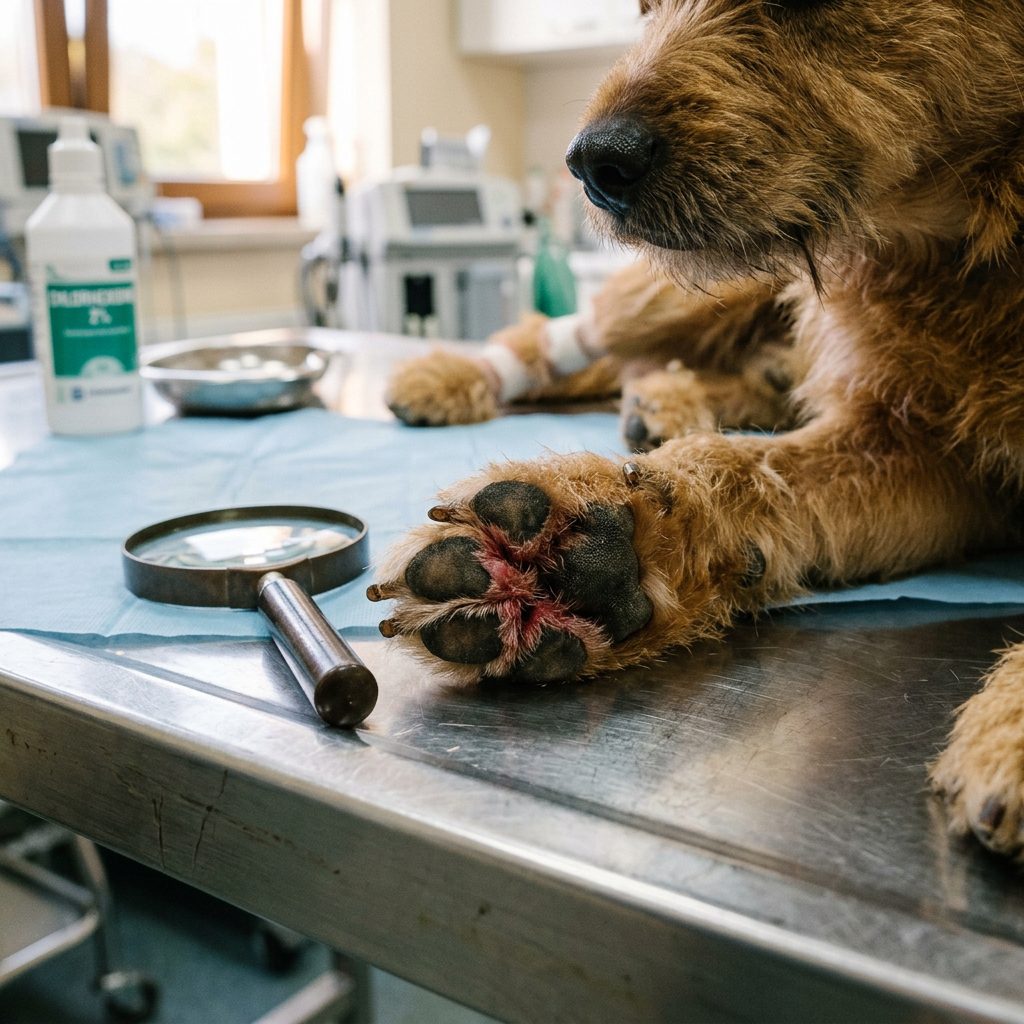
Before we can hack the solution, we have to understand the enemy. The culprit behind the incessant licking, the red and inflamed nail beds, and that distinct corn chip odor is a sneaky little fungus called Malassezia pachydermatis. Now, Malassezia naturally lives on your dog’s skin and in their ears without causing any trouble. It is a normal part of their microbiome. However, when the conditions are just right—specifically, when the immune system is compromised, or the environment becomes too warm, moist, and sugar-rich—this harmless yeast turns into a rapidly multiplying monster.
The Sugar Connection
Here is the insider secret that the commercial pet food industry does not want you to focus on: Yeast feeds on sugar. And I am not just talking about the obvious sugars like molasses or corn syrup. I am talking about complex carbohydrates that break down into sugars inside your dog’s body. When you feed your dog a diet or treats loaded with starches, potatoes, tapioca, and cheap grains, you are essentially setting up an all-you-can-eat buffet for the yeast on their skin. The yeast consumes these sugars and excretes toxins, which causes intense itching. Your dog licks to soothe the itch, which adds moisture to the paws, creating the perfect humid environment for the yeast to multiply even faster. It is a vicious, maddening cycle.
Hacker Tip: If your dog’s paws are stained a rusty, reddish-brown color, that is not just dirt. That is porphyrin staining mixed with severe yeast overgrowth. It is a physical manifestation of an internal imbalance.
To stop the paw licking for good, topical sprays and shampoos are only a band-aid. You have to fix the gut, starve the yeast, and rebuild the microbiome from the inside out. That means we have to ruthlessly eliminate the “Enemy Ingredients” that are hiding in plain sight in your kitchen right now.
The Enemy Ingredients: Exposing the “Healthy” Treat Industry
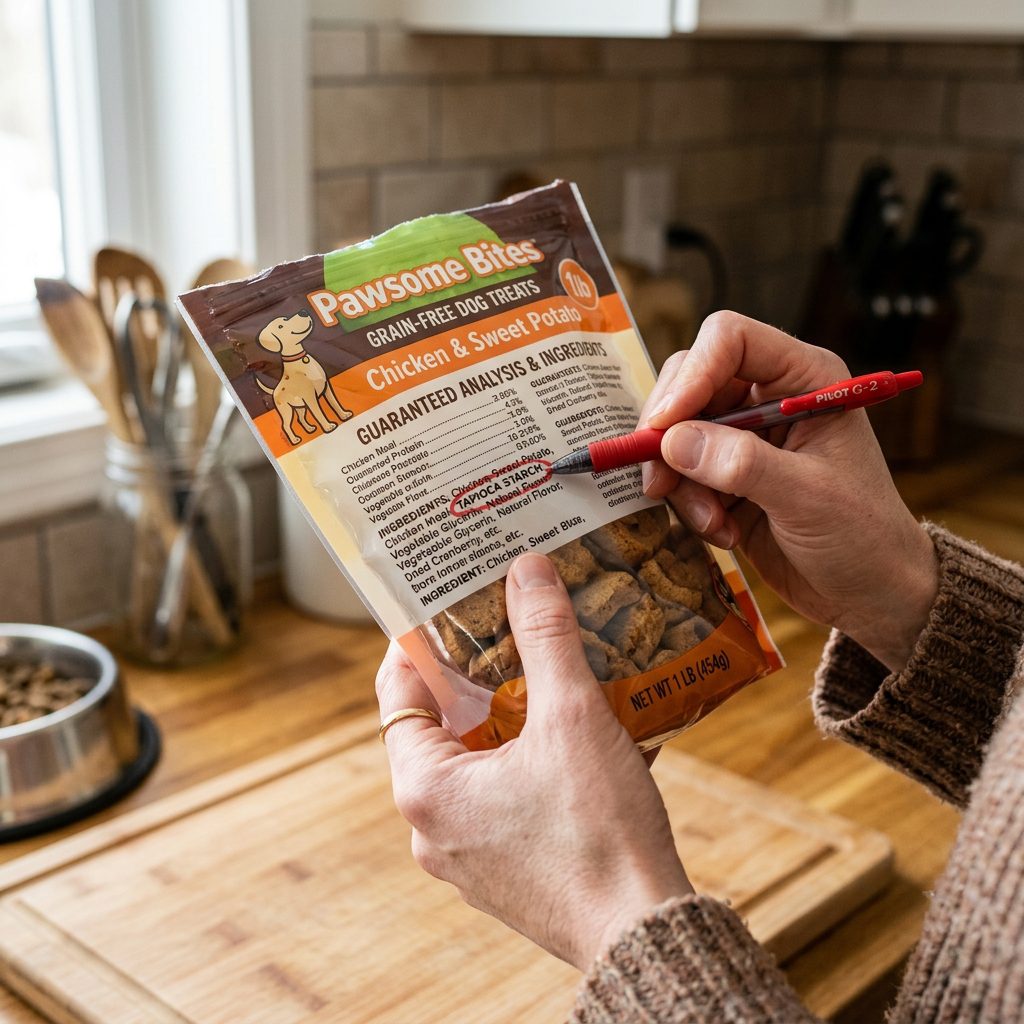
Let us play a game of forensic label reading. Go to your pantry and grab the bag of your dog’s favorite treats. Even if the bag proudly proclaims “Grain-Free,” “All Natural,” or “Veterinarian Recommended” on the front, turn it over. The front of the bag is marketing; the back of the bag is the truth. We need to look at the First 5 Ingredients. By law, ingredients are listed by weight. If you see any of the following enemy ingredients in those top spots, you are actively feeding the yeast infection.
The First 5 Ingredients Truth
- Corn Gluten Meal: A cheap, highly processed filler that spikes blood sugar and provides zero bioavailable nutrition for a carnivore.
- Potatoes and Sweet Potatoes: While often touted as healthy alternatives in grain-free diets, these are massive starch bombs. Starch equals sugar, and sugar equals yeast.
- Tapioca Starch: Another high-glycemic binder used to keep kibble and crunchy treats from falling apart. It is pure food for Malassezia.
- Peas and Pea Flour: Often used to artificially inflate the protein percentage on the label, peas are starchy legumes that can disrupt digestion and feed fungal overgrowth.
- Glycerin (or Vegetable Glycerin): Used to keep chewy treats soft and moist. It is a sugar alcohol that not only feeds yeast but can also cause severe gastrointestinal upset in sensitive dogs.
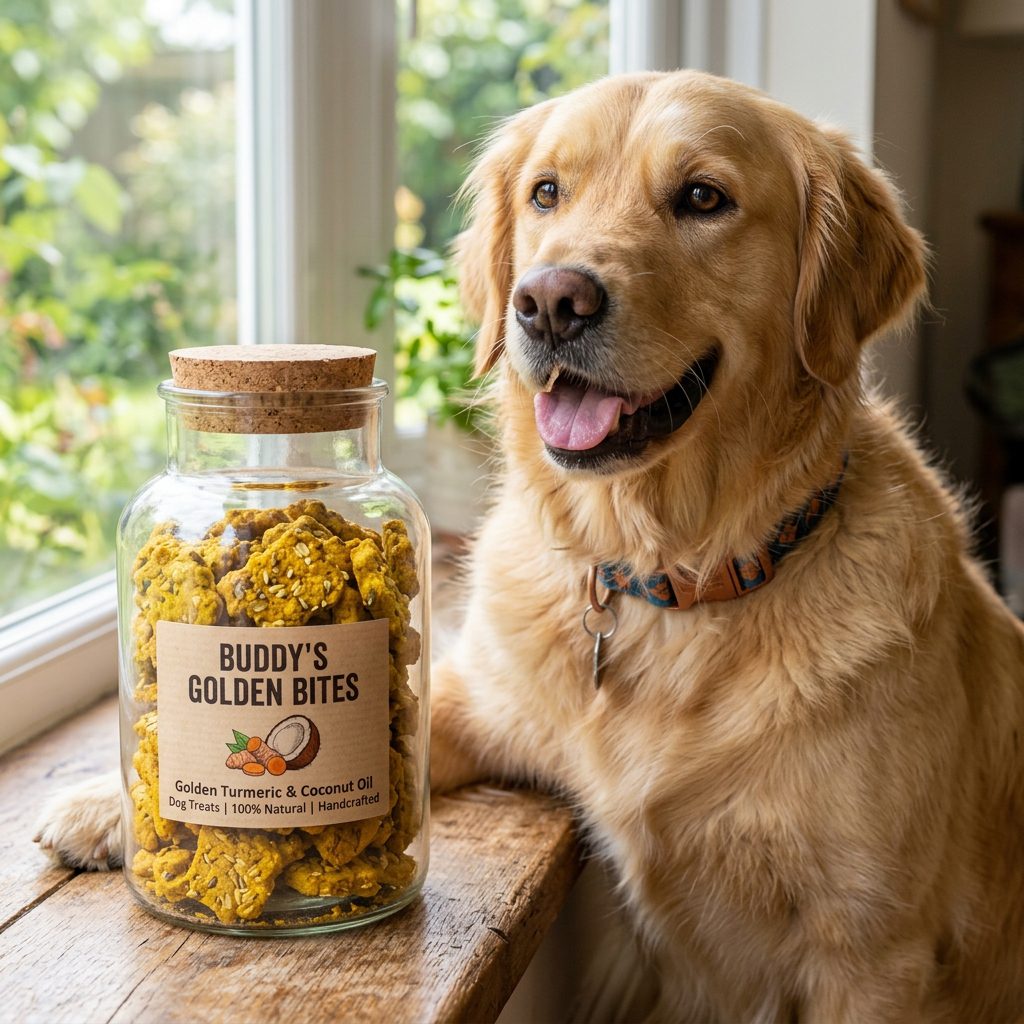
When you calculate the cost of these premium commercial treats, you are often paying upwards of $15 to $20 for a small bag of shaped carbohydrates. You are paying top dollar to make your dog itchy. As a savvy owner, you have to demand better. We need treats that actively fight the problem, not contribute to it. That brings us to our nutritional arsenal.
The Hero Ingredients: Building the Ultimate Yeast-Starving Treat
To create the Yeast-Free Miracle Treat, we need to completely ditch the carbohydrates and focus on functional, medicinal foods. We are combining three powerhouse “Hero Ingredients” that work synergistically to destroy yeast cell walls, reduce inflammation, and heal the gut. Let us break down the science of why this works.
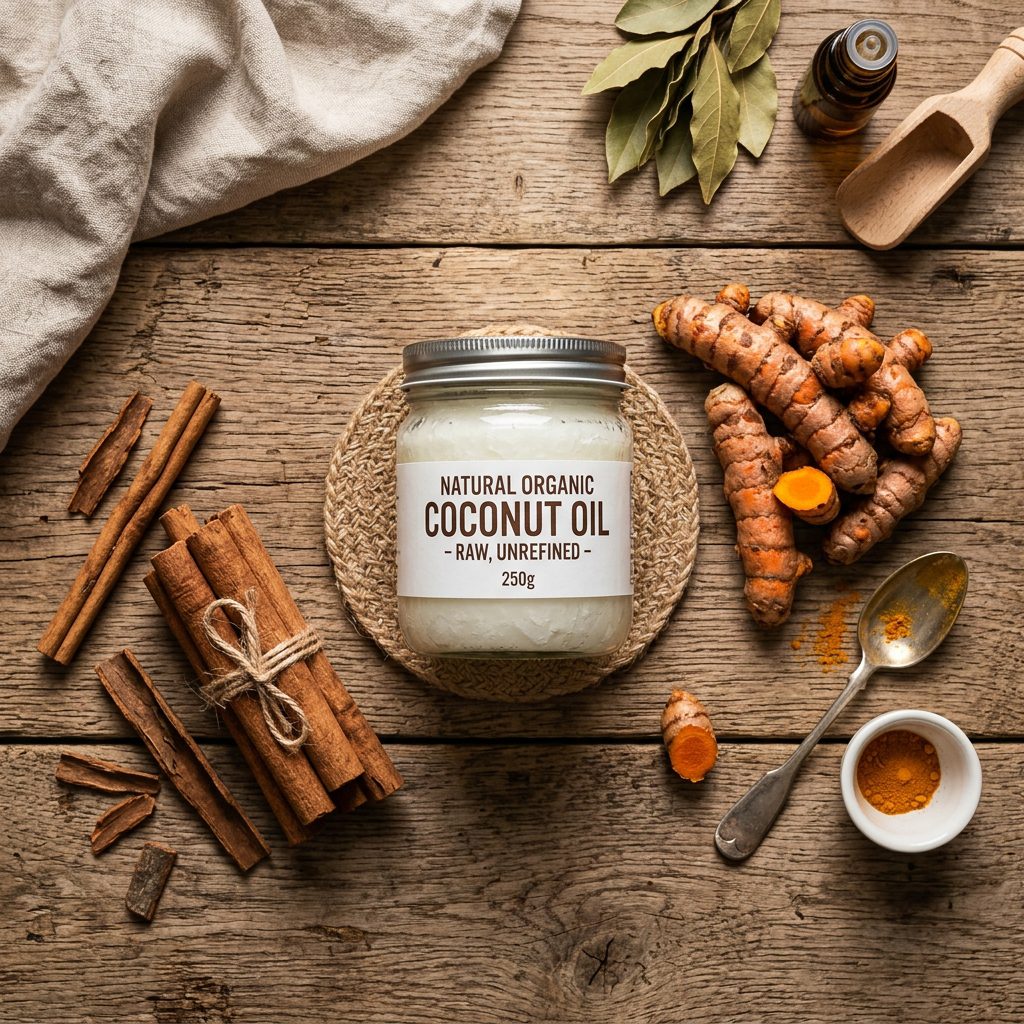
Hero 1: Unrefined, Cold-Pressed Coconut Oil
Coconut oil is the undisputed champion of the anti-yeast protocol. It contains a high concentration of Caprylic Acid (a medium-chain triglyceride). Caprylic acid is a potent natural antifungal that literally pokes holes in the cellular walls of yeast, causing them to die off. It is incredibly effective, but you must use unrefined, cold-pressed, organic coconut oil to get the therapeutic benefits. Do not use refined coconut oil, as the chemical processing destroys the beneficial fatty acids.
Hero 2: Ceylon Cinnamon
Notice I specified Ceylon cinnamon, not Cassia cinnamon (the cheap stuff in most grocery stores). Ceylon cinnamon is a powerful anti-inflammatory and antifungal agent. It helps regulate blood sugar spikes and creates a hostile environment for yeast in the digestive tract. It also adds a naturally sweet flavor without adding actual sugar, making the treats highly palatable for your dog.
Hero 3: Organic Turmeric (with a pinch of Black Pepper)
Turmeric contains curcumin, one of the most heavily researched anti-inflammatory compounds on the planet. Yeast infections cause massive systemic inflammation, leading to the redness and swelling in your dog’s paws. Curcumin soothes this inflammation. However, curcumin is notoriously difficult for the body to absorb. By adding a tiny, microscopic pinch of freshly ground black pepper (which contains piperine), you increase the bioavailability of the curcumin by up to 2,000 percent. It is a true nutritional hack.
Hacker Tip: Always source Ceylon cinnamon and organic turmeric from reputable health food stores. The spices sitting in the baking aisle for three years have lost their volatile oils and medicinal potency.
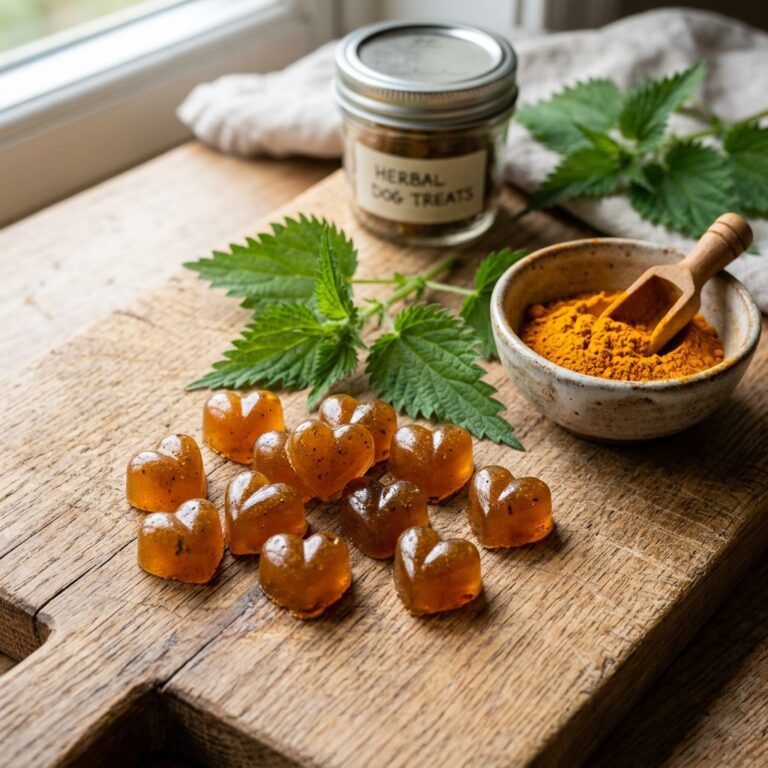
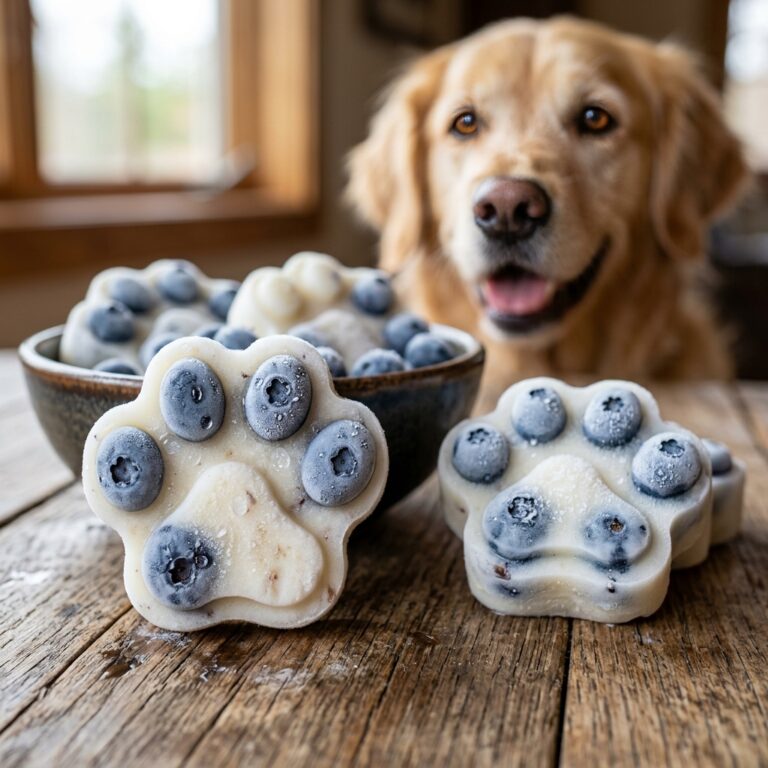
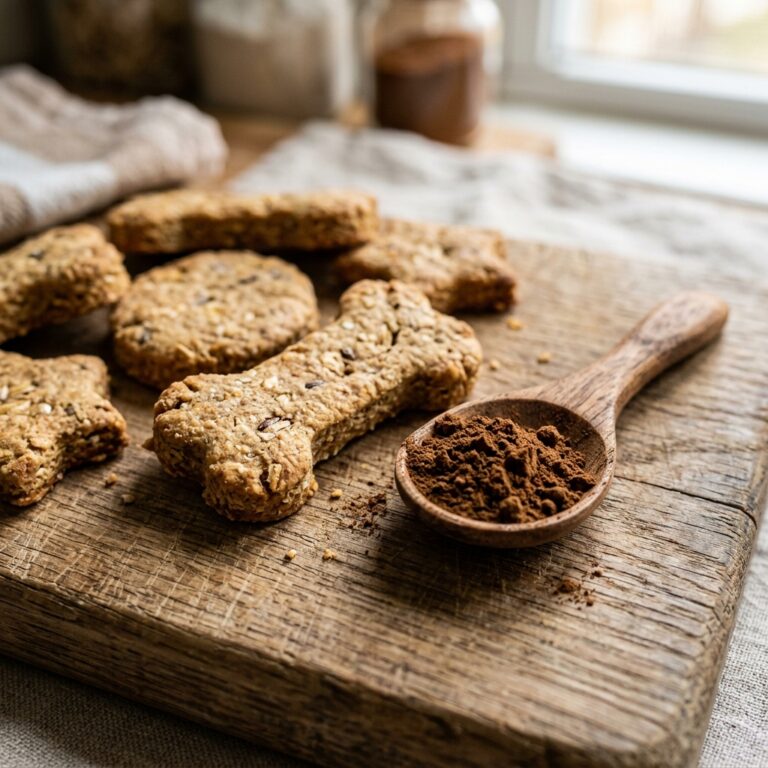
The Safe Chef Guide: The Yeast-Free Miracle Treat Recipe
Now it is time to put on your chef’s hat. This recipe is incredibly simple, requires zero baking (because heat destroys some of the beneficial enzymes), and takes about ten minutes of active prep time. Because it is fat-based, it is virtually zero-carb and completely yeast-starving.
Ingredients You Will Need:
- 1 cup of Organic, Unrefined, Cold-Pressed Coconut Oil (liquefied, but not hot)
- 1 teaspoon of Organic Ceylon Cinnamon
- 1 teaspoon of Organic Turmeric Powder
- A tiny pinch (about 1/16th of a teaspoon) of freshly ground Black Pepper
- Optional: 1/4 cup of plain, unflavored Kefir (for an added probiotic gut-healing boost, ensure it is 100% sugar-free)
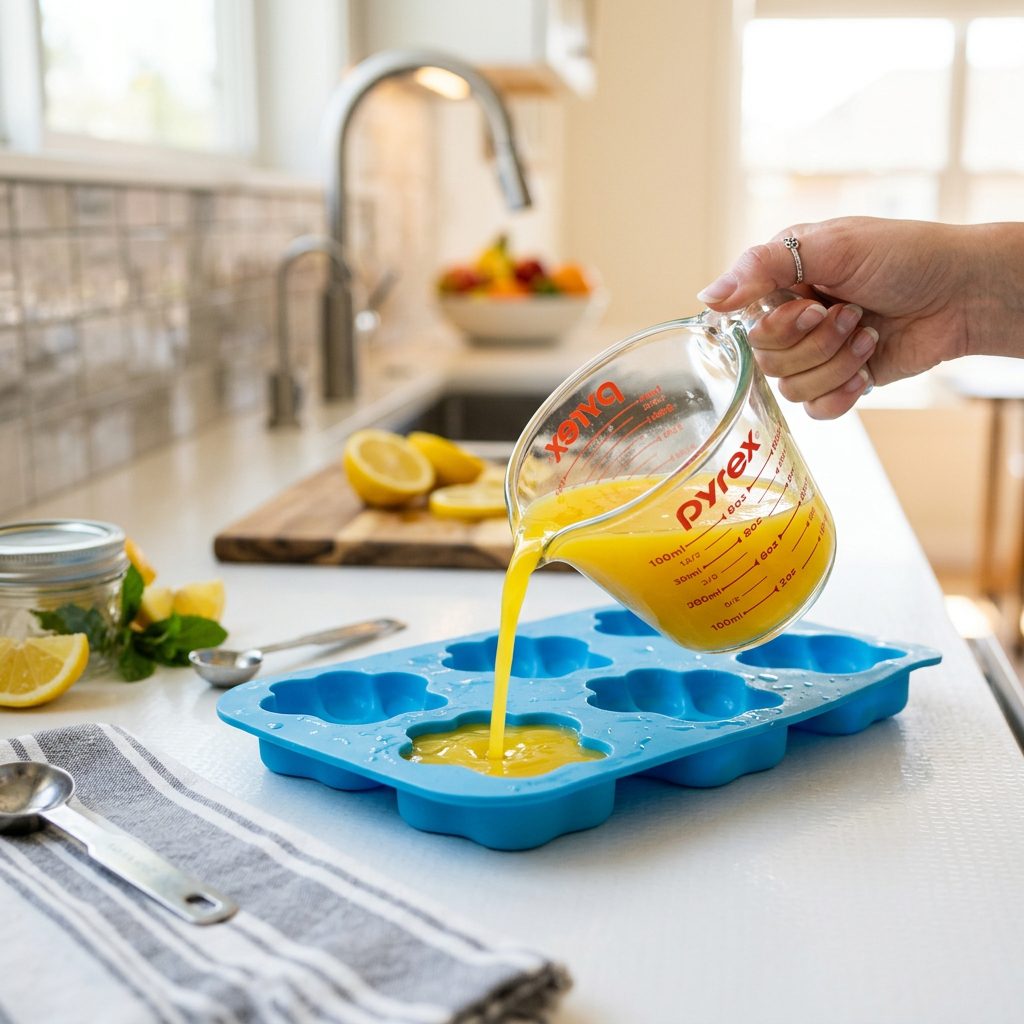
Step-by-Step Instructions:
- Melt the Oil: Place your jar of coconut oil in a bowl of warm water until it liquefies. Do not microwave it, as microwaves can alter the molecular structure of the fats.
- Mix the Actives: In a glass measuring cup with a pour spout, combine the liquid coconut oil, Ceylon cinnamon, turmeric, and black pepper. Whisk vigorously until the spices are completely suspended in the oil.
- Add the Probiotic (Optional): If you are using the kefir, gently fold it into the mixture now. The mixture will become slightly cloudy, which is perfect.
- Mold the Treats: Carefully pour the liquid mixture into silicone molds. You can use fun bone-shaped molds, or simply use a standard silicone ice cube tray.
- Set and Store: Place the silicone mold flat in your freezer for about 2 hours until the treats are completely solid. Once solid, pop them out and store them in an airtight glass container in the refrigerator or freezer. They will melt at room temperature!
The Real Cost Breakdown
Let us look at the financial reality of taking control of your dog’s nutrition. Commercial “allergy” treats are bleeding your wallet dry while failing to fix the root cause. Here is how our Miracle Treat stacks up against a popular premium commercial alternative.
| Feature | Premium Store-Bought “Allergy” Treat | The Yeast-Free Miracle Treat (DIY) |
|---|---|---|
| Primary Ingredient | Potato Starch or Pea Flour (Starch) | Unrefined Coconut Oil (Antifungal Fat) |
| Yeast-Feeding Carbs? | Yes (High) | No (Zero Carbs) |
| Cost Per Day (50lb Dog) | $1.50/day | $0.30/day |
| Recall History | Frequent industry recalls | Zero (You control the kitchen) |
| Verdict | Expensive band-aid that feeds yeast | Cost-effective, targeted fungal destroyer |
By switching to this DIY approach, you are saving over a dollar a day, which equates to nearly $400 a year, all while actually curing the paw licking instead of just masking it.
The Hacker’s Guide to Feeding and Long-Term Results
You have made the treats, they are chilling in the fridge, and you are ready to stop the midnight slurp-fest. But hold on, savvy owner—we need to talk about implementation. You cannot just hand your dog a bowl full of coconut oil on day one. You have to be strategic.
Dosage and Introduction
Coconut oil is a rich fat. If you introduce too much too quickly, you will trade paw licking for explosive diarrhea, and nobody wants that. The golden rule of canine nutrition hacking is: Start low and go slow.
- Small Dogs (under 20 lbs): Start with 1/4 teaspoon of the treat per day.
- Medium Dogs (20-50 lbs): Start with 1/2 teaspoon of the treat per day.
- Large Dogs (over 50 lbs): Start with 1 teaspoon of the treat per day.
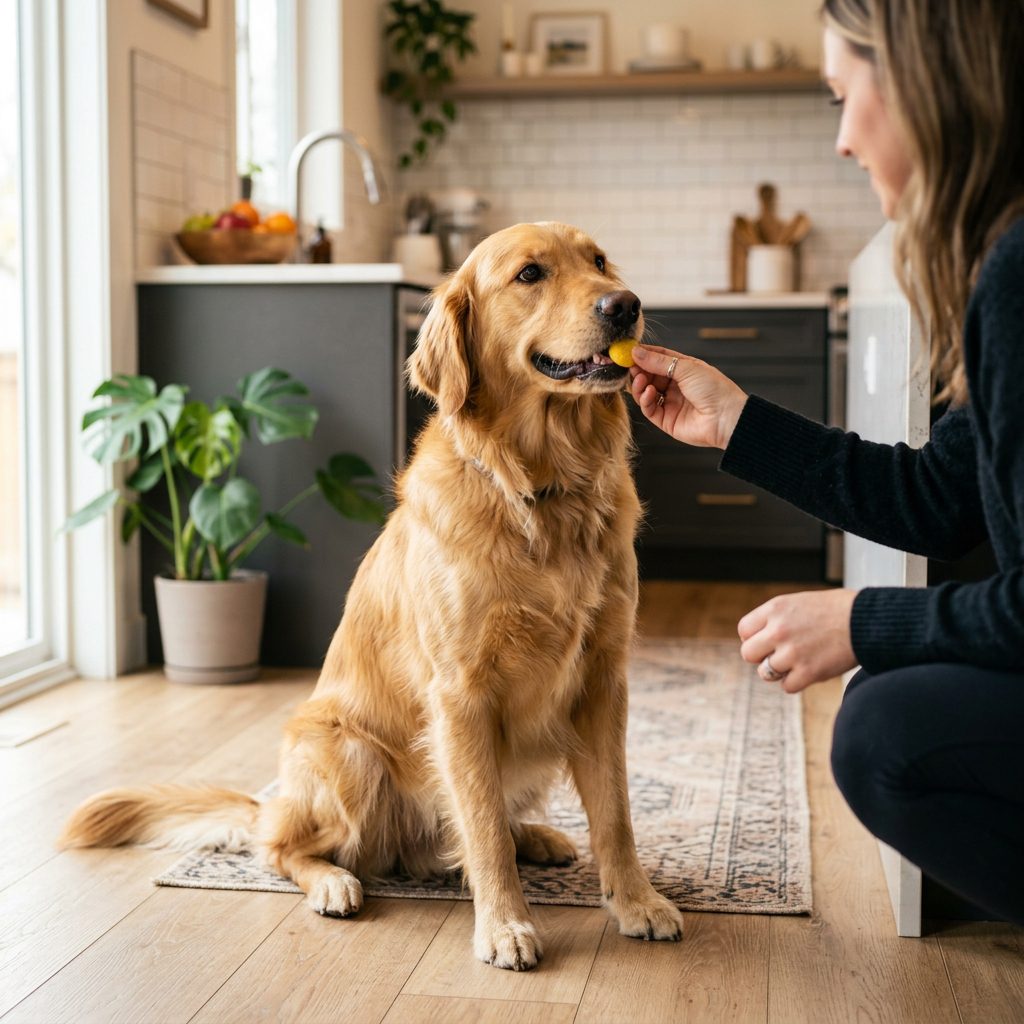
Gradually increase this amount over two weeks until you reach a maintenance dose of about 1 teaspoon per 10 pounds of body weight daily. You can give these as a direct reward, or drop them into their dinner bowl.
Understanding the Healing Crisis (Detox)
Here is an insider secret that most vets will not warn you about: When you start effectively killing off yeast, your dog might actually look a little worse before they look better. This is known as a Herxheimer reaction, or a “healing crisis.” As the yeast cells die, they release toxins into the bloodstream. For a few days, your dog might seem a little more itchy, or their ears might produce more dark wax. Do not panic, and do not quit. This is proof that the protocol is working. Ensure your dog has access to plenty of fresh, filtered water to help their liver and kidneys flush out these dead yeast toxins.
Batch Cooking and Storage
To make your life easier, I highly recommend batch cooking these treats. Because coconut oil is highly stable, these treats will last for up to 6 months in the freezer. Dedicate one Sunday afternoon a month to melt, mix, and pour three or four silicone trays worth of treats. Pop them out, throw them in a large freezer-safe Ziploc bag or a glass Tupperware container, and you have a daily anti-yeast arsenal ready to go at a moment’s notice.
Conclusion
Stopping your dog’s relentless paw licking does not require a lifetime subscription to expensive pharmaceuticals or monthly steroid shots that wreck their immune system. It requires a shift in perspective. By understanding that yeast overgrowth is a dietary issue, and by ruthlessly cutting out the hidden sugars in commercial treats, you take back control of your dog’s health. The Yeast-Free Miracle Treat is your secret weapon. It is cheap, it is incredibly effective, and most importantly, it treats the root cause of the Frito-feet phenomenon. Remember, you are the ultimate advocate for your dog. Do not settle for marketing fluff on the front of a bag. Read the labels, hack the nutrition, and enjoy the sound of absolute silence at 2:00 AM. Your dog—and your sanity—will thank you.