The Mold-Free Secret: How to Keep Homemade Dog Treats Fresh for Months
Let’s get real for a second. There is nothing quite like the feeling of being a ‘super-pup parent’ when you pull a fresh tray of homemade liver bites or peanut butter biscuits out of the oven. Your dog is doing backflips, your kitchen smells like a gourmet bakery, and you feel like you’ve finally beaten the system. You’ve bypassed the hidden fillers, the mysterious ‘meat by-products,’ and the chemical preservatives found in those $15 bags at the big-box stores.
But then, three days later, the tragedy strikes. You reach into the jar and—bam—a fuzzy green science experiment is staring back at you. Mold. It’s the ultimate heartbreak for the DIY dog chef. Most owners get discouraged here and go back to buying overpriced, shelf-stable junk. But not us. We’re the hackers. We know that the secret to a long-lasting treat isn’t a laboratory chemical; it’s a combination of moisture management and smart preservation science.
In this guide, I’m going to pull back the curtain on how the pros (and the savvy insiders) keep their homemade creations fresh, crunchy, and mold-free for months. We aren’t just baking; we are engineering the ultimate snack. Grab your apron and your dehydrator—we’re about to change your dog’s snack game forever.
The Safety Disclaimer: Read This Before You Bake
SAFETY FIRST: I am a passionate dog nutrition advocate and a ‘hacker’ of the pet food industry, but I am not a veterinarian or a board-certified veterinary nutritionist. The recipes and preservation methods discussed here are intended for supplemental feeding only. Always consult with your vet before introducing new ingredients, especially if your dog has underlying health conditions like pancreatitis or kidney disease. Remember, homemade treats lack the synthetic stabilizers of commercial food, so when in doubt, throw it out!
When we talk about ‘fresh for months,’ we are talking about specific conditions. A soft, chewy biscuit with 30% moisture will never last months at room temperature without heavy-duty chemicals. To achieve longevity, we have to change the physics of the treat itself. Our goal is to reduce ‘Water Activity’ (Aw)—the amount of ‘free’ water available for mold and bacteria to grow. If we hit the sweet spot, your treats become shelf-stable naturally.
The Enemy of Freshness: Why Your Treats Are Rotting
The Three Horsemen of Spoilage
To defeat mold, you have to understand what it loves. Mold is a simple organism with three main requirements: Moisture, Heat, and Oxygen. If you leave even one of these in the equation, your treats are on a countdown to the trash can.
1. Moisture (The Biggest Killer)
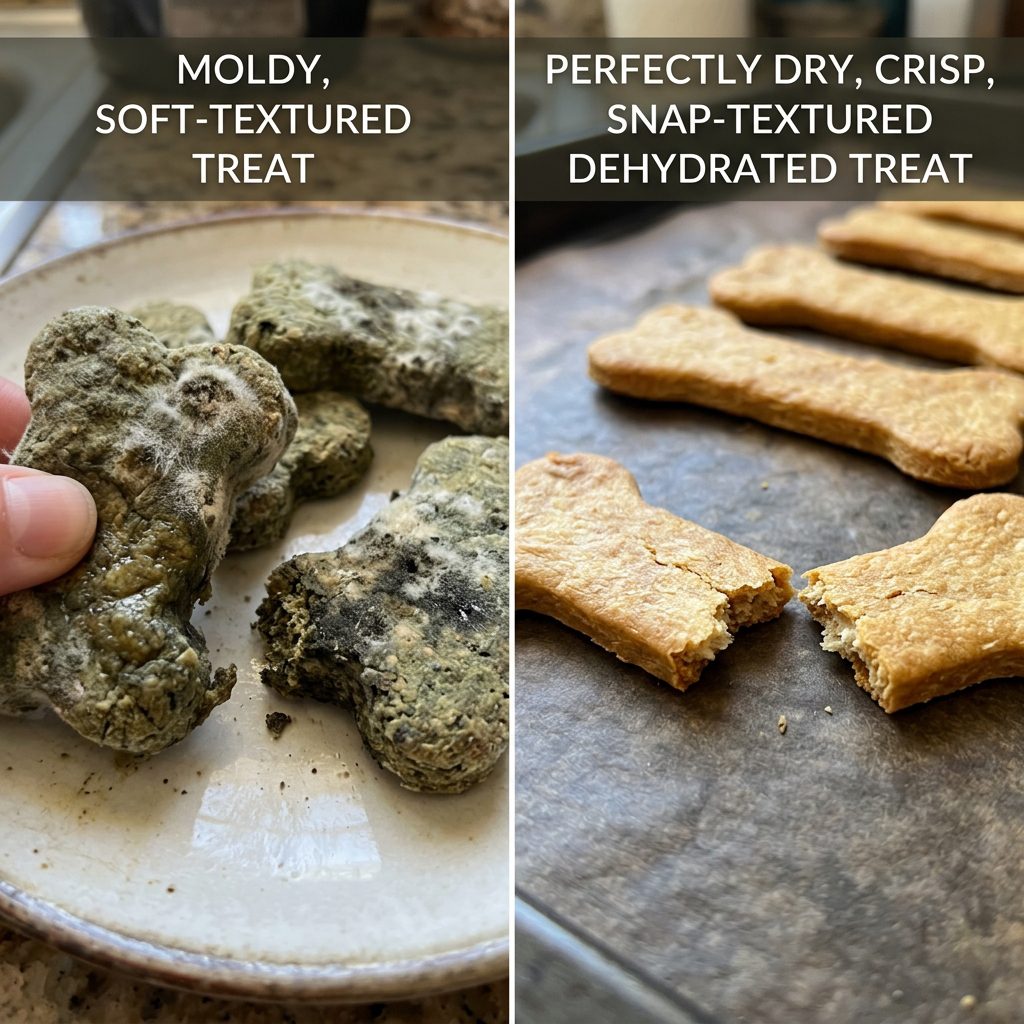
Most homemade recipes are basically cookies for dogs. They contain flour, eggs, and water. If the center of that biscuit feels even slightly soft or ‘bready,’ it contains enough moisture to host a mold colony within 48 to 72 hours. To get months of shelf life, we need to achieve a ‘snap.’ If it doesn’t crunch, it won’t last.
2. Fat Oxidation (The Stink Factor)
Ever smelled a bag of treats that just smelled… off? That’s rancidity. Fats, especially animal fats and oils, react with oxygen over time. While mold makes treats fuzzy, rancidity makes them toxic. Using lean meats and avoiding heavy oils is a hacker secret for long-term storage.
3. Condensation
This is the rookie mistake. You bake the treats, they look dry, and you put them in a plastic bag while they are still slightly warm. That residual heat creates steam, which turns into water droplets inside the bag. Boom. Instant mold environment. Always, always let treats cool for at least 4 hours on a wire rack before sealing them up.
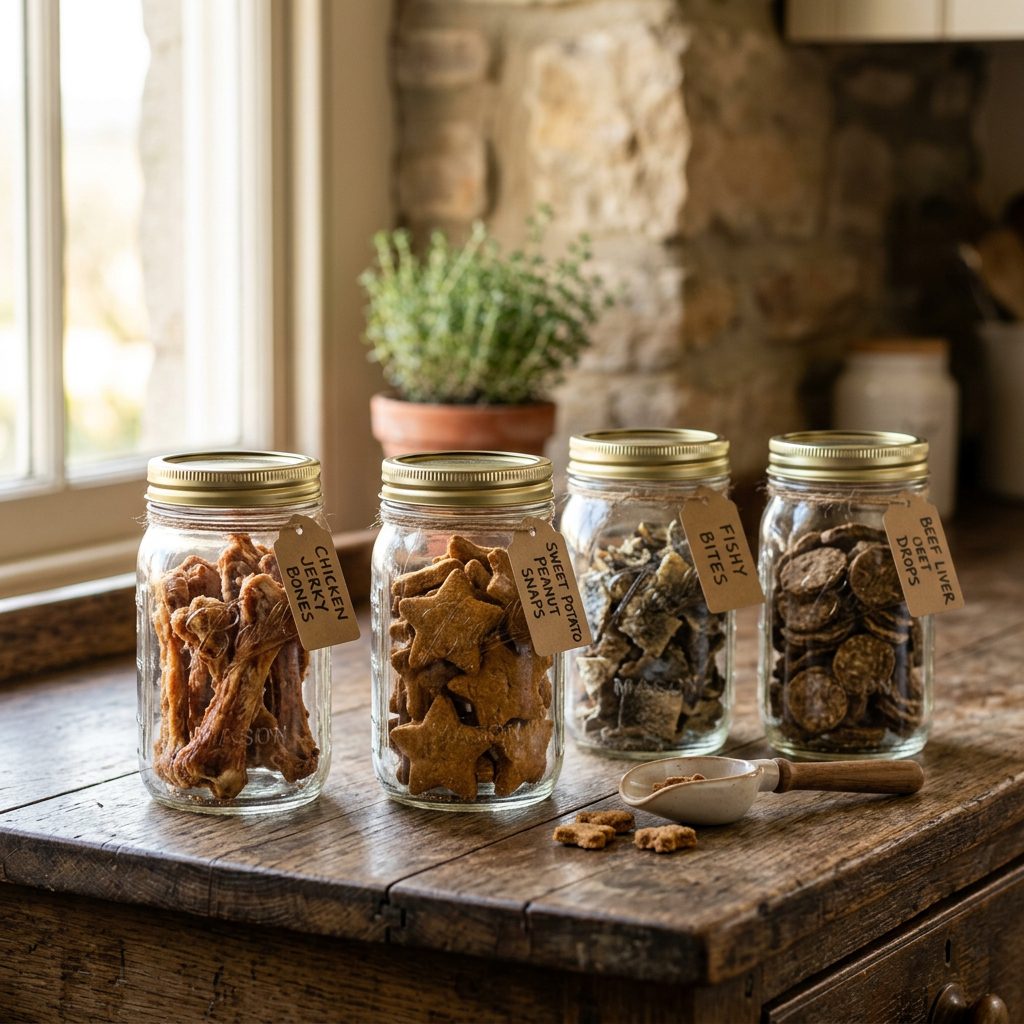
Natural Preservatives: The Hacker’s Toolkit
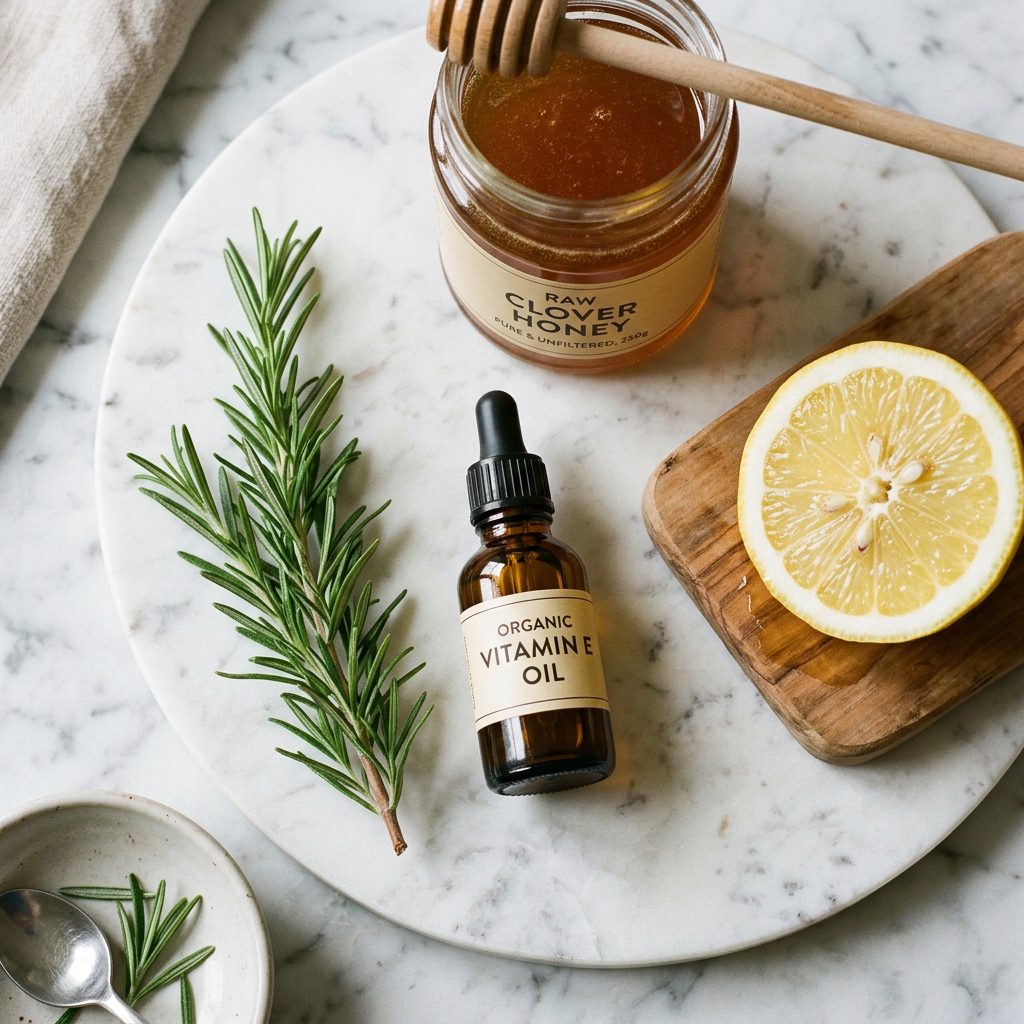
Commercial brands use BHA, BHT, and Ethoxyquin—chemicals you wouldn’t want in your own cereal, let alone your dog’s snacks. We can achieve similar (albeit slightly shorter) results using nature’s own preservatives. Here are the heavy hitters I use in my kitchen:
- Vitamin E (Mixed Tocopherols): This is the gold standard. You can actually buy Vitamin E oil and add a few drops to your dough. It acts as a powerful antioxidant that slows down fat spoilage.
- Rosemary Extract: Not only does it smell great, but it’s a potent natural preservative. Note: Use the extract, not the essential oil, and keep it in small quantities.
- Honey: In low-moisture environments, honey acts as a natural humectant and antimicrobial agent. Plus, dogs love the taste.
- Citric Acid (Lemon Juice): A small amount of lemon juice can lower the pH of the treat, making it a hostile environment for certain bacteria.
By combining these with a low-moisture baking technique, you’re building a multi-layered defense system against spoilage.
The Cost Breakdown: DIY vs. Premium Store-Bought
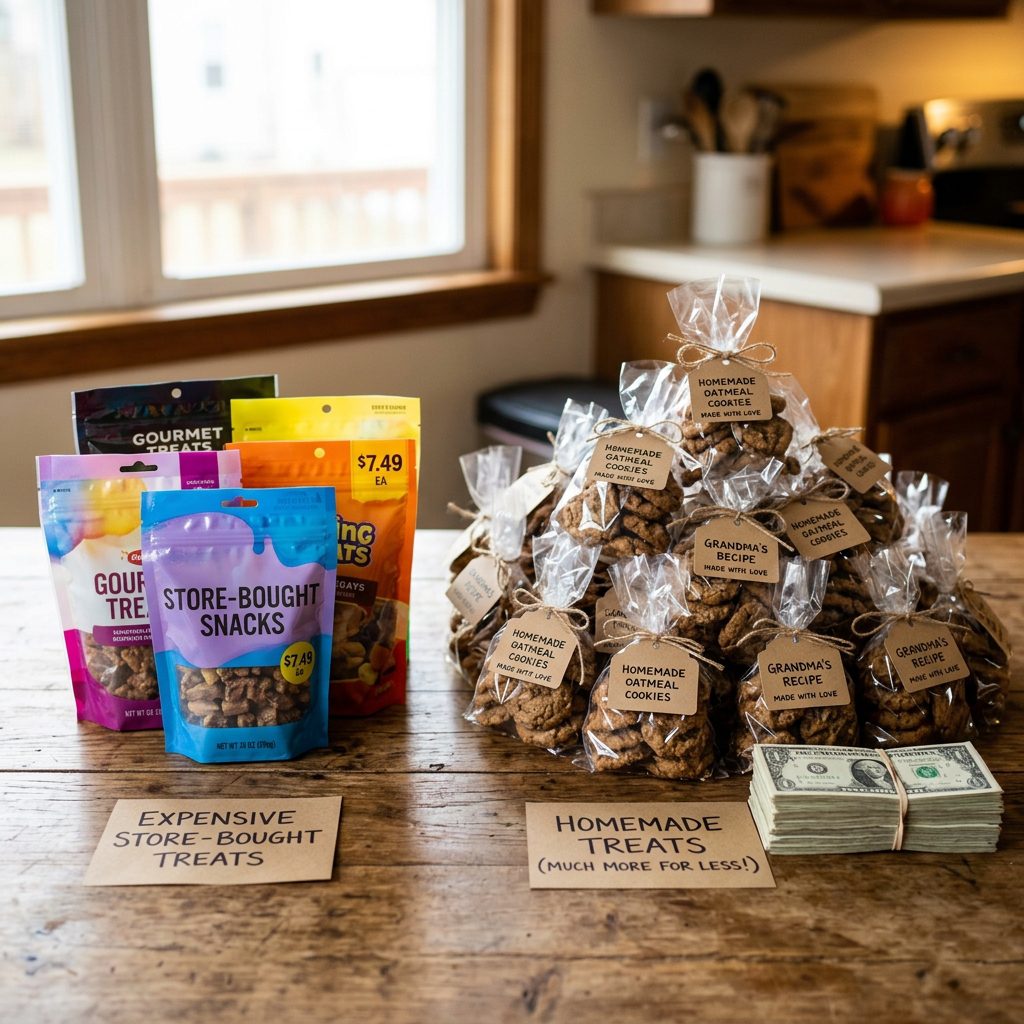
Is it actually cheaper to make your own long-lasting treats? Let’s look at the numbers. We’re comparing a high-quality, single-ingredient dehydrated beef liver treat (the kind that lasts months) against the DIY version.
| Feature | Store-Bought Premium (4oz) | DIY Hacker Version (4oz) | The Verdict |
|---|---|---|---|
| Main Ingredient | Grass-fed Beef Liver | Local Butcher Beef Liver | Same Quality |
| Preservatives | Often none (dehydrated) | None + Vitamin E | DIY is Fresher |
| Price | $12.99 – $15.00 | $1.50 – $2.50 | 80% Savings |
| Shelf Life | 12 Months (Sealed) | 3-6 Months (Properly Stored) | Store-bought wins slightly |
As you can see, you are paying a massive premium for the process of dehydration. By doing it yourself, you save enough money in three months to pay for a high-quality food dehydrator. That’s what I call a win.
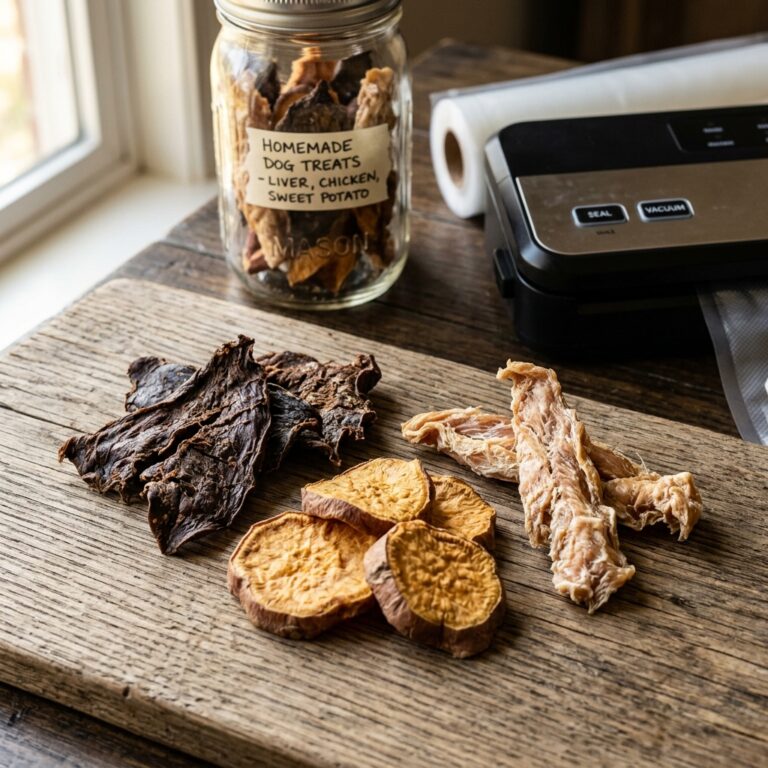
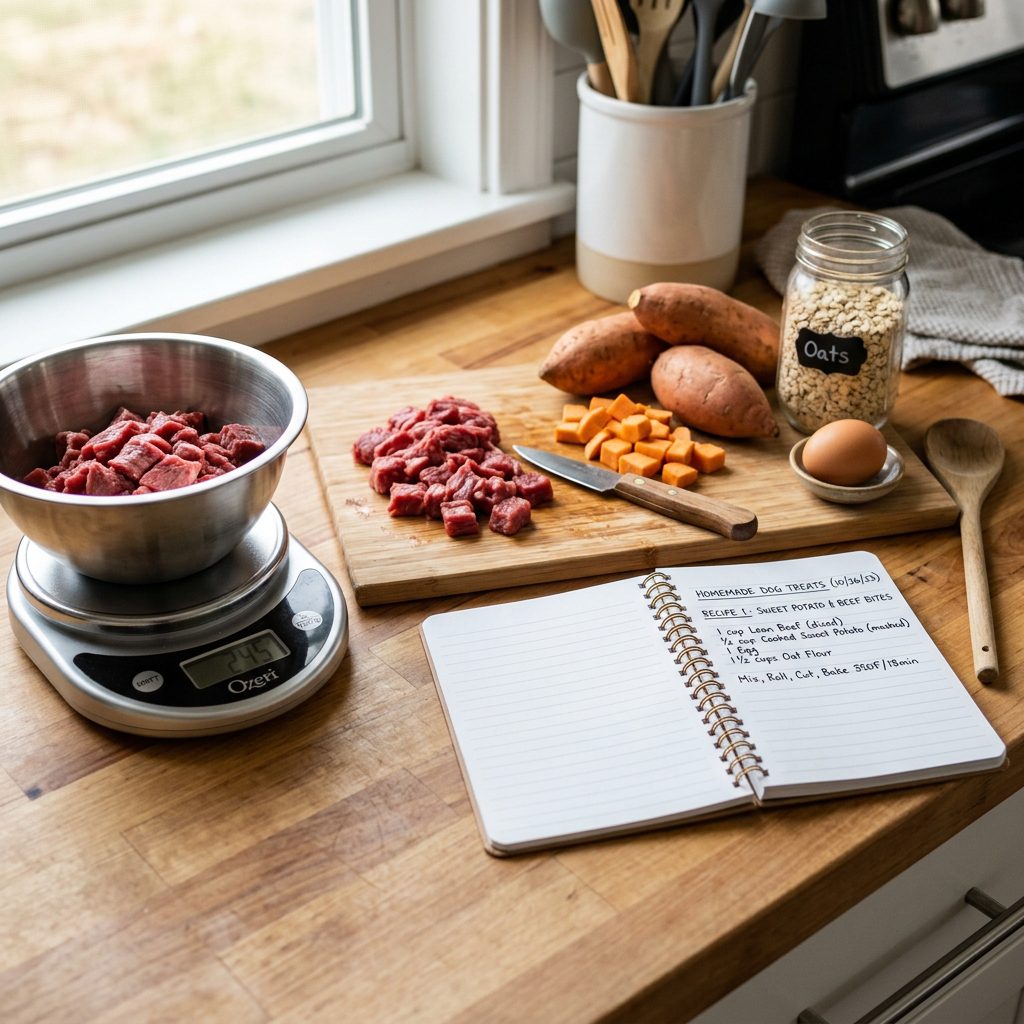
The Safe Chef Recipe: ‘Everlasting’ Sweet Potato & Liver Jerky
The Logic Behind the Recipe
This recipe focuses on high protein and low fat. Why? Because fat goes rancid, but lean protein dehydrates into a rock-hard ‘jerky’ that mold hates. We use sweet potato for fiber and its natural ability to dry out into a ‘leather’ texture.
Ingredients:
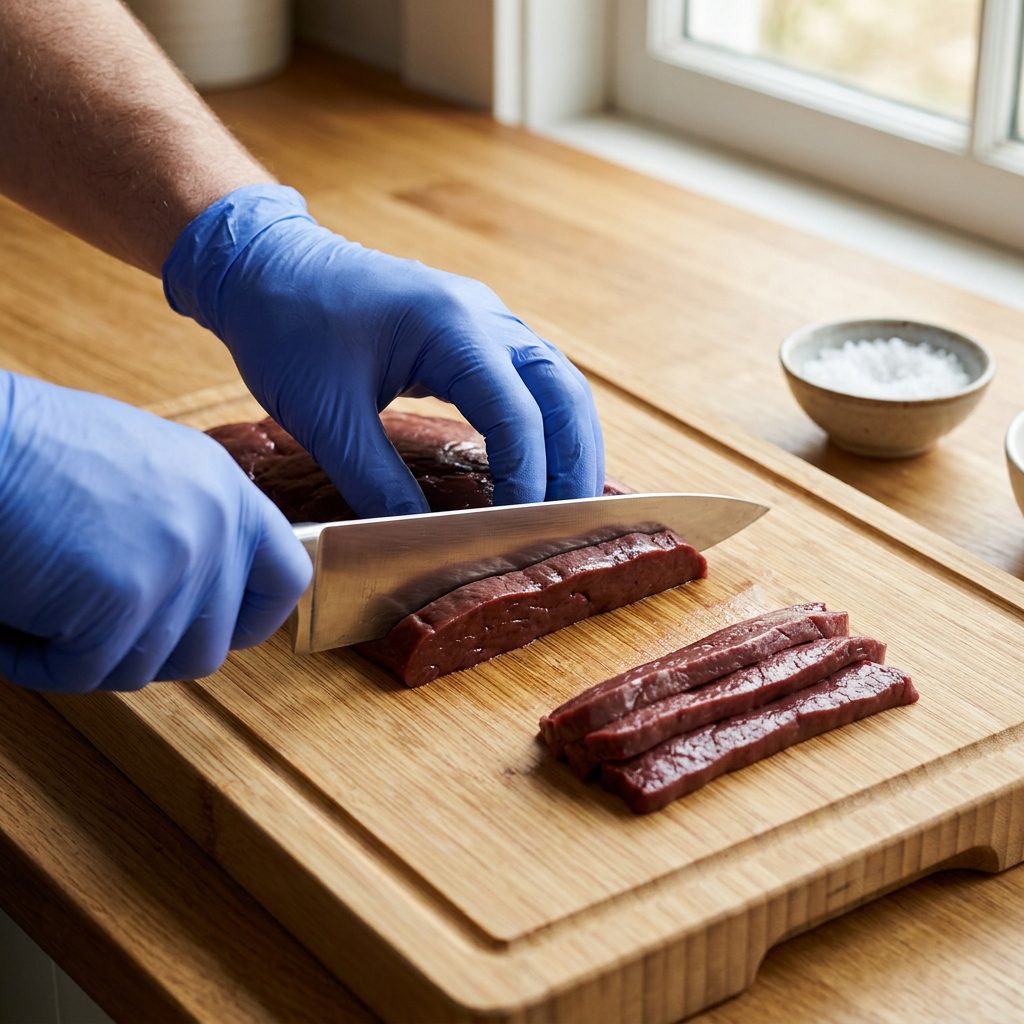
- 1 lb Beef Liver (sliced 1/8 inch thick)
- 1 Large Sweet Potato (peeled and sliced thin)
- 1/4 tsp Vitamin E oil (optional)
- 1 tsp Dried Parsley (for breath and preservation)
Instructions:
- Prep: Slice your liver and sweet potatoes as thin as possible. Consistency is key for even drying.
- The Soak: Toss the slices in a bowl with the Vitamin E oil and parsley.
- The ‘Hacker’ Secret: Blanch the sweet potato slices for 2 minutes in boiling water first. This breaks down the starches and helps them dry faster.
- Dehydrate: Arrange on dehydrator trays. Set to 160°F (71°C). This temperature is crucial to kill any pathogens in the raw meat.
- The Wait: Let them go for 8-12 hours. You want them to be ‘brittle.’ If you can bend them, they aren’t done. They should snap like a cracker.
- Cooling: Let them sit on a wire rack for 4-6 hours until they are room temperature throughout.
The Batch Cooking & Storage Masterclass
How to Store for 3+ Months
Once you’ve spent 12 hours dehydrating, don’t ruin it with a bad jar. Here is the hierarchy of storage for the savvy owner:
Level 1: The Pantry (1-2 Weeks)
Only for treats you’ll use immediately. Use a glass mason jar with a silicone seal. Add a food-grade silica gel packet (the kind you find in seaweed snacks) to absorb any stray moisture.
Level 2: The Fridge (1 Month)
Good for treats that are ‘mostly’ dry but still have a little chew. Keep them in an airtight container. Note: Cold air is dry, which helps, but beware of ‘sweating’ when you take the jar out.
Level 3: The Freezer (6 Months+)
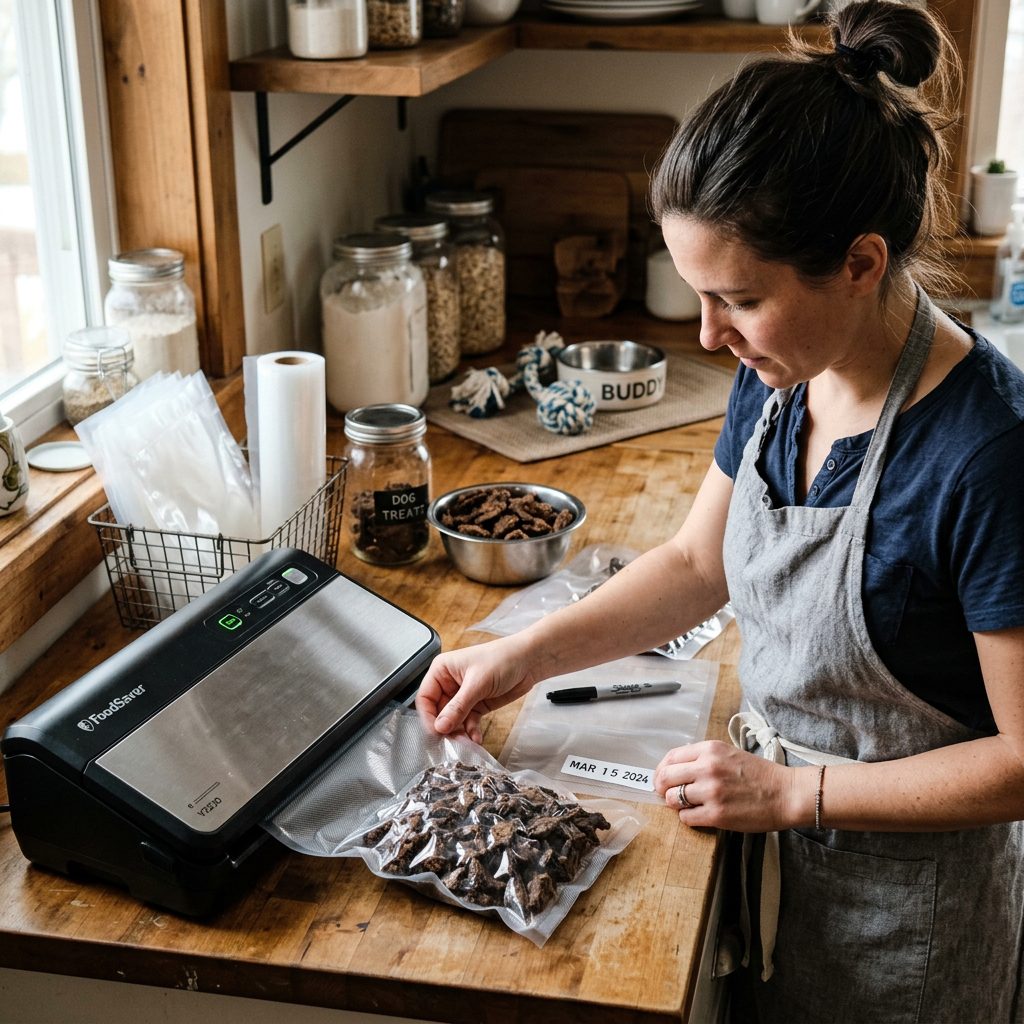
This is the ultimate hacker move. I store 90% of my batches in the freezer in vacuum-sealed bags. Because we’ve already removed the moisture, they won’t get freezer burn easily. You can take out a week’s worth at a time.
Hacker Tip: Use a vacuum sealer! Removing the oxygen is the single most effective way to prevent fat rancidity and mold. A vacuum-sealed, dehydrated treat is practically indestructible.
Conclusion
Keeping homemade dog treats fresh isn’t magic—it’s just good old-fashioned science. By focusing on moisture removal, using lean ingredients, and mastering the cooling process, you can provide your dog with world-class nutrition without the ‘commercial’ price tag or the scary chemicals. Remember: if it doesn’t snap, it’s a snack for today; if it snaps, it’s a snack for next month.
You now have the tools to be the ultimate canine nutrition hacker. Go forth, bake in bulk, and keep those tails wagging with the freshest, safest treats on the block!