How to Make Instagram-Worthy Dog Cookies Without Fake Dyes
Let’s be honest, half the fun of having a dog is spoiling them rotten, right? And in the age of Instagram, sharing a photo of your furry best friend enjoying a beautiful, tasty-looking treat is pure joy. But when you look at the ingredients list on many brightly colored commercial dog treats, you might see a rainbow of artificial dyes and unpronounceable chemicals. Yikes!
What if you could make treats that are not only stunningly beautiful but also genuinely healthy for your pup? Well, you absolutely can! Forget the fake stuff. We’re diving into the world of natural, dog-safe food colorings to help you become a master baker of Instagram-worthy dog cookies. Get ready to fill your feed—and your dog’s belly—with goodness!
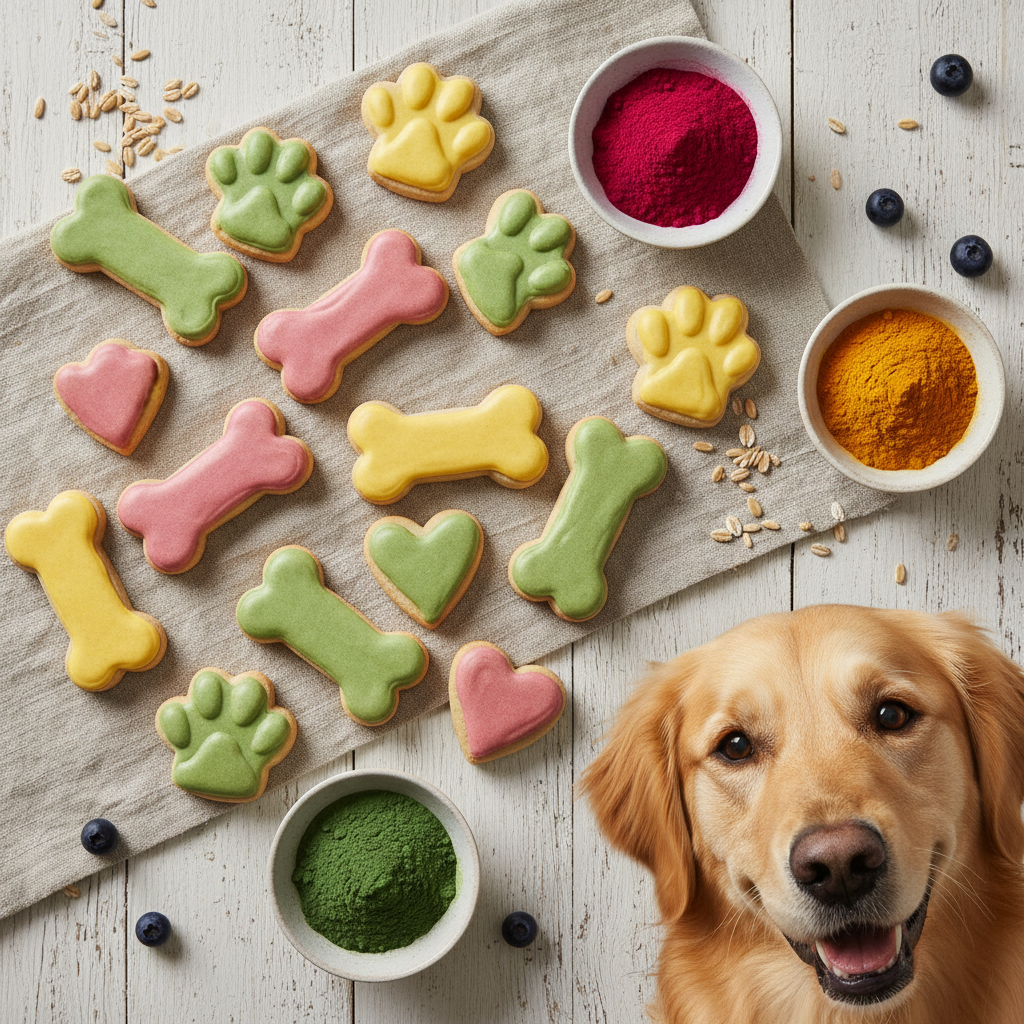
Your Natural Dye Toolkit: Dog-Safe Ingredients for Every Color

The secret to creating vibrant dog treats is hiding right in your pantry or local grocery store. Mother Nature provides a whole palette of colors that are perfectly safe and even healthy for your canine companion. The key is knowing which ingredients to use and how to prepare them. Here’s a handy chart to get you started on your natural dye journey.
The Rainbow in Your Kitchen
| Color | Natural Source | How to Use |
|---|---|---|
| Pink / Red | Beetroot Powder or Puree | Beetroot powder is potent; start with a tiny pinch and add more until you get the desired shade. For puree, simply blend cooked beets with a little water. |
| Orange / Yellow | Turmeric or Pumpkin Puree | A little turmeric goes a long way and adds anti-inflammatory benefits! For a softer orange, plain canned pumpkin puree (not pie filling) is perfect and great for digestion. |
| Green | Spirulina or Spinach Powder | Spirulina, a type of algae, creates a deep, rich green and is packed with nutrients. Spinach powder or blended fresh spinach works wonderfully too. |
| Purple / Blue | Blueberries or Blackberries | Mash fresh or frozen blueberries to create a lovely purple hue. For a deeper color, you can gently heat them to release more juice. Blackberries also work well. |
| Brown | Carob Powder | IMPORTANT: Never use chocolate! Carob powder is the perfect dog-safe alternative that gives a rich, chocolatey-brown color and taste that dogs love. |
Expert Tip: When mixing colors into your icing, start with a very small amount of the natural dye and gradually add more. These natural pigments can be surprisingly strong!
The Master Recipe: A Simple, Versatile Dog Cookie Base
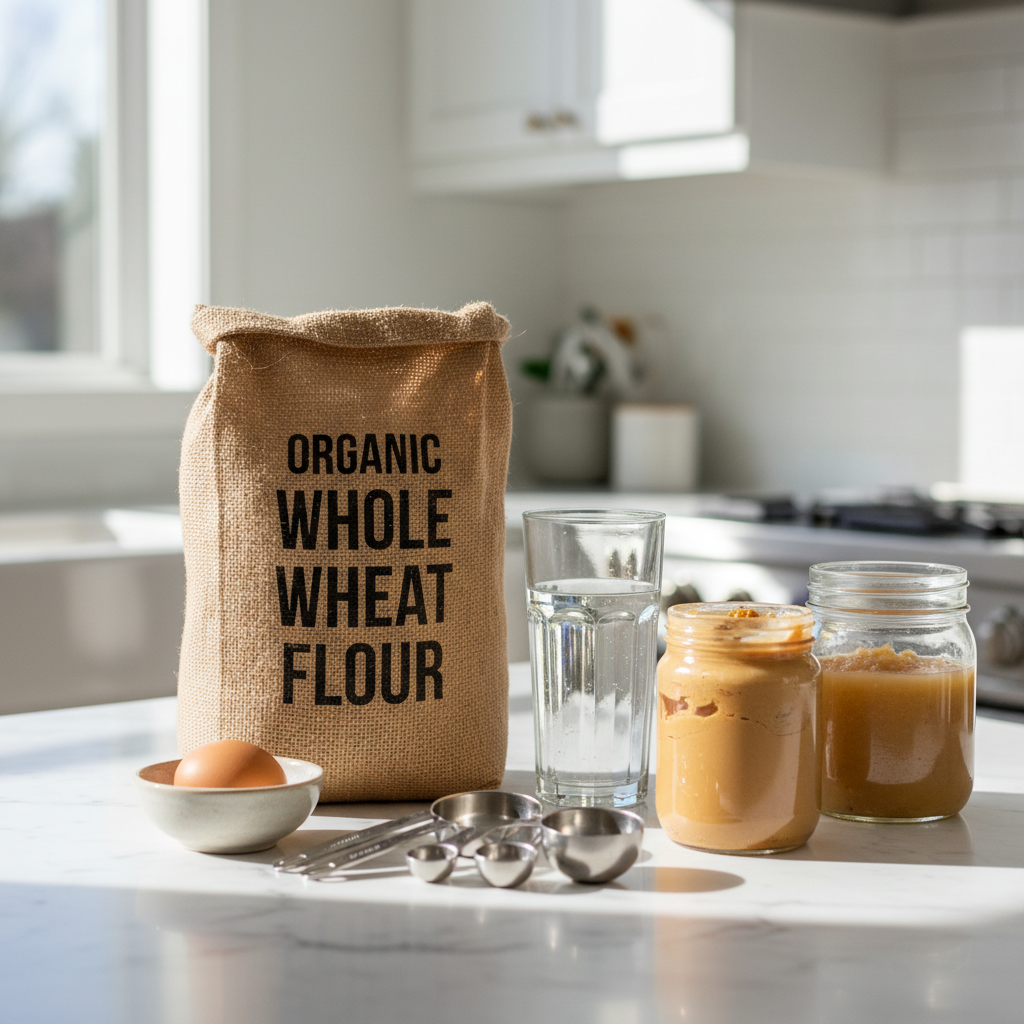
Before you can decorate, you need a solid cookie foundation. This recipe is simple, uses common ingredients, and creates a perfect ‘canvas’ for your colorful creations. It’s firm enough to hold its shape but soft enough for dogs to chew easily.
Ingredients:
- 2 ½ cups whole wheat flour (or oat flour for a gluten-free option)
- 1 large egg
- 1 cup of water or low-sodium broth
- ½ cup unsweetened applesauce
- 2 tablespoons of peanut butter (ensure it does not contain xylitol)
Instructions:
- Preheat your oven to 350°F (175°C) and line a baking sheet with parchment paper.
- In a large bowl, whisk together the whole wheat flour and the egg.
- Gradually add the applesauce, peanut butter, and water/broth. Mix with a spoon or your hands until a stiff dough forms. If it’s too sticky, add a little more flour. If it’s too dry, add a splash more water.
- On a lightly floured surface, roll out the dough to about ¼-inch thickness.
- Use your favorite cookie cutters to cut out shapes and place them on the prepared baking sheet.
- Bake for 20-25 minutes, or until the edges are golden brown.
- Let the cookies cool completely on a wire rack before you even think about decorating! A warm cookie will just melt the icing.
The Icing on the Cookie: Decorating Your Masterpieces

This is where the magic happens! Creating a dog-safe ‘icing’ is incredibly easy. The best base is something with a thick, creamy consistency that will hold the color and firm up nicely.
Simple Dog-Safe Icing Recipe:
- Base: ½ cup plain Greek yogurt or plain cream cheese.
- Color: Your natural dyes from the toolkit above.
Step-by-Step Decorating Guide:
- Prepare Your Palette: Set out several small bowls. Place a tablespoon or two of your icing base (yogurt or cream cheese) into each bowl.
- Mix Your Colors: Add a tiny amount of a different natural dye to each bowl. A pinch of beet powder in one, a dash of turmeric in another, and so on. Stir thoroughly until the color is consistent.
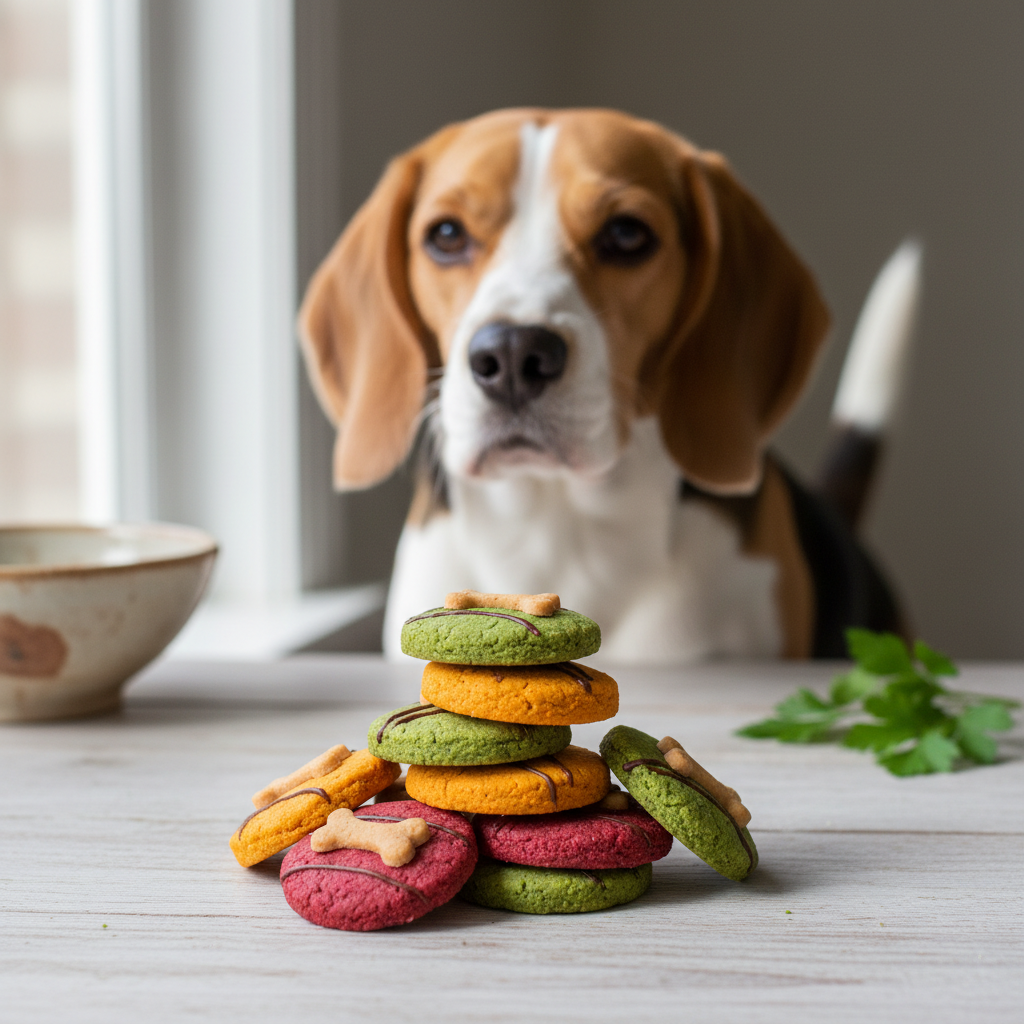
- Get Creative: Now for the fun part! You can decorate your cooled cookies in a few ways:
- Dipping: Simply dip the top of the cookie into the colored icing for a smooth, solid coat.
- Piping: For more detailed designs, spoon your colored icing into small plastic bags or piping bags. Snip a tiny corner off the plastic bag to create a makeshift piping tool. Now you can draw lines, dots, or even write your pup’s name!
- Let it Set: Place the decorated cookies on a baking sheet and pop them in the refrigerator for at least 30 minutes to allow the icing to firm up.
Photo Shoot! Tips for That Paw-fect Instagram Shot
You’ve baked and decorated your beautiful cookies. Now it’s time to show them off! A great photo can make your homemade creations look like they came from a gourmet dog bakery.
- Find the Light: Natural light is your best friend. Take your photos near a bright window. Avoid harsh, direct sunlight, which creates strong shadows. An overcast day is actually perfect!
- Choose a Simple Background: You want your colorful cookies and your cute dog to be the stars. A clean floor, a simple blanket, or a patch of green grass works much better than a cluttered, busy background.
- Get on Their Level: Don’t just shoot from above. Get down on the floor to capture your dog’s perspective. Photos taken at your dog’s eye level are often much more engaging.
- Involve the Star: The best photos include the happy customer! Place a cookie in front of your dog and capture their look of anticipation. You can also get a shot of them gently taking a bite. Have your camera ready, as these moments are quick!
- Style the Scene: Arrange a few of the best-looking cookies in a neat pile or a pretty pattern. You can add a prop like your dog’s favorite toy or a cute bandana to complete the scene.
Conclusion
See? Making gorgeous, healthy, and totally Instagrammable treats for your dog is easier than you thought! By swapping out artificial dyes for a rainbow of natural ingredients, you’re not just creating a picture-perfect moment; you’re also giving your best friend a snack you can feel great about. So go ahead, preheat that oven, get creative with your colors, and get ready for your pup to be the most popular dog on the block (and on your social feed). Happy baking!