Rally Obedience Decoded: A Beginner’s Guide to Reading the Course Signs
Rally Obedience, often referred to simply as "Rally," is one of the fastest-growing canine sports in the world. Unlike traditional obedience, which requires silent precision and a rigid atmosphere, Rally is a dynamic, energetic sport that encourages communication between the handler and the dog. It is a course-based activity where the team moves through a station of signs, each indicating a specific skill to perform. For beginners, however, walking onto a course filled with geometric shapes, arrows, and text can feel like trying to read a foreign language.
The key to success in Rally is not just teaching your dog to sit or heel, but mastering the art of reading the course signs fluidly. Each sign provides critical information about direction, pace, and body position. Misinterpreting a sign can lead to point deductions or disqualification, regardless of how well-trained your dog is. This guide is designed to decode the visual language of Rally Obedience, helping you transition from a confused novice to a confident handler ready to navigate the ring with precision and joy.
The Anatomy of a Rally Sign
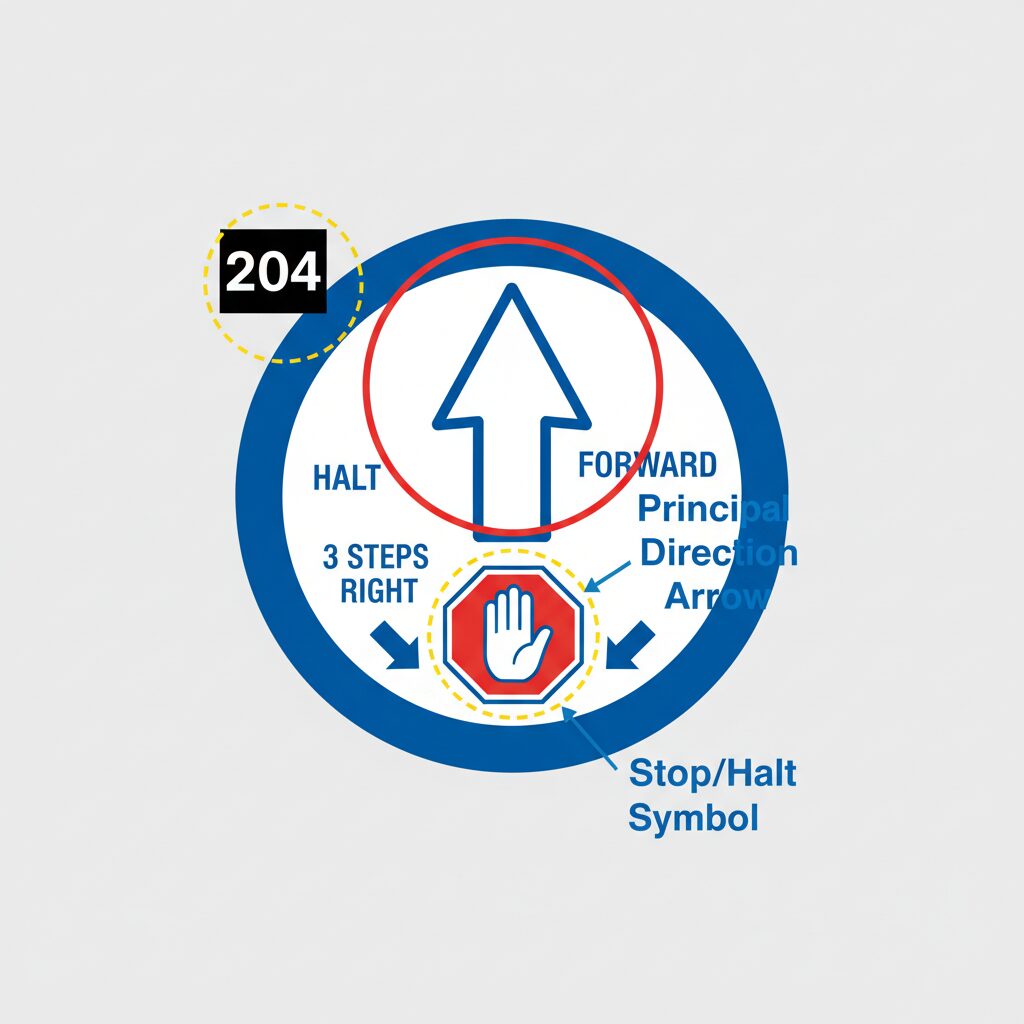
Before diving into specific exercises, it is essential to understand the layout of the sign itself. Rally signs are standardized to provide information at a glance. When you approach a station, you are not just reading text; you are interpreting a visual code designed to be processed while moving.
- The Exercise Name: Located at the top or bottom of the sign, this text describes the maneuver (e.g., "Halt – Sit"). While helpful during a walkthrough, you eventually want to rely on the visual symbols.
- The Directional Arrow: Most signs feature a large arrow indicating the path you must take after performing the exercise. A straight arrow means continue forward, while curved arrows indicate turns.
- The Symbol: Specific icons represent actions. For example, a red octagon universally signifies a Halt, while a spiral line indicates a weaving movement.
- The Sign Number: A small number holder is placed next to each sign on the course. This indicates the sequence. You must perform the signs in numerical order, which requires constant awareness of your surroundings.
Understanding these components allows you to process the requirement instantly, keeping your connection with your dog uninterrupted.
Decoding Stationary Exercises: The Halt Family
The foundation of Rally Obedience lies in the stationary exercises, primarily involving the "Halt." In the Novice class, you will encounter various signs that require you to stop forward motion. Recognizing these signs early is crucial because failing to stop completely is a common error.
The Basic Halt
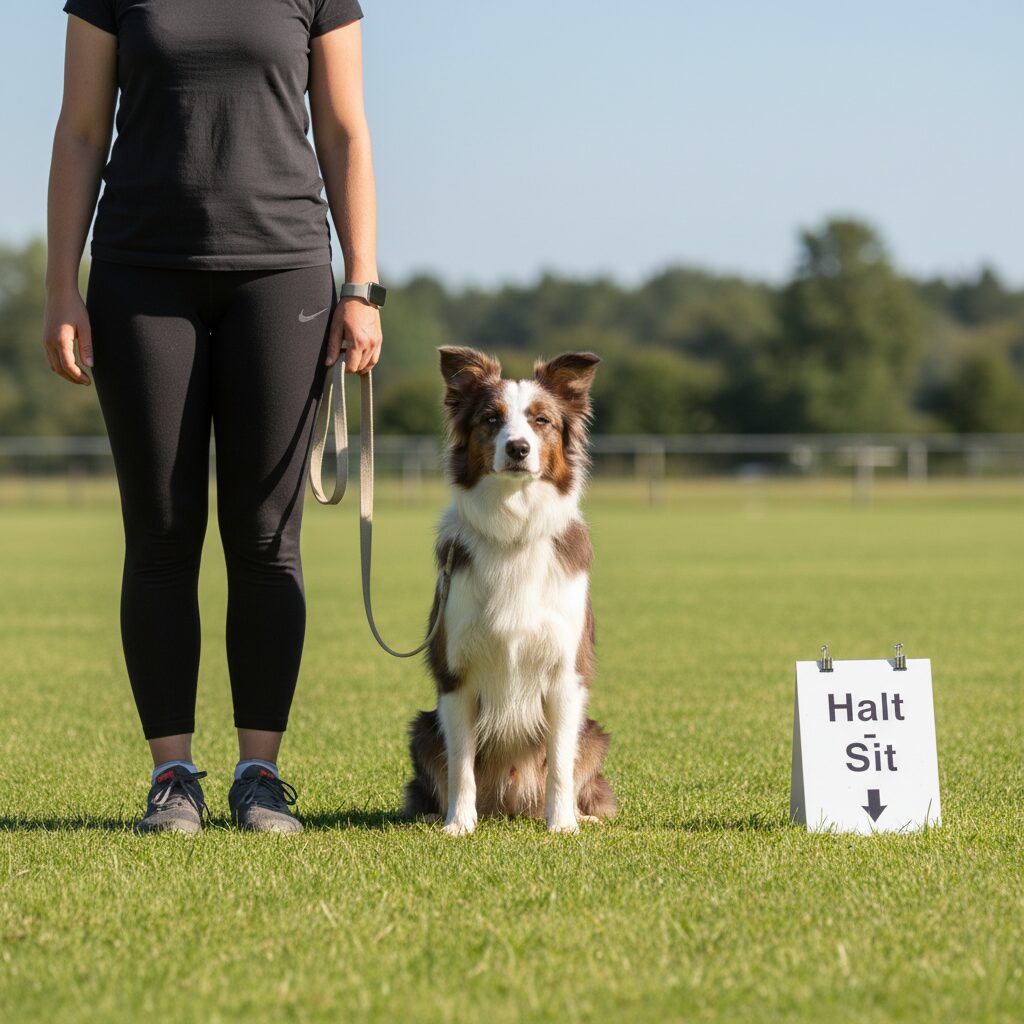
The most common sign is the Halt – Sit. Visually, this is often represented by a stop sign symbol. When you see this, you must stop your forward motion, and your dog must automatically sit at your left side in the "heel" position. You do not need to give a verbal "sit" command if your dog is well-trained, but in Rally, you are permitted to talk to your dog, so a verbal cue is allowed.
Variations of the Halt
As you progress, the signs become more complex. You may see Halt – Down – Walk Around. This sign tells you to stop, have the dog lie down, walk a circle around them, and then return to heel position before moving forward. The visual cue on the sign will usually show a circular arrow around a dog symbol. Reading these signs requires you to prepare your dog for a transition before you arrive at the station.
Navigating Turns and Pivots
Rally courses are rarely straight lines. They are designed to test your dog’s ability to move with you through changes in direction. The signs for turns are distinguished by the angle and shape of the arrow.
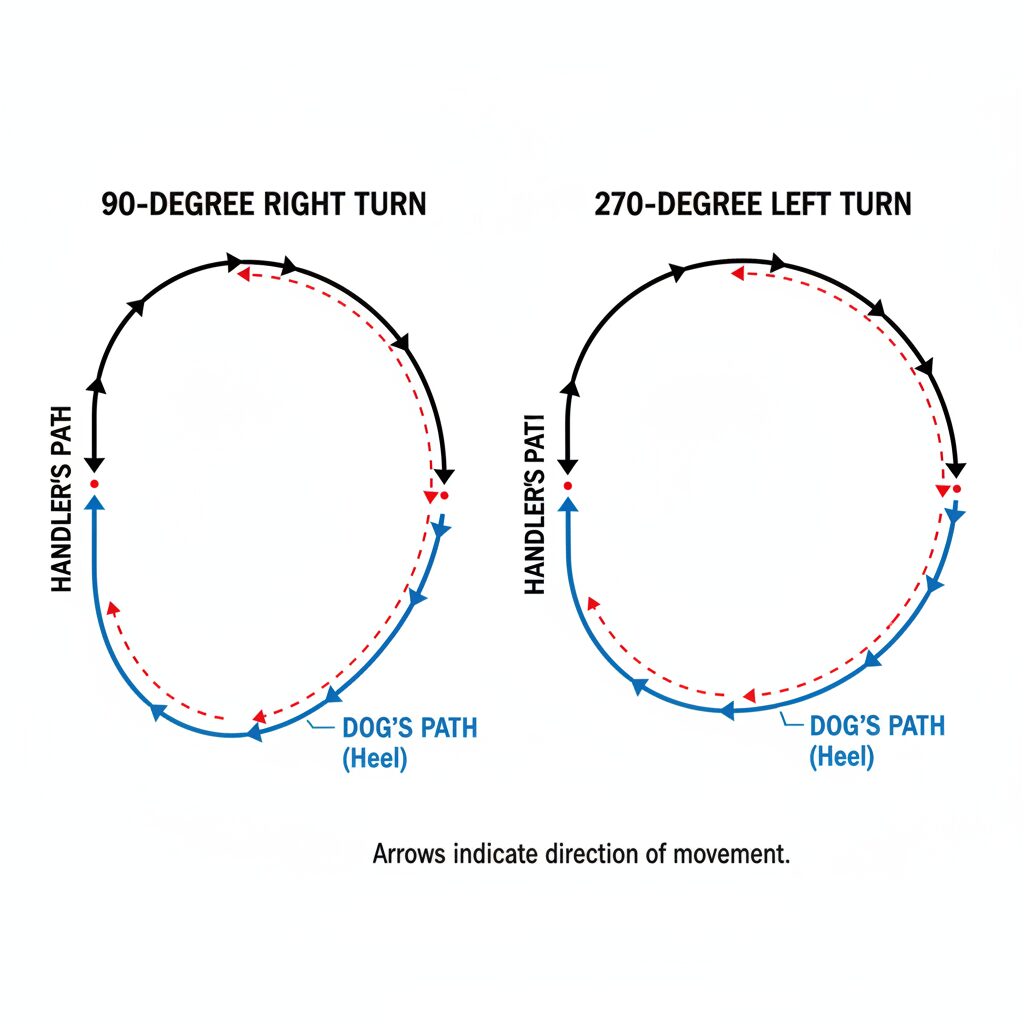
- 90-Degree Turns: These signs show a sharp right or left angle. They require a crisp turn where the dog maintains the heel position without lagging (on left turns) or forging ahead (on right turns).
- 270-Degree Turns: These are often confusing for beginners. The sign will show a loop that looks like three-quarters of a circle. A 270-right turn means you turn to your right in a tight circle until you are facing the new direction (which is essentially a left turn relative to your original path).
- 360-Degree Circles: These signs indicate a full circle. The key here is reading the direction of the arrow. A 360-right means you turn away from the dog, while a 360-left means you turn into the dog.
When reading these signs on a course map, visualize your footwork. A common mistake is misinterpreting a 270-degree turn for a simple left turn, which results in entering the next station from the wrong angle.
Pace Changes and Moving Exercises
Not all signs require you to stop or turn; some dictate the speed at which you travel. These signs test your dog’s impulse control and responsiveness.
Fast and Slow Pace
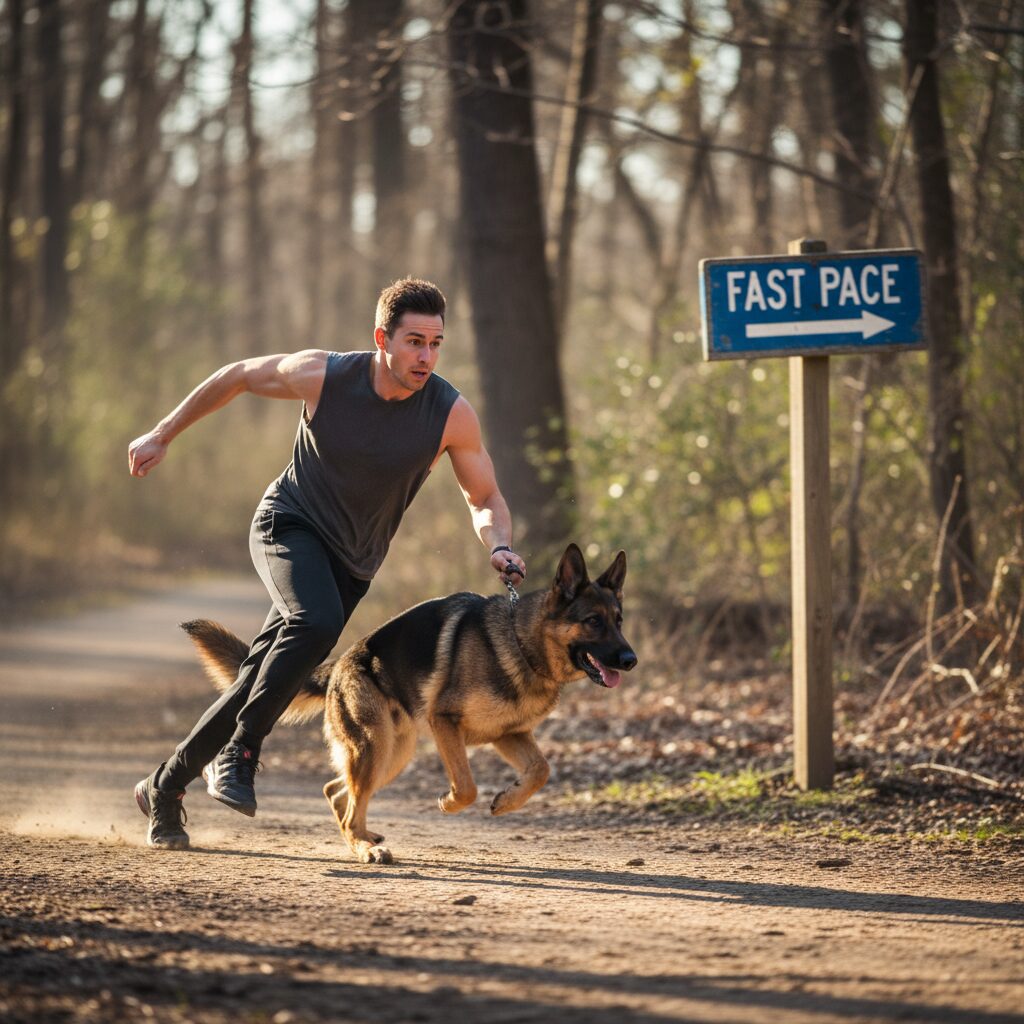
You will encounter signs that say Slow Pace, Fast Pace, and Normal Pace. The visual cues are usually distinct: "Fast" may have an arrow with motion lines, while "Slow" might appear shorter or wavy.
- Slow Pace: This is not a casual stroll; it is a deliberate, creeping pace. The dog must decelerate immediately without sitting.
- Fast Pace: This requires a jog or a run. The transition must be obvious to the judge.
It is critical to look ahead for the Normal Pace sign. You must maintain the altered speed until you pass the sign that releases you back to a normal walking speed. Failing to return to normal pace is a substantial point deduction.
Mastering the Course Map and Walkthrough
Before you run the course with your dog, you are given a course map and a period for a "walkthrough" without the dog. This is the most critical time for decoding the signs.
When reviewing the map, trace the line from sign #1 to the finish. Note the flow. Are the turns tight? Is there a fast pace immediately followed by a halt? During the physical walkthrough, stand at each sign and physically orient your body in the direction of the arrow. Look at the next sign to see where you need to go. This prevents the common error of performing a sign correctly but exiting in the wrong direction.
Pro Tip: If a sign confuses you during the walkthrough, ask the judge. It is better to clarify the meaning of a symbol beforehand than to guess and lose points during your run.
Building Confidence Through Practice
Rally Obedience is a celebration of the partnership between you and your dog. While the array of signs and symbols may seem daunting at first, they are simply the roadmap for your performance. By taking the time to study the anatomy of the signs, understanding the difference between stationary and moving exercises, and utilizing your walkthrough effectively, you can remove the anxiety of the unknown.
Remember, every expert handler started exactly where you are now—staring at a sign and wondering which way to turn. With patience and consistent practice, decoding these signs will become second nature, allowing you to focus on what truly matters: the joy of working with your canine companion.