DIY Dog Sushi: The Cutest Birthday Treat You Can Make Without Baking
Is your dog’s birthday or gotcha-day coming up? We’re always looking for special ways to celebrate the furry family members who bring us so much joy. While pupcakes and store-bought biscuits are great, what if you could make something truly unique, healthy, and incredibly cute? Enter DIY Dog Sushi!
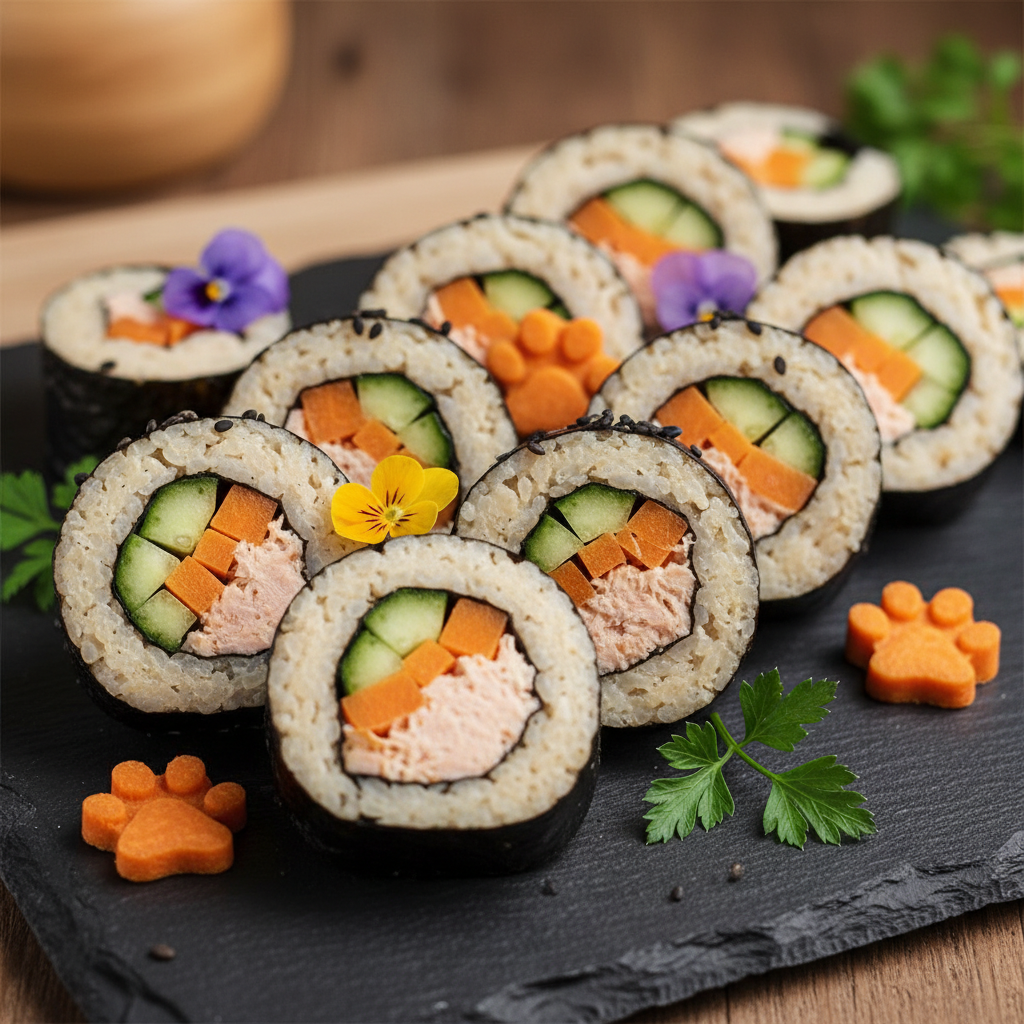
Don’t worry, there’s no raw fish involved. This is a fun, no-bake recipe that uses simple, dog-friendly ingredients to create adorable sushi-style rolls your pup will go wild for. It’s the perfect way to make a memorable treat that’s as fun for you to create as it is for them to eat. Let’s get rolling!
Why Dog Sushi is the Paw-fect Party Treat
Before we dive into the recipe, let’s talk about why this is such a fantastic choice for a canine celebration. It’s more than just a cute photo op (though it’s definitely great for that, too!).
- No Baking Required: On a hot day, the last thing you want to do is turn on the oven. This recipe is completely no-bake, making it a quick and cool kitchen activity.
- Totally Customizable: Is your dog allergic to chicken? Is he a picky eater who turns his nose up at carrots? No problem! You can swap out virtually any ingredient for something your dog loves and can safely eat.
- Packed with Nutrients: Unlike many sugary store-bought treats, dog sushi can be loaded with healthy ingredients. From vitamin-rich sweet potatoes to omega-3-packed salmon, you’re giving your dog a treat that’s good for them.
- Great for Sensitive Tummies: Because you control the ingredients, you can easily create a grain-free or single-protein treat that’s gentle on your dog’s digestive system.
- It’s Just Plain Fun: Making dog sushi is a creative and loving way to bond with your pet and show them how much you care. Plus, their reaction will be priceless!
Safety First: A Guide to Dog-Friendly ‘Sushi’ Ingredients
The most important part of any DIY dog treat is ensuring every single ingredient is safe for your pup. While our sushi is dog-friendly, it’s crucial to know what you can and cannot use. Here’s a handy breakdown of safe swaps for traditional sushi ingredients.
Ingredient Safety Chart
| Sushi Component | Dog-Safe Options | Ingredients to AVOID |
|---|---|---|
| The ‘Rice’ (Base) | Mashed sweet potato, mashed pumpkin, mashed cauliflower, or plain, cooked white or brown rice. | Sushi rice (often has vinegar/sugar), anything with salt or seasonings. |
| The ‘Fish’ (Protein) | Cooked, deboned salmon; canned tuna or sardines in water (no salt); shredded cooked chicken or turkey; small pieces of dog-friendly jerky. | Raw fish, imitation crab (highly processed), any fish with bones, or proteins cooked with onion/garlic. |
| The Veggies (Fillings) | Shredded carrots, cucumber sticks (seeds removed), steamed green beans, bell pepper strips, steamed asparagus spears. | Avocado, onions, garlic, mushrooms, chives. |
| The Wrapper (Nori) | Thin ribbons of zucchini or cucumber made with a vegetable peeler. Plain nori (seaweed) is okay in very small amounts, but can be high in iodine and sodium. | Seasoned or flavored seaweed snacks. |
Expert Tip: When in doubt, leave it out! Stick to simple, whole foods that you know your dog tolerates well. Always introduce new foods in small quantities to see how their system reacts.
Let’s Get Rolling! Your Step-by-Step Dog Sushi Recipe
Ready to become a canine sushi chef? This recipe is super simple and requires more assembly than actual cooking. Let’s go!
What You’ll Need:
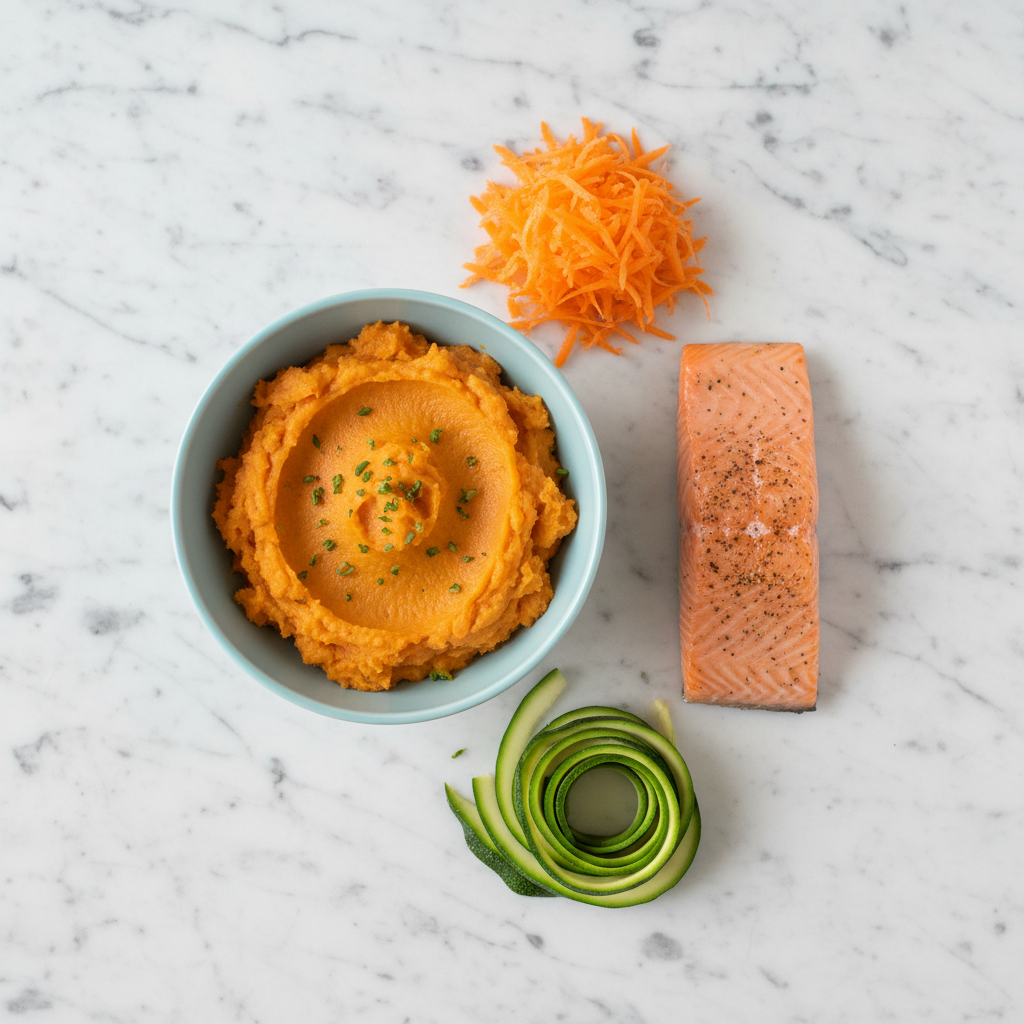
- For the ‘Rice’: 1 large sweet potato, cooked and mashed.
- For the Protein: 1 small filet of cooked, flaked salmon.
- For the Veggies: 1 carrot, shredded, and 1/2 cucumber, cut into thin matchsticks.
- For the Wrapper: 1 zucchini.
- Tools: A vegetable peeler, a cutting board, and a sharp knife.
The Steps:
- Prepare Your Base: Start with your cooked and cooled sweet potato. Mash it in a bowl until it’s smooth and has a sticky consistency, similar to sushi rice.
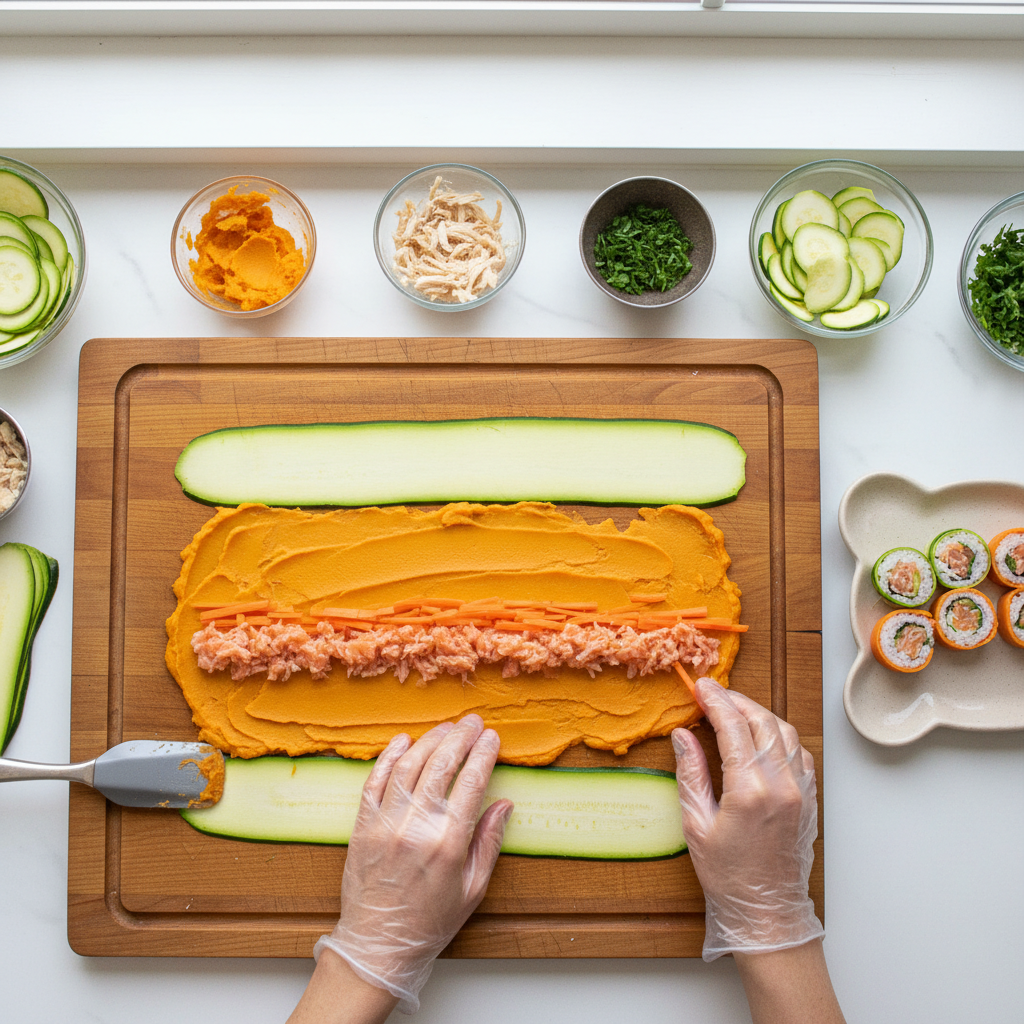
- Create Your Wrapper: Wash the zucchini. Using a vegetable peeler, carefully peel long, wide ribbons from the zucchini. These will act as your ‘nori’ to hold everything together. Lay a few ribbons on your cutting board or a piece of parchment paper, overlapping them slightly to create a solid sheet.
- Spread the ‘Rice’: Take a spoonful of the mashed sweet potato and spread it in a thin, even layer over your zucchini sheet, leaving a small border along the edges.
- Add the Fillings: In a line down the center of the sweet potato, add your flaked salmon, shredded carrots, and cucumber matchsticks. Don’t overfill, or it will be difficult to roll!
- Roll It Up: Carefully but firmly, begin rolling the zucchini sheet over the fillings. Use the parchment paper to help you tuck and tighten the roll, just like you would with real sushi.
- Slice and Serve: Once you have a tight log, use a sharp, non-serrated knife to slice the roll into 1-inch thick ‘sushi’ pieces. For cleaner cuts, you can wipe the knife with a damp cloth between slices.
And that’s it! You have a beautiful platter of dog-friendly sushi, ready for the birthday pup.
Serving Suggestions and Portion Control

Your masterpiece is complete! But before you let your dog devour the entire plate, let’s talk about serving sizes. Remember, these are treats, not a meal replacement.
The 10% Rule
A good rule of thumb for any treat is the 10% rule: treats should make up no more than 10% of your dog’s total daily caloric intake. Dog sushi is nutrient-dense, so a little goes a long way.
- For small dogs (under 20 lbs): 1-2 pieces are plenty for a special occasion.
- For medium dogs (20-50 lbs): 2-4 pieces would be a suitable serving.
- For large dogs (over 50 lbs): 4-5 pieces can be a fun and satisfying treat.
Presentation and Storage
Make the moment special! Arrange the sushi pieces on a special plate or their favorite lick mat. For a ‘soy sauce’ effect, you can add a tiny drizzle of low-sodium chicken or beef broth over the top (just a little!).
If you have leftovers, they can be stored in an airtight container in the refrigerator for up to 2 days. They might get a little soft, but your dog won’t mind one bit!
Conclusion
Making DIY dog sushi is more than just preparing a treat; it’s an act of love. It’s a chance to get creative in the kitchen and give your dog something that is not only delicious and exciting but also healthy and made with their specific needs in mind. Seeing their happy tail wags and eager eyes as you present their special birthday platter is a reward in itself.
So next time a special occasion rolls around, skip the store-bought goodies and try your hand at being a canine sushi master. Your dog will thank you for it!