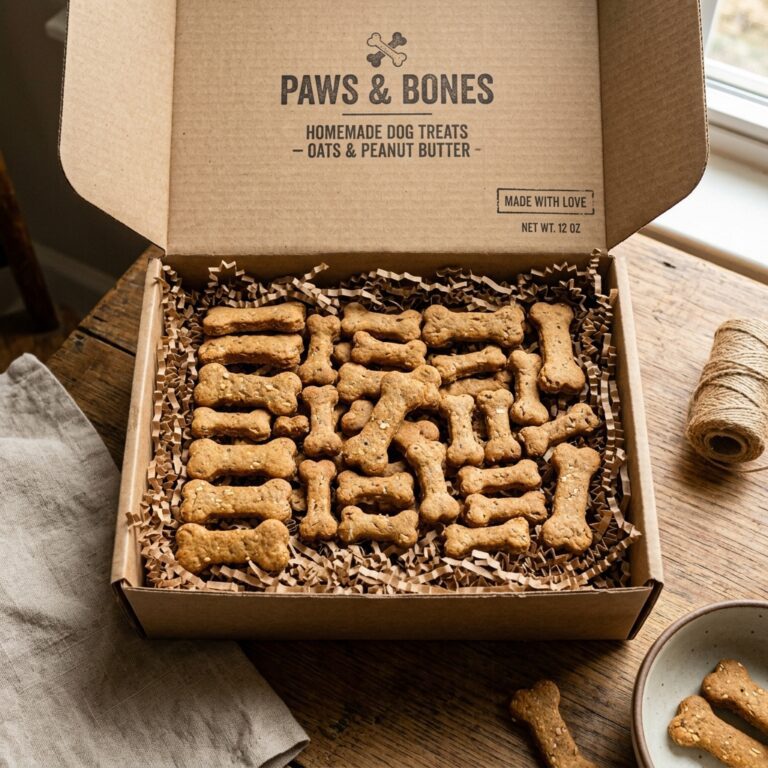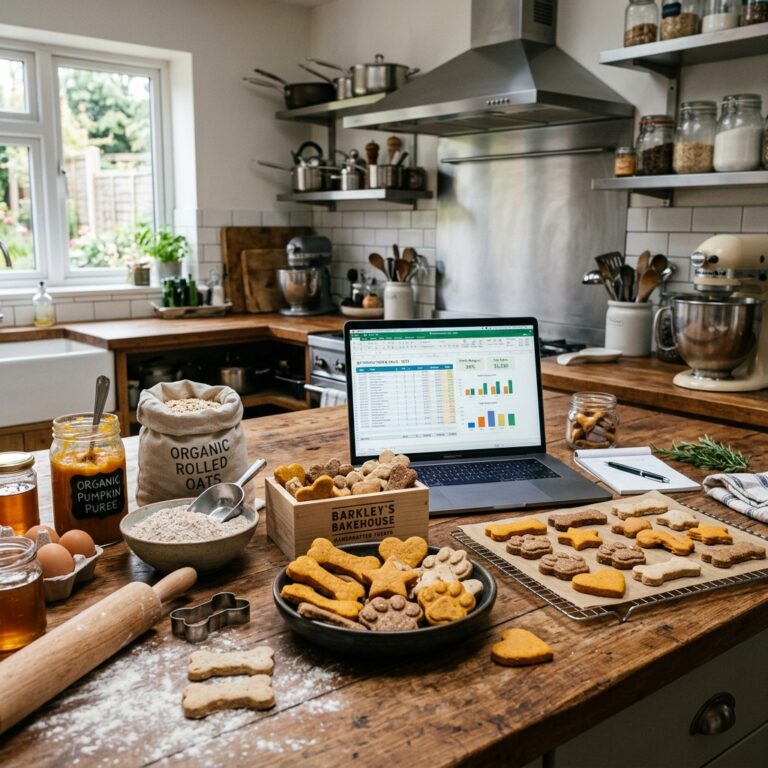
Why You Should Use A Cake Decorating Bag To Make 500 Tiny Dog Treats
Listen up, savvy dog owners. If you have been buying those tiny ‘training treats’ from the big-box pet stores, you are being taken for a ride. You know the ones—those little moist morsels that come in a 4-ounce bag for ten dollars? As the Canine Nutrition Hacker, it is my job to tell you that those bags are mostly filled with air, marketing fluff, and ingredients that would make a forensic scientist blush. We are talking about glycerin, pea starch, and sugar disguised as ‘natural flavors.’ You are paying premium steak prices for what is essentially flavored sawdust. But what if I told you that you could produce 500 high-value, nutrient-dense training treats in less than fifteen minutes for about the price of a single cup of coffee? The secret isn’t a fancy new dehydrator or a high-tech kitchen gadget. It is a simple, five-dollar cake decorating bag. This isn’t just about saving money; it is about taking total control over what goes into your dog’s body. When you are training a dog—especially a high-energy breed or a puppy—you might go through fifty treats in a single session. If those treats are loaded with fillers, you are sabotaging your dog’s health one ‘good boy’ at a time. Today, I am pulling back the curtain on the ‘Squeeze & Bake’ method that professional trainers and nutrition nerds use to keep their dogs motivated without breaking the bank or ruining their gut health.
The Economics of the Pastry Bag: Stop Getting Ripped Off
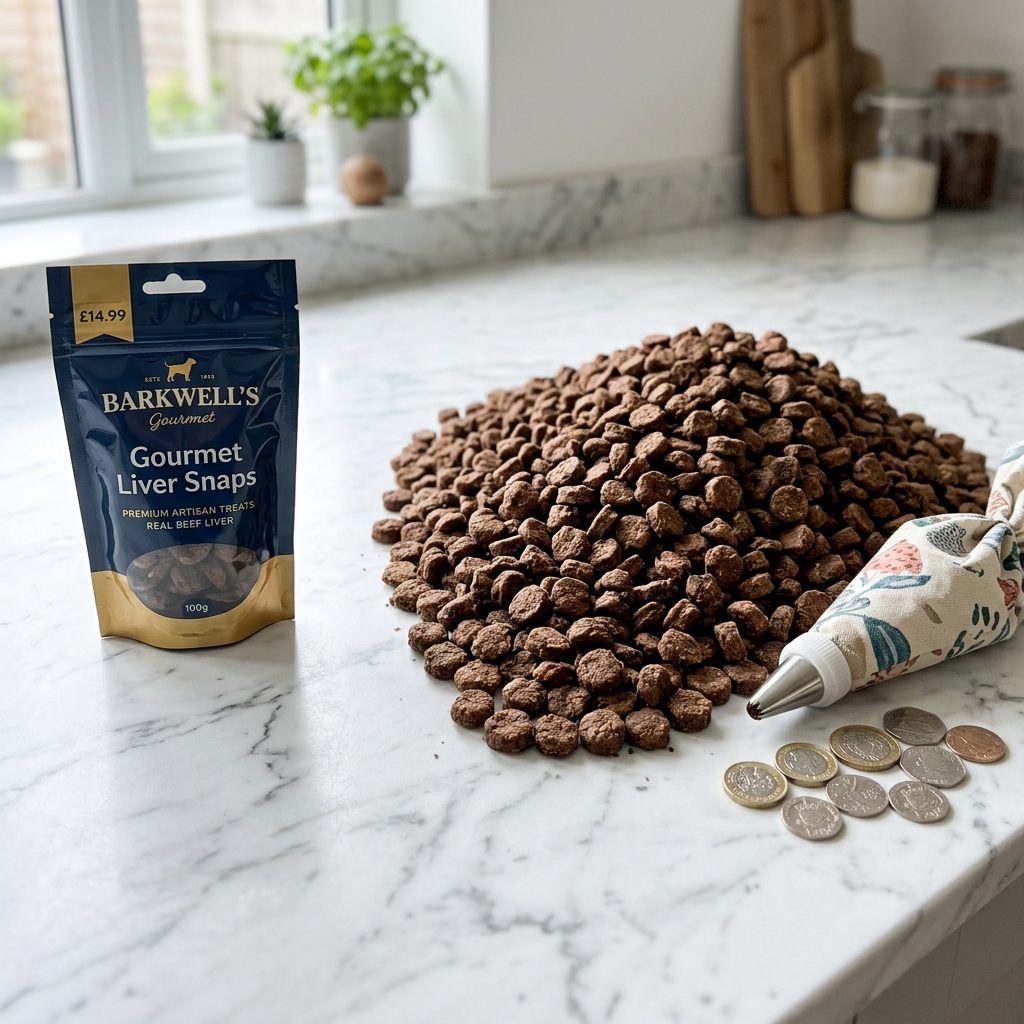
Let’s talk cold, hard cash. The pet treat industry is a multi-billion dollar machine designed to make you feel like you need their ‘specialized’ formulas. But when we look at the cost per ounce, the reality is staggering. Most high-end training treats cost roughly $1.50 to $2.00 per ounce. For a 50lb dog in active training, you could easily spend $150 a month just on treats. By using the cake decorating bag hack, you are utilizing whole-food ingredients like beef liver, eggs, and oat flour. Your cost drops to approximately $0.15 per ounce. That is a 90% savings that stays in your pocket while your dog gets 100% better nutrition. This method allows you to create ‘micro-treats’—tiny dots the size of a pea—which are perfect for repetitive training because they don’t fill the dog up or add excessive calories. Here is how the math breaks down when you stop buying the hype and start hacking the system:
| Feature | Commercial ‘Premium’ Treats | Pastry Bag DIY Hacker Treats |
|---|---|---|
| Price Tier | Luxury ($$$) | Budget Friendly ($) |
| Main Ingredient | Pea Flour or Glycerin | Pure Liver or Heart |
| Cost Per 500 Treats | $25.00 – $40.00 | $2.50 – $4.50 |
| Glycemic Index | High (Spikes Insulin) | Low (Steady Energy) |
| Hacker Verdict | A Marketing Scam | The Gold Standard |
Hacker Tip: The reason commercial treats are so expensive isn’t the ingredients; it’s the ‘shelf-stabilizers’ and the fancy packaging. When you bake at home, you skip the chemicals and keep the cash.
The Forensic Ingredient Analysis: What Are You Actually Feeding?
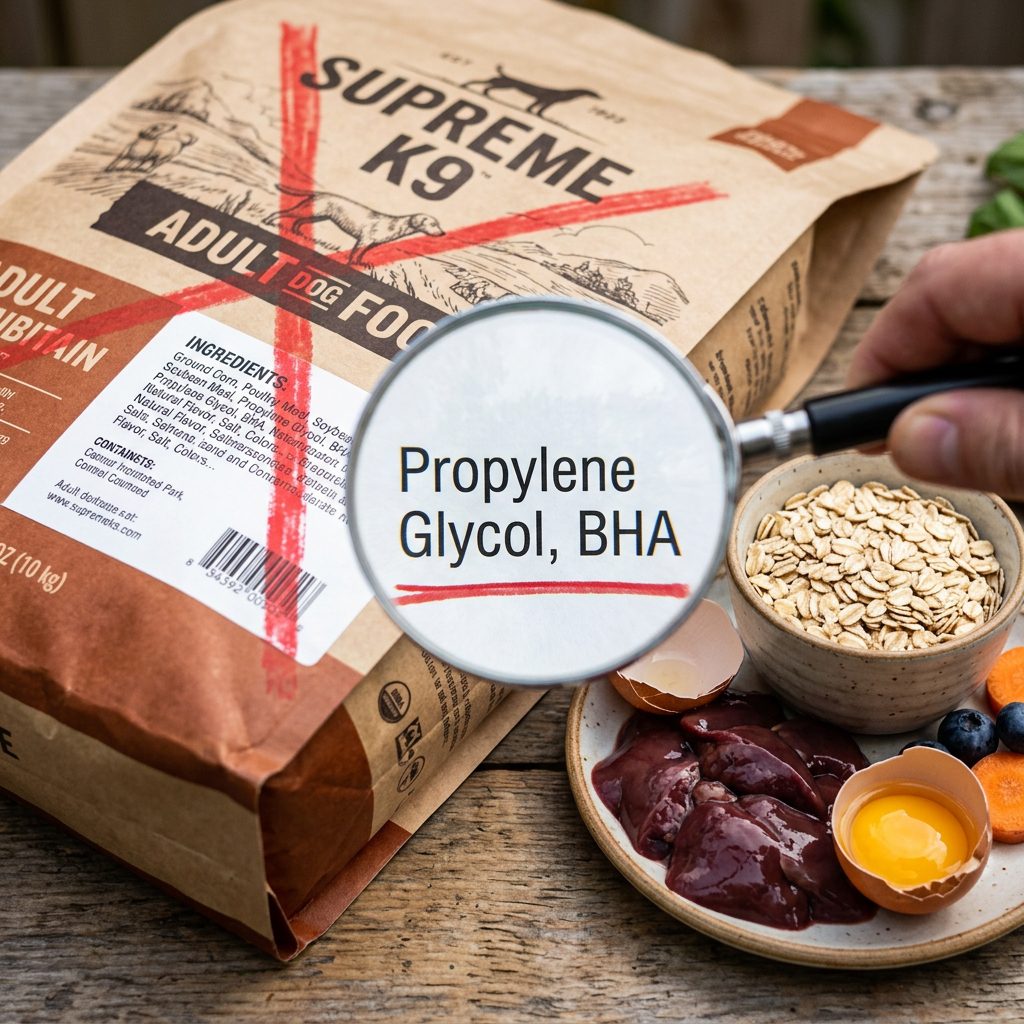
As a Canine Nutrition Hacker, I analyze labels like a crime scene. Most owners see ‘Chicken Flavor’ and think ‘Chicken.’ I see Hydrolyzed Soy Protein and Red 40. When you use a cake decorating bag to make your own treats, you become the gatekeeper of your dog’s health. Commercial treats often use Propylene Glycol (an additive also found in antifreeze) to keep treats moist. They use BHA and BHT as preservatives, which have been linked to health issues in long-term studies. By making your own, you eliminate the ‘Dirty Dozen’ of pet food additives.
The Enemy Ingredients to Avoid
- Glycerin: Used to keep treats soft, but it is often a byproduct of the biodiesel industry and adds empty calories.
- Liquid Smoke: Often contains polycyclic aromatic hydrocarbons (PAHs), which are potential carcinogens.
- Corn Syrup: A cheap way to make treats palatable that leads to obesity and dental decay.
- Animal By-Product Meal: A ‘mystery meat’ that can include anything from diseased tissues to non-nutritional scraps.
By contrast, our hacker recipe uses Hero Ingredients. We want Bioavailable Proteins like liver, which is nature’s multivitamin, packed with Vitamin A, B vitamins, and iron. We use Oat Flour instead of wheat or corn because it is easier on the canine digestive tract and provides a slow release of energy. When you pipe these treats through a pastry bag, you are creating a ‘nutrient bomb’ that reinforces good behavior without the metabolic fallout of store-bought junk.
The ‘Squeeze & Bake’ Master Recipe: Ratios That Work
To use a cake decorating bag successfully, your batter needs the perfect consistency. It cannot be too thick (it will burst the bag) or too thin (it will run all over the tray). After testing hundreds of variations, I have perfected the 1:1:0.5 Hacker Ratio. This ensures a smooth flow through a #10 or #12 round piping tip.
SAFETY DISCLAIMER: I am a nutrition hacker, not a veterinarian. These treats are intended for supplemental feeding only and should not exceed 10% of your dog’s daily caloric intake. Always consult your vet before introducing new proteins if your dog has underlying health issues.
The Hacker’s Ingredient List
- 1 lb Raw Protein: Beef liver, chicken hearts, or canned sardines (in water, no salt).
- 2 Large Eggs: These act as the ‘glue’ and provide essential fatty acids.
- 1.5 to 2 Cups Binder: Oat flour or brown rice flour work best for the piping consistency.
- Optional Power-Ups: A tablespoon of unsweetened applesauce or a pinch of turmeric for inflammation.
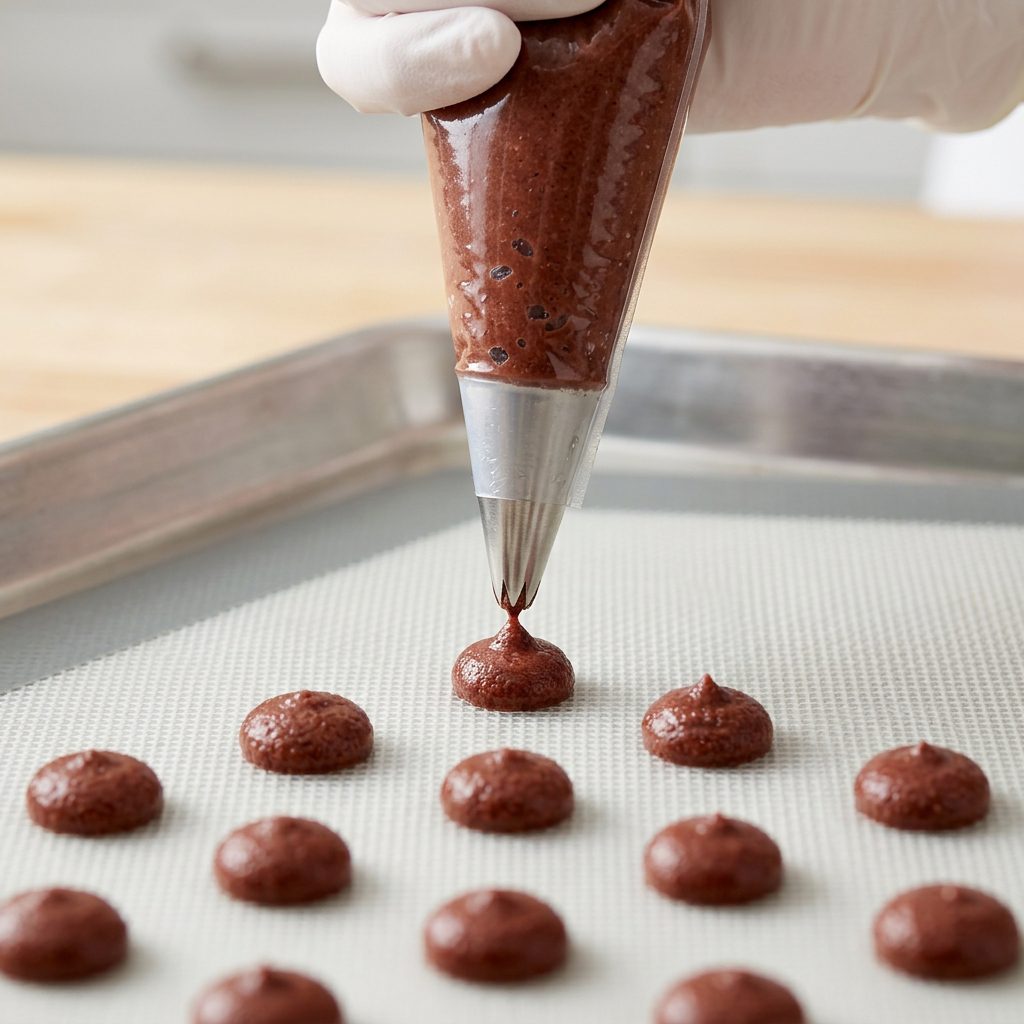
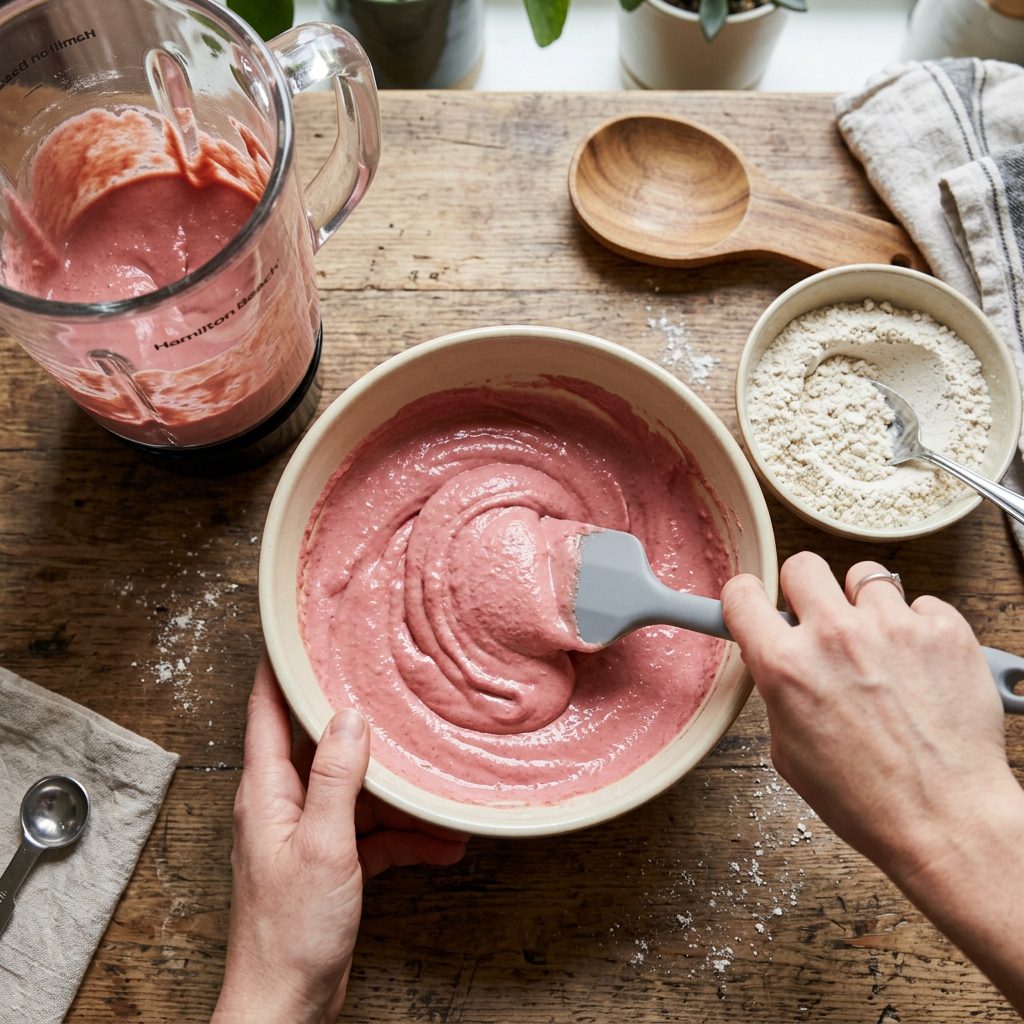
Step 1: Liquefy your protein and eggs in a high-speed blender until it looks like a thick smoothie. Step 2: Slowly fold in your flour until you reach a consistency similar to thick pancake batter. Step 3: Fit your pastry bag with a medium round tip and fill it up. Step 4: Pipe tiny dots—think the size of a chocolate chip—onto a parchment-lined baking sheet. Step 5: Bake at 350°F for 15-20 minutes until firm. You now have 500 high-value rewards that smell like heaven to your dog and cost you next to nothing.
The Pastry Bag Technique: 500 Treats Without the Hand Cramp
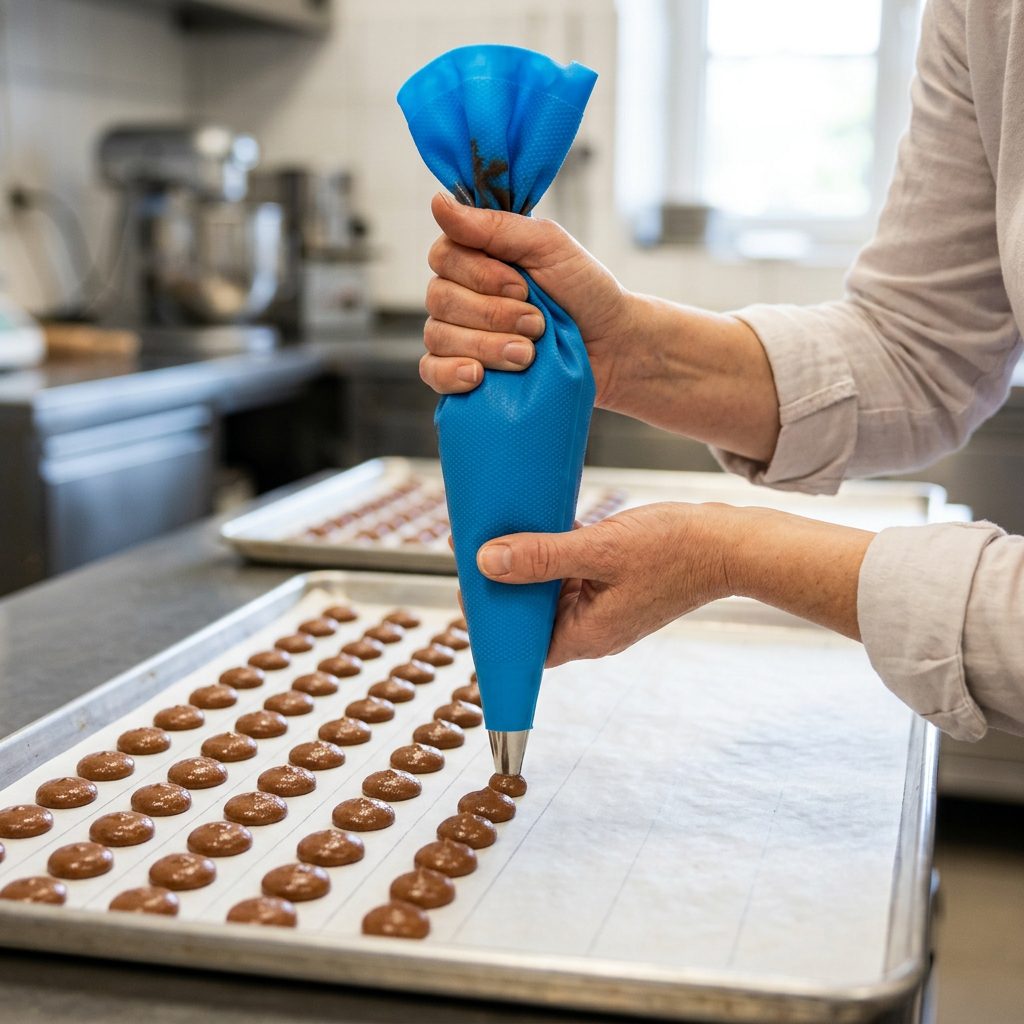
Many people try to make DIY treats by rolling out dough and cutting it with tiny cookie cutters. That is a rookie mistake. It takes hours, it’s messy, and your back will ache. The cake decorating bag is the ultimate efficiency hack. With one steady squeeze, you can ‘drop’ a treat every second. If you use a large silicone bag, you can fit the entire batch at once.
Pro Tips for Perfect Piping
- The ‘Twist and Lock’: Always twist the top of the bag tightly against the batter to create pressure. This prevents the batter from leaking out the top and gives you better control.
- Tip Selection: Use a stainless steel round tip. Avoid the star-shaped ones; the ‘points’ of the star can break off after baking, making the treats crumbly.
- The Silicone Mat Secret: If you really want to level up, use a ‘pyramid’ silicone baking mat. Flip it over, and the little indentations act as a mold for your piping. You just smear the batter across with a spatula, but the pastry bag gives you more precision for ‘high-value’ sizing.
By using the bag, you ensure every treat is the exact same size. This is crucial for Caloric Management. If every treat is exactly 2 calories, you can track exactly how much ‘extra’ food your dog is getting during a heavy training day. No more guessing, no more accidental weight gain.
Storage Secrets: Keeping Your 500 Treats Fresh for Months
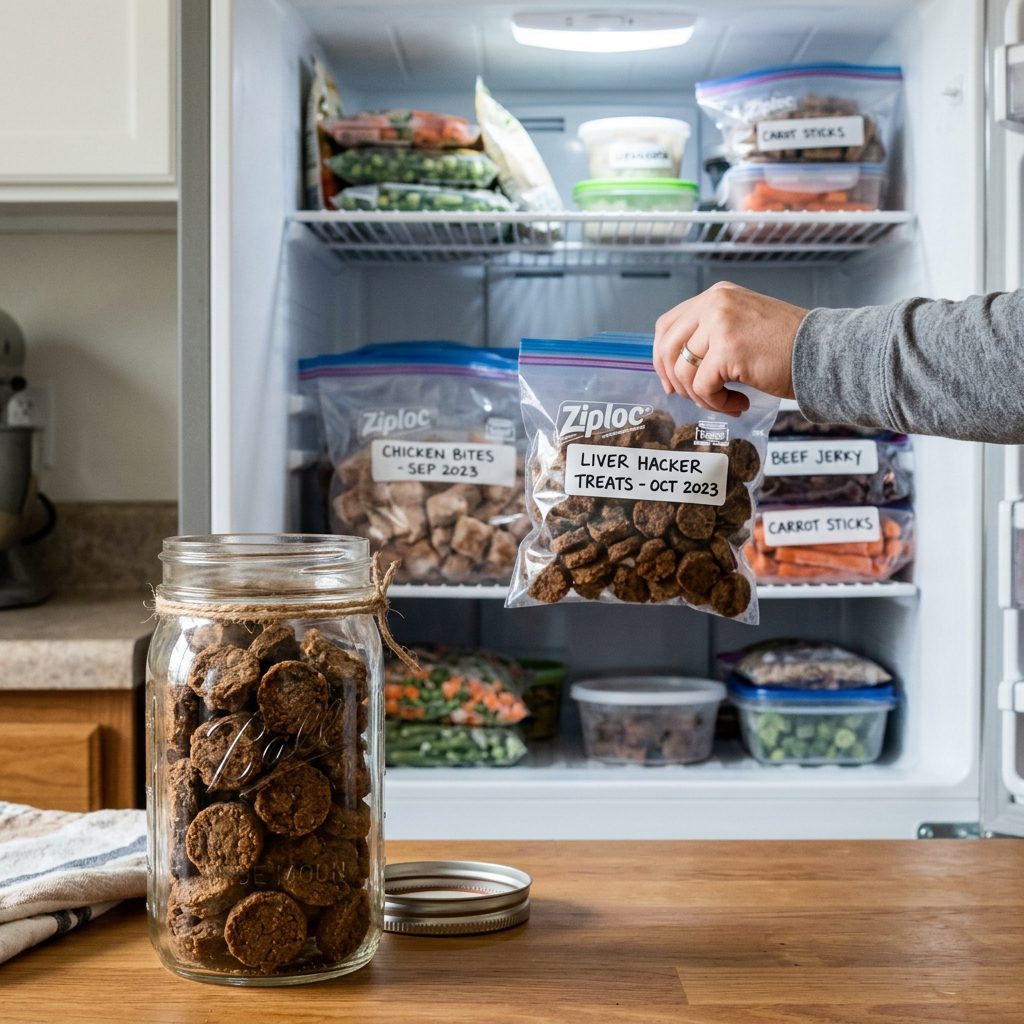
Because these treats don’t contain the nasty chemical preservatives found in commercial bags, you have to be smarter about storage. You’ve just made 500 treats; if you leave them on the counter, they will spoil in three days. As a hacker, you need a multi-tier storage strategy.
The Hacker Storage Protocol
- The 3-Day Rule: Keep a small jar of treats in the fridge for immediate use. These stay fresh and moist for about 72 hours.
- The Freezer Stash: Divide the remaining treats into small ‘snack-sized’ freezer bags. Liver treats freeze beautifully and don’t stick together if they were baked properly. They will last 6 months in the freezer.
- The Dehydration Hack: If you want shelf-stable treats that can sit in your training pouch all day without getting ‘mushy,’ turn your oven down to 175°F after the initial bake and leave them in for another 2 hours with the door slightly ajar. This removes the moisture and turns them into ‘crunchies’ that last much longer.
Money Saved: By batch-cooking and freezing, you are essentially creating your own ‘subscription service’ without the monthly fee. You’ll always have high-value rewards ready to go, whether you’re working on a ‘sit-stay’ or a complex agility course.
Conclusion
The transition from a ‘consumer’ to a ‘hacker’ starts in the kitchen. By choosing to use a cake decorating bag to make your own dog treats, you are rejecting the low-quality, high-markup world of commercial pet snacks. You are providing your dog with superior protein, zero fillers, and a lower glycemic load, all while saving hundreds of dollars a year. Remember, training is the ultimate bonding experience between you and your dog. Don’t taint that experience with chemical-laden ‘mystery meat’ drops. Grab a pastry bag, blend up some liver, and start piping. Your dog’s health—and your bank account—will thank you. Stay savvy, keep hacking, and I’ll see you in the next deep dive into the bowl.