Adorable Dog Safe Sandwich Cookies That Look Human
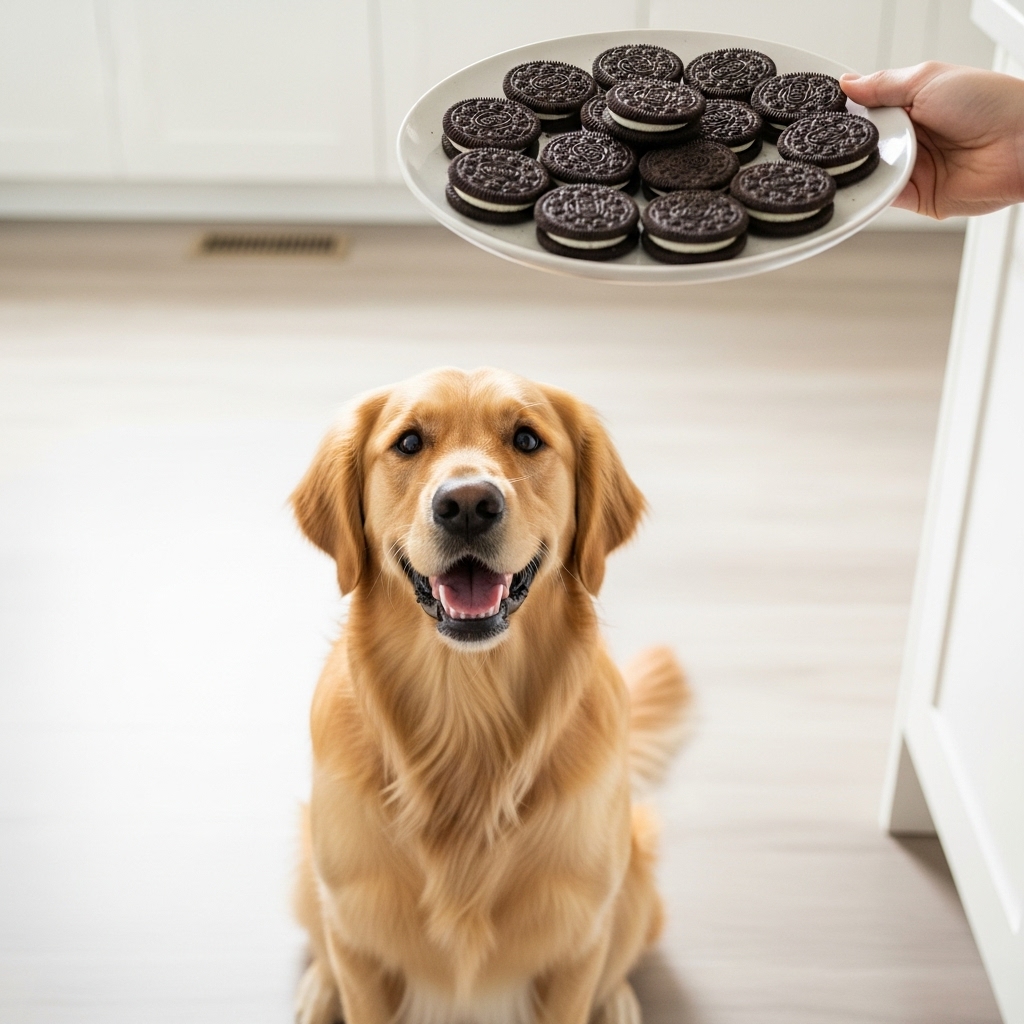
There are few things more heartwarming than your dog’s hopeful gaze as you unwrap a snack. You munch on your cookie, they stare with those big, soulful eyes, and the temptation to share is almost overwhelming. But we all know that our favorite human treats, especially chocolate sandwich cookies, are packed with ingredients that are dangerous for our four-legged family members. So, what’s a loving pet parent to do?
Get baking, of course! We’ve cracked the code on creating adorable, dog-safe sandwich cookies that look just like the iconic human version but are made with wholesome, pup-friendly ingredients. In this guide, we’ll walk you through why sharing your snacks is a bad idea, what ingredients make the perfect dog cookie, and a simple, step-by-step recipe for what we like to call ‘Pup-Oreos.’ Get ready to win the ‘Best Dog Parent’ award!
Why Your Dog Can’t Share Your Sandwich Cookies
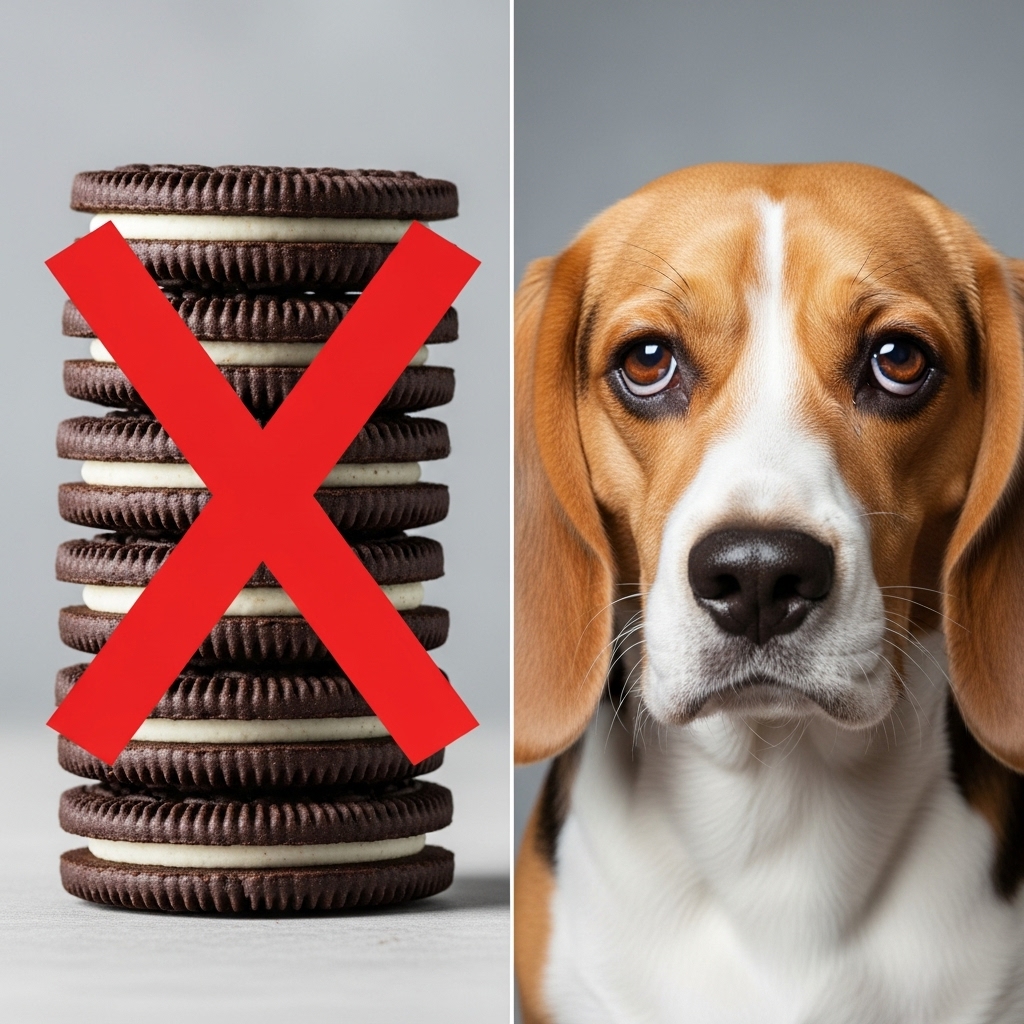
Before we dive into the fun stuff, let’s cover the serious side of things. It’s crucial to understand why human cookies are off-limits for dogs. It’s not just about avoiding a few extra calories; it’s about preventing a potential medical emergency. Here are the main culprits hiding in your snack cabinet:
- Chocolate: This is the big one. Chocolate contains theobromine and caffeine, two stimulants that dogs cannot metabolize effectively. Even a small amount can cause vomiting and diarrhea, while larger amounts can lead to heart problems, seizures, and can even be fatal. The darker the chocolate, the more dangerous it is.
- Xylitol: This sugar substitute is extremely toxic to dogs. It’s found in many sugar-free products, including some peanut butters and baked goods. Xylitol can cause a rapid, life-threatening drop in a dog’s blood sugar (hypoglycemia) and lead to liver failure. Always check ingredient labels!
- Excess Sugar & Fat: A dog’s digestive system isn’t designed to handle the high levels of sugar and fat found in human desserts. Over time, these can lead to obesity, pancreatitis (a painful inflammation of the pancreas), and dental problems.
- Dairy: Many dogs are lactose intolerant, meaning they lack the enzyme to properly digest the lactose in milk. While the cream filling might seem harmless, it could lead to an upset stomach, gas, and diarrhea for your pup.
Expert Tip: When in doubt, don’t share. It’s always safer to stick to treats specifically formulated for dogs or to make your own using vet-approved ingredients.
Building a Better, Safer Cookie for Your Pup
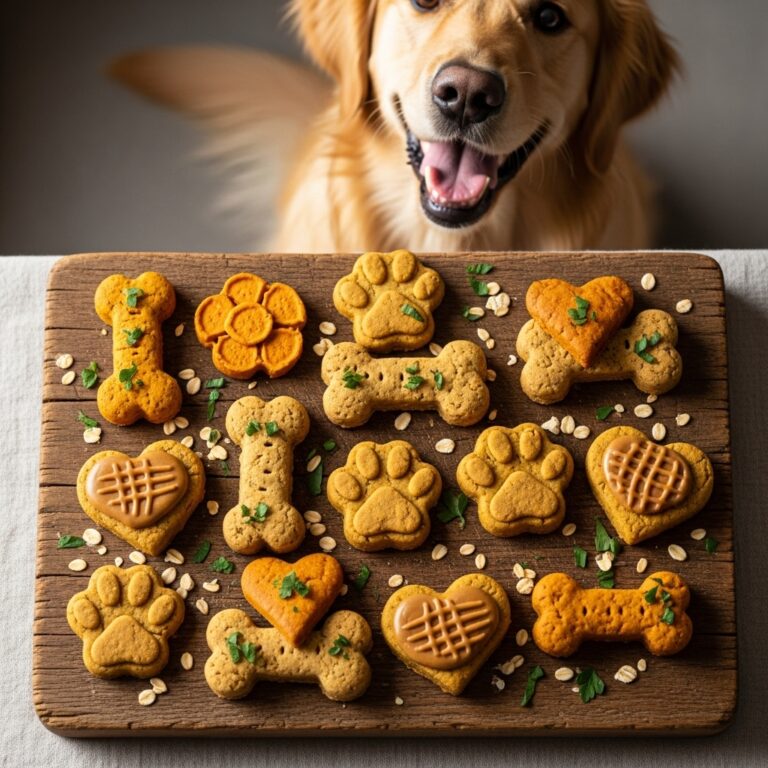
The secret to a great dog-safe cookie is using simple, whole-food ingredients that are beneficial (or at least harmless) for your canine companion. We’re swapping out the bad stuff for wholesome goodness. Here’s what we’ll be using in our recipe:
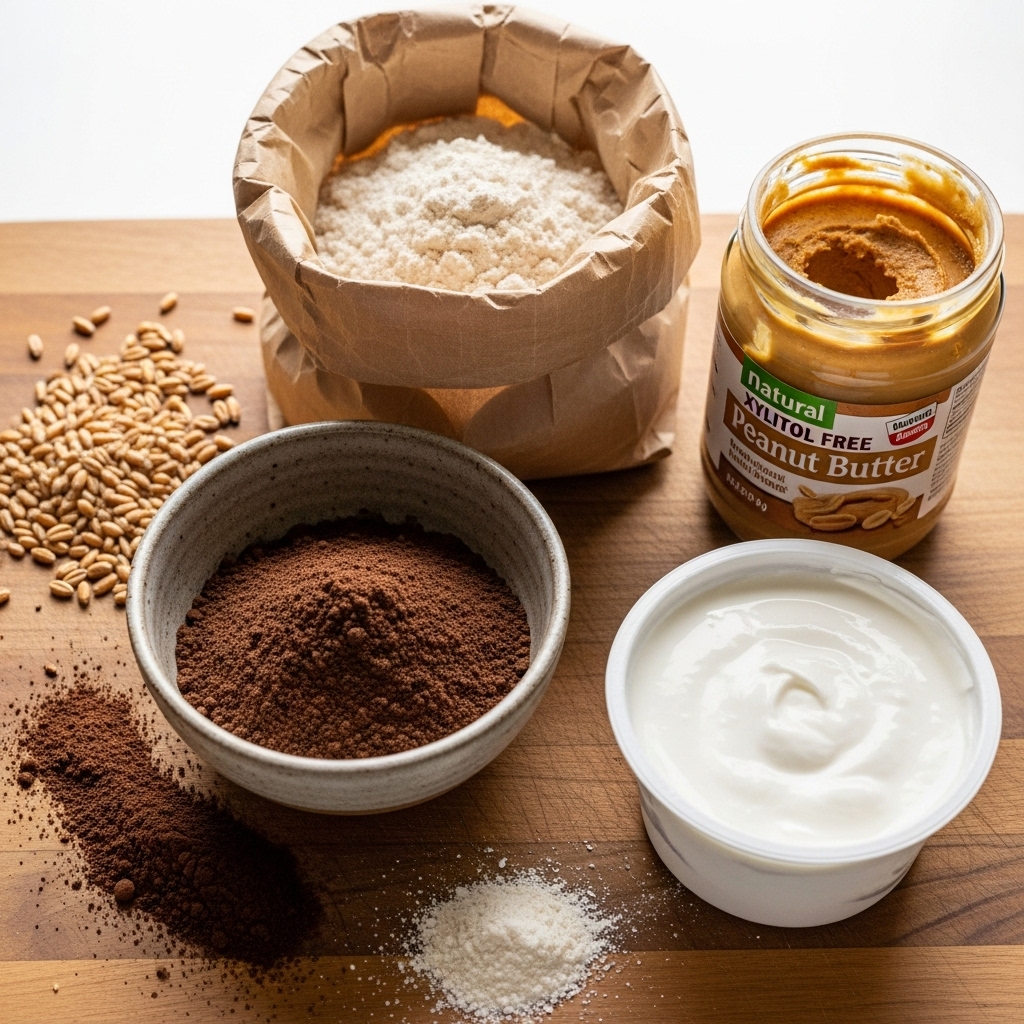
For the Cookie Wafers:
- Carob Powder: This is our magic ingredient! Carob comes from a pod and is naturally sweet, caffeine-free, and theobromine-free, making it the perfect dog-safe substitute for chocolate. It gives our cookies that classic dark color and a slightly sweet flavor dogs love.
- Whole Wheat or Oat Flour: Instead of processed white flour, we use whole wheat flour for fiber. If your dog has a grain sensitivity, oat flour or coconut flour are fantastic gluten-free alternatives.
- Unsweetened Applesauce or Banana: These act as natural sweeteners and binders, replacing the need for processed sugar and too much oil.
For the Creamy Filling:
- Plain Greek Yogurt: A great source of probiotics and calcium. Make sure it’s plain and has no added sugars or artificial sweeteners like xylitol.
- Xylitol-Free Peanut Butter: Most dogs go crazy for peanut butter! It makes a delicious and sticky filling. CRITICAL: Read the label to ensure it does not contain xylitol. Look for brands that contain only peanuts and maybe a little salt.
- Cream Cheese: Use plain, full-fat cream cheese in moderation as a rich and creamy binder for the filling.
Step-by-Step Recipe: Your Dog’s Favorite New Treat!
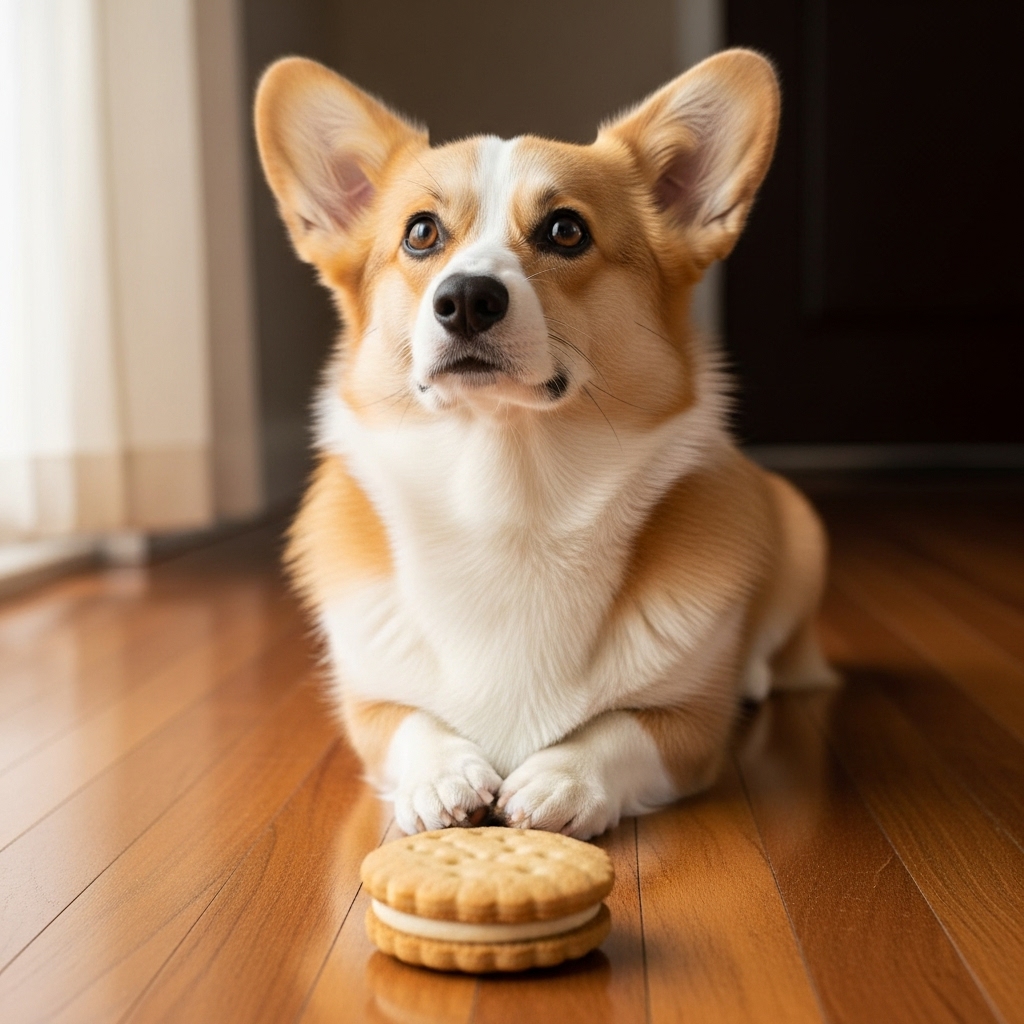
Ready to get baking? This recipe is simple, fun, and the results are ridiculously cute. Your dog will be your official taste-tester and biggest fan!
Ingredients List
- For the Cookies: 1 cup whole wheat flour, 1/2 cup carob powder, 1/4 cup unsweetened applesauce, 1/4 cup coconut oil (melted), 1 egg.
- For the Filling: 1/2 cup plain Greek yogurt OR 1/2 cup xylitol-free peanut butter.
Equipment Needed
- Mixing bowls
- Whisk and spatula
- Rolling pin
- Baking sheets
- Parchment paper
- A small, round cookie cutter (a bottle cap works too!)
Instructions
- Preheat & Prep: Preheat your oven to 350°F (175°C). Line a baking sheet with parchment paper.
- Mix Dry Ingredients: In a medium bowl, whisk together the whole wheat flour and carob powder until well combined.
- Mix Wet Ingredients: In a separate bowl, mix the melted coconut oil, unsweetened applesauce, and the egg until smooth.
- Combine: Pour the wet ingredients into the dry ingredients and stir until a stiff dough forms. You may need to use your hands to bring it all together.
- Roll & Cut: Place the dough between two sheets of parchment paper and roll it out to about 1/4-inch thickness. Use your small round cookie cutter to cut out as many circles as you can. Re-roll the scraps to use all the dough.
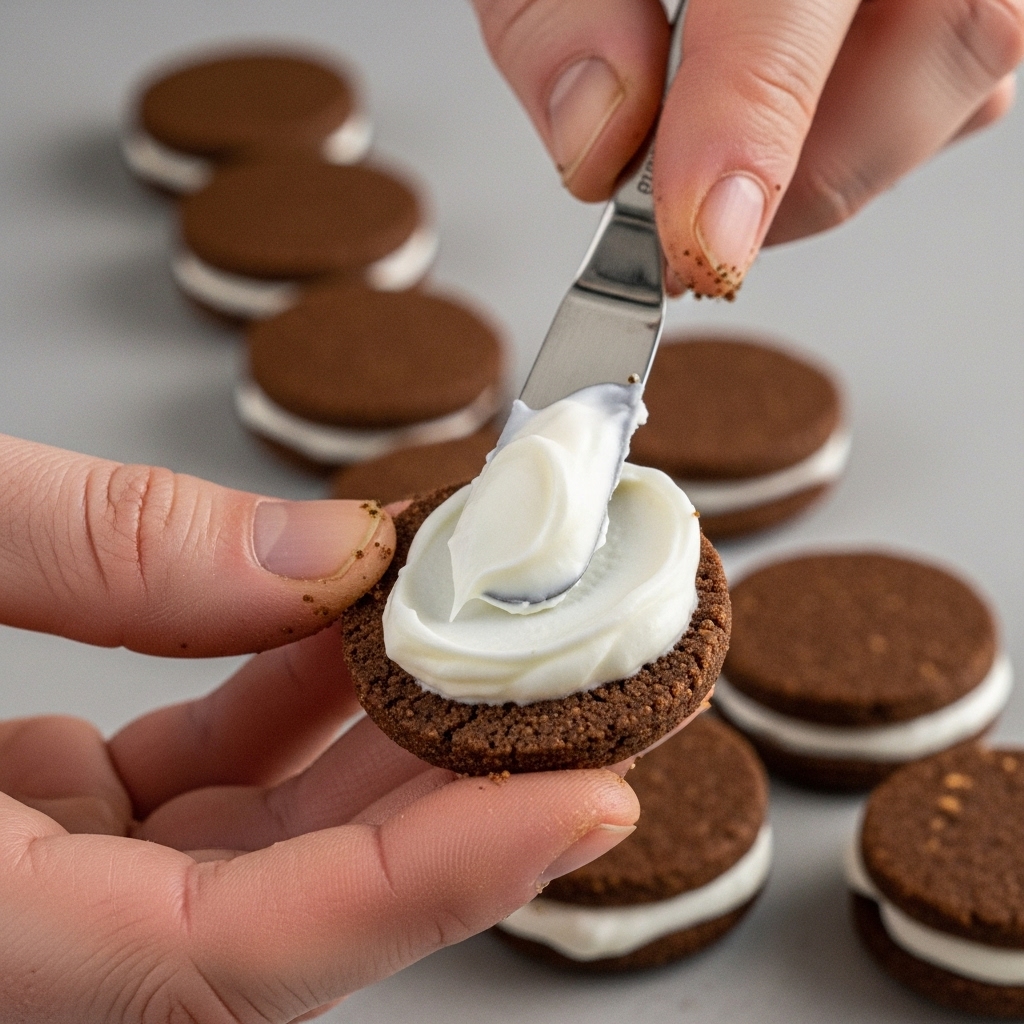
- Bake: Place the cookie circles on your prepared baking sheet. Bake for 10-12 minutes, until firm.
- Cool Down: Let the cookies cool completely on a wire rack. This is important! A warm cookie will just melt the filling.
- Assemble: Once cool, take one cookie wafer and spread a small amount of your chosen filling (yogurt or peanut butter) on the flat side. Top it with another cookie wafer and gently press to create your sandwich.
How Many is Too Many? Portion Control and Storage
Your dog will probably try to convince you that these cookies are a new food group, but remember: treats are treats! They should only make up about 10% of your dog’s daily caloric intake. Overfeeding, even with healthy snacks, can lead to weight gain.
Serving Size Guide
This is a general guideline. Always consider your dog’s age, activity level, and overall health.
| Dog Size | Recommended Daily Treat Limit |
|---|---|
| Small (under 20 lbs) | 1 cookie |
| Medium (20-50 lbs) | 2 cookies |
| Large (over 50 lbs) | 3 cookies |
Storage Tips
Because these cookies contain fresh ingredients like yogurt, they need to be stored properly.
- Refrigerator: Store the assembled cookies in an airtight container in the fridge for up to 5 days.
- Freezer: For longer storage, you can freeze the cookies. They make a great crunchy, cool treat on a hot day! They’ll last for up to 2 months in the freezer.
Conclusion
There you have it! A simple and fun way to create a special treat that you can feel good about sharing with your dog. Baking for your pup is more than just about the food; it’s an act of love and a wonderful way to strengthen your bond. You get the peace of mind of knowing exactly what’s in their snacks, and they get a delicious, custom-made cookie that will have their tail wagging with joy. So, tie on that apron, get out the carob powder, and get ready for some happy, sloppy, cookie-filled kisses from your best friend.