Instagram-Ready: How To Make Dog Donuts With A Gut-Boosting Goat Milk Glaze
Hey there, fellow dog lovers! Are you ever scrolling through your phone, seeing all those perfect pooches with their gourmet treats, and thinking, ‘My dog deserves that!’? Well, you’re in luck! Today, we’re whipping up a batch of something truly special: homemade dog donuts that are not only ridiculously cute but also packed with goodness for your pup’s tummy. We’re talking about delicious, easy-to-make donuts with a creamy, gut-boosting goat milk glaze.
Forget those bland, store-bought biscuits with ingredients you can’t pronounce. Baking for your dog is an amazing way to show your love, control what goes into their body, and have a little fun in the kitchen. These donuts are the perfect project for a lazy afternoon, and the end result is a healthy, tail-waggingly good treat that’s ready for its close-up. So, tie on your apron, preheat that oven, and let’s get baking for our best friends!
Why Goat Milk is a Gut-Boosting Superstar for Your Pup
Before we dive into the recipe, let’s talk about our star ingredient: goat milk. You might be wondering what makes it so special. While we often think of milk as a no-go for dogs, goat milk is a completely different story, and it’s a fantastic addition to your pup’s diet for several reasons.
First and foremost, it’s much easier for dogs to digest than cow’s milk. The fat globules in goat milk are smaller, and it contains lower levels of lactose, which is the sugar in milk that often causes upset stomachs in our canine companions. This means less gas, less bloating, and a happier digestive system overall.
But the real magic lies in its probiotic and prebiotic properties. Here’s a quick breakdown of the benefits:
- Packed with Probiotics: Goat milk is a natural source of beneficial bacteria (probiotics) that help maintain a healthy balance of microflora in your dog’s gut. A healthy gut is the cornerstone of a strong immune system.
- Natural Prebiotics: It also contains prebiotics, which are essentially food for the good bacteria. They help the probiotics thrive, making them even more effective.
- Nutrient-Rich: It’s loaded with essential vitamins and minerals like calcium for strong bones, vitamin A for immune health, and B vitamins for energy.
- Anti-Inflammatory Properties: Some studies suggest that goat milk has natural anti-inflammatory properties, which can be beneficial for dogs with allergies or joint issues.
By turning this powerhouse ingredient into a delicious glaze, you’re not just making a pretty treat; you’re giving your dog a tasty dose of digestive support. It’s a win-win!
Gathering Your Pawsome Ingredients & Tools
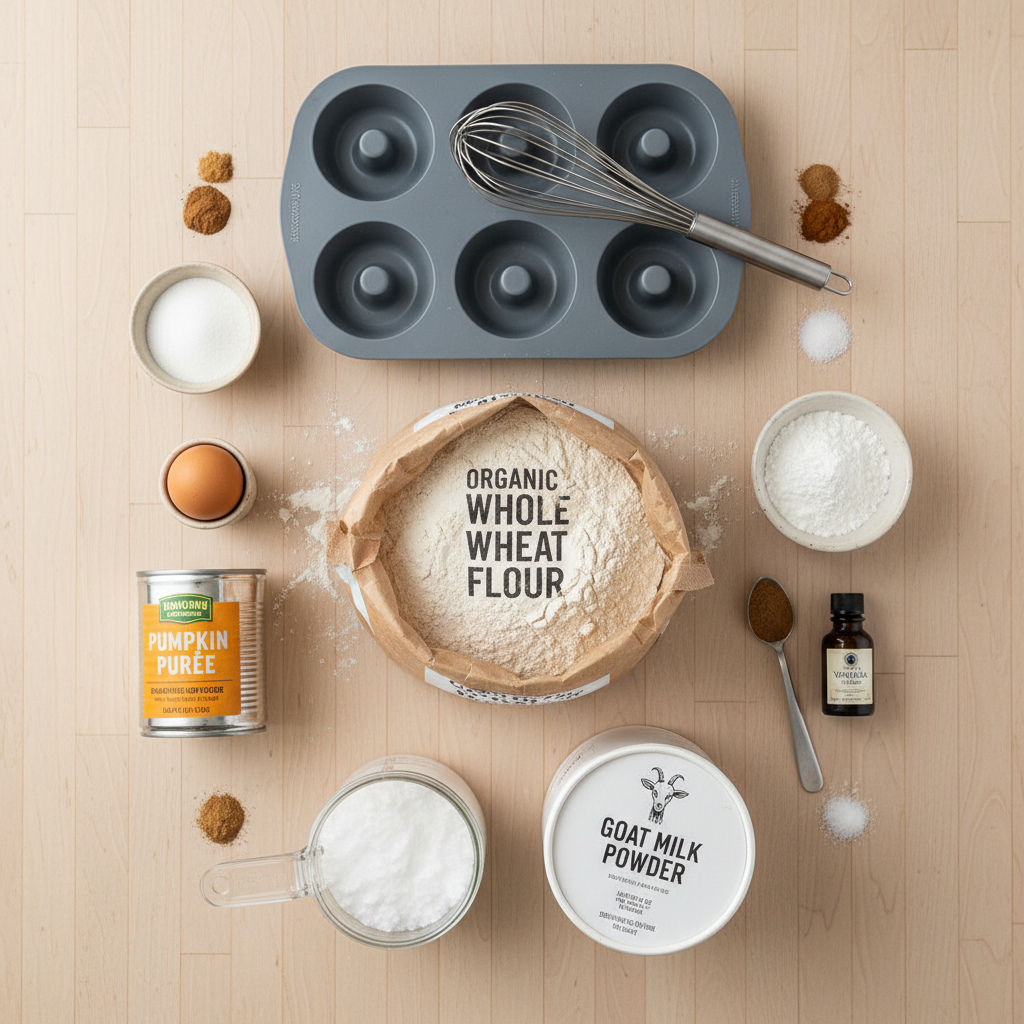
Alright, time to raid the pantry! The best part about this recipe is that it uses simple, wholesome ingredients you might already have. If not, they’re all easy to find at your local grocery store. Let’s get everything ready to go!
For the Donuts:
- 1 cup whole wheat flour (or oat flour for a gluten-free option)
- 1/2 cup pure pumpkin puree (not pumpkin pie filling!)
- 1/4 cup unsweetened applesauce
- 1 large egg
- 1 tablespoon coconut oil, melted
- 1/2 teaspoon baking soda
For the Gut-Boosting Goat Milk Glaze:
- 1/4 cup goat milk powder (found in the baking aisle or online)
- 2-3 teaspoons of water
Kitchen Gear You’ll Need:
- A silicone donut pan (a mini muffin tin will also work in a pinch!)
- Two mixing bowls (one large, one medium)
- A whisk and a spatula
- Measuring cups and spoons
- A piping bag or a zip-top bag to easily fill the donut pan (optional, but helpful!)
A quick note on ingredients: Always double-check that your pumpkin puree and applesauce are 100% pure with no added sugars, spices, or especially xylitol, which is highly toxic to dogs.
Let’s Get Baking! Step-by-Step Donut Directions
This is where the fun begins! This recipe is super simple, so don’t worry if you’re not a professional baker. Just follow these easy steps, and you’ll have perfect pup donuts in no time.
- Preheat and Prep: Start by preheating your oven to 350°F (175°C). Lightly grease your silicone donut pan with a little coconut oil to ensure the donuts pop out easily.
- Mix the Dry Ingredients: In a large bowl, add the whole wheat flour and baking soda. Give it a quick whisk to combine everything evenly. This helps make sure your donuts rise nicely.
- Combine the Wet Ingredients: In a separate, medium-sized bowl, whisk together the pumpkin puree, unsweetened applesauce, egg, and melted coconut oil. Keep whisking until the mixture is smooth and well-combined.
- Bring It All Together: Pour the wet ingredient mixture into the large bowl with the dry ingredients. Use a spatula to gently fold everything together. Mix only until you no longer see dry flour—it’s important not to overmix, as that can make the donuts tough. The batter will be thick.
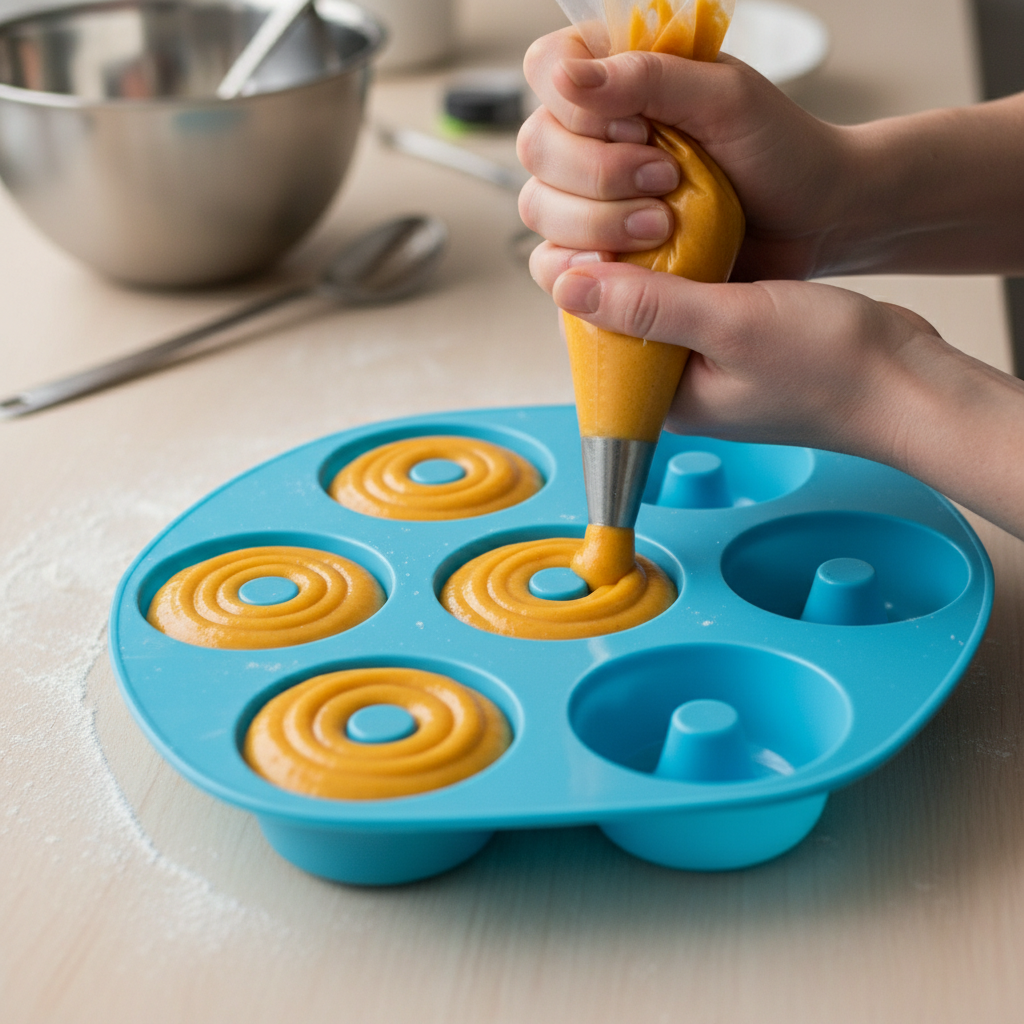
- Fill the Donut Pan: This is where a piping bag comes in handy! If you have one, spoon the batter into it and pipe it evenly into each donut cavity, filling them about three-quarters full. If you don’t have a piping bag, no worries! You can use a small spoon or a zip-top bag with the corner snipped off.
- Time to Bake: Place the donut pan on the middle rack of your preheated oven. Bake for 15-18 minutes, or until a toothpick inserted into the center of a donut comes out clean.
- Cool Down: Once baked, let the donuts cool in the pan for about 10 minutes before carefully transferring them to a wire rack to cool completely. It’s crucial that they are fully cool before you add the glaze, otherwise it will just melt right off!
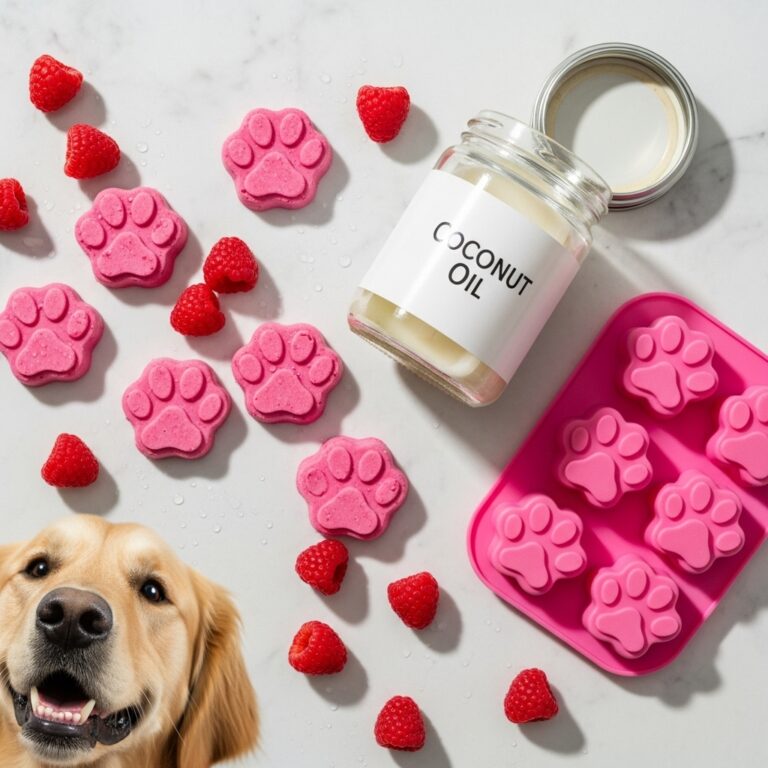
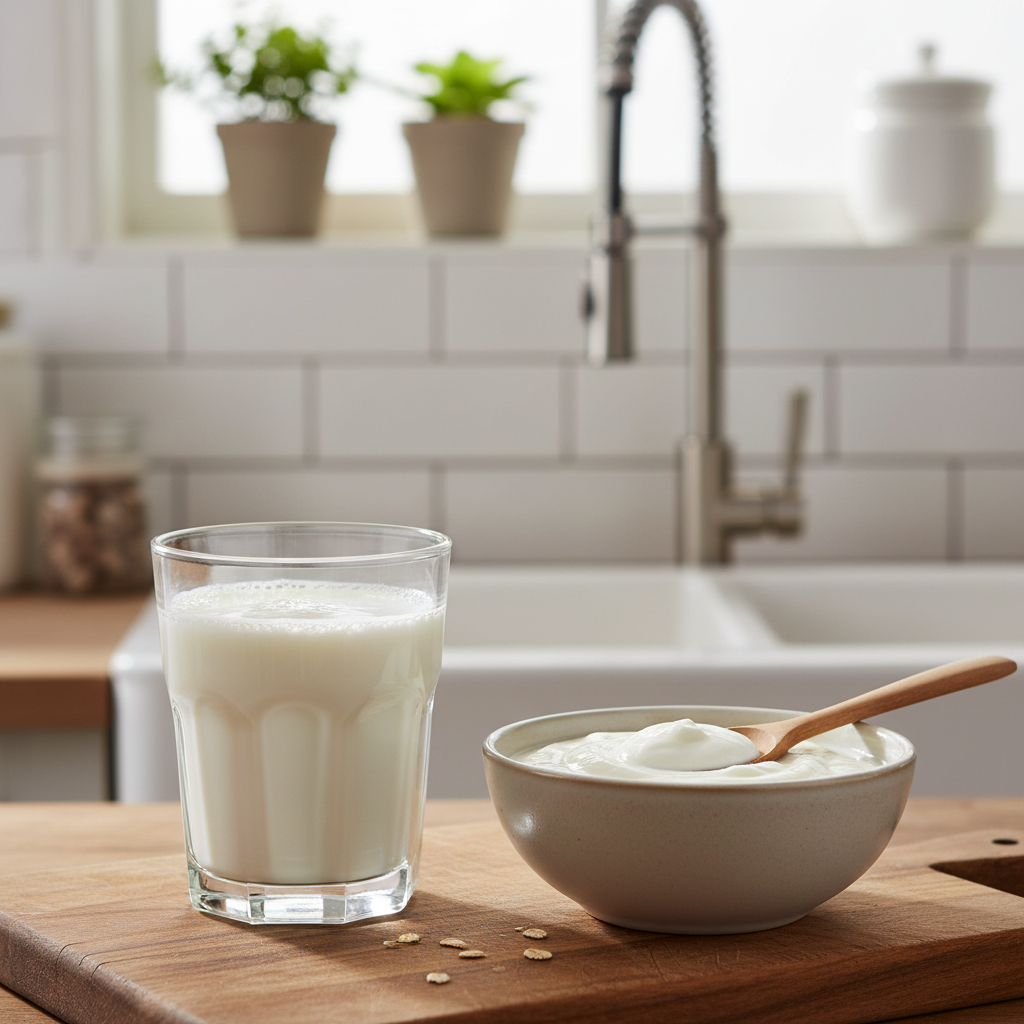
The Grand Finale: Whipping Up the Goat Milk Glaze
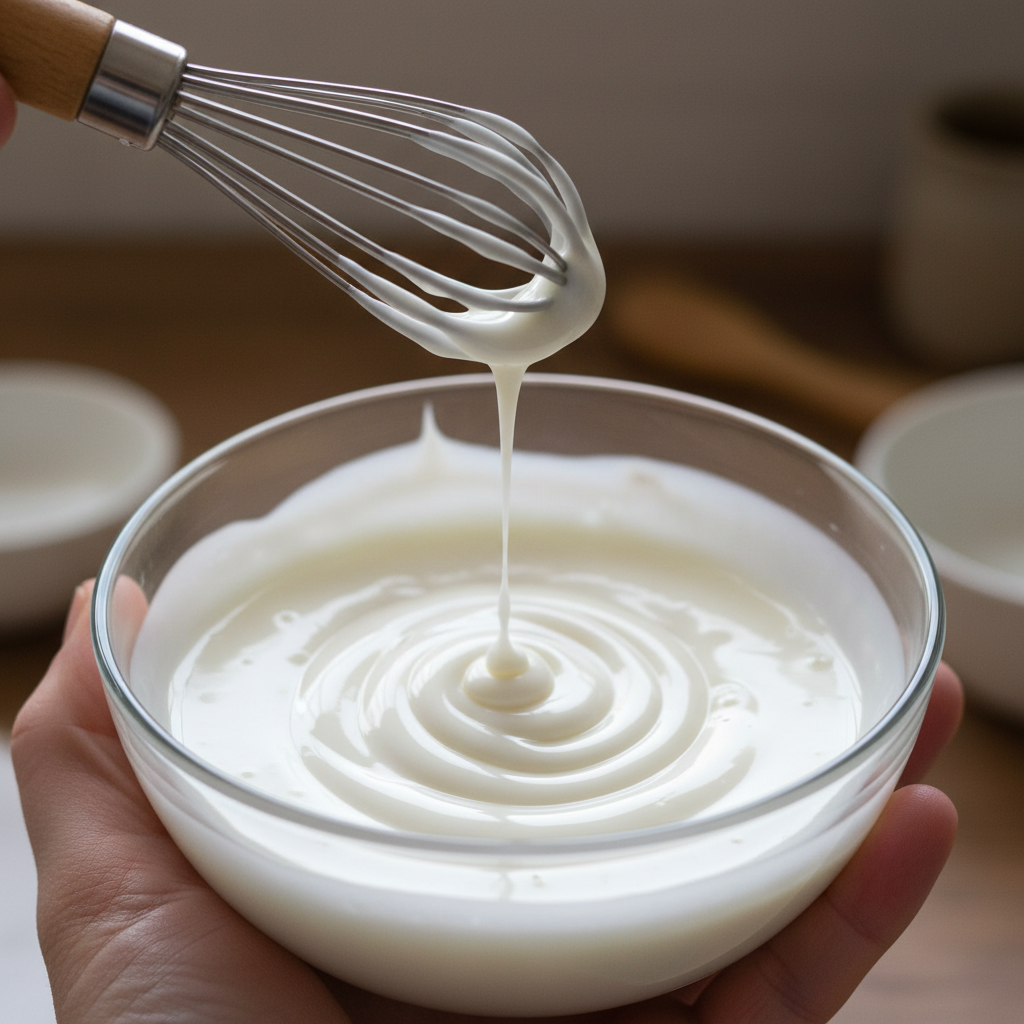
While your donuts are cooling, you can whip up the simple yet amazing two-ingredient glaze. This is what takes your treats from simple baked goods to gourmet goodies!
In a small bowl, add the goat milk powder. Start by adding 2 teaspoons of water and whisk vigorously. You’re looking for a smooth, thick but pourable consistency, similar to a classic sugar glaze. If it’s too thick, add more water, but do it just a tiny bit at a time—a little goes a long way! If you accidentally make it too thin, you can always add a pinch more goat milk powder to thicken it back up. Keep whisking until there are no lumps, and you have a beautiful, glossy white glaze ready for decorating.
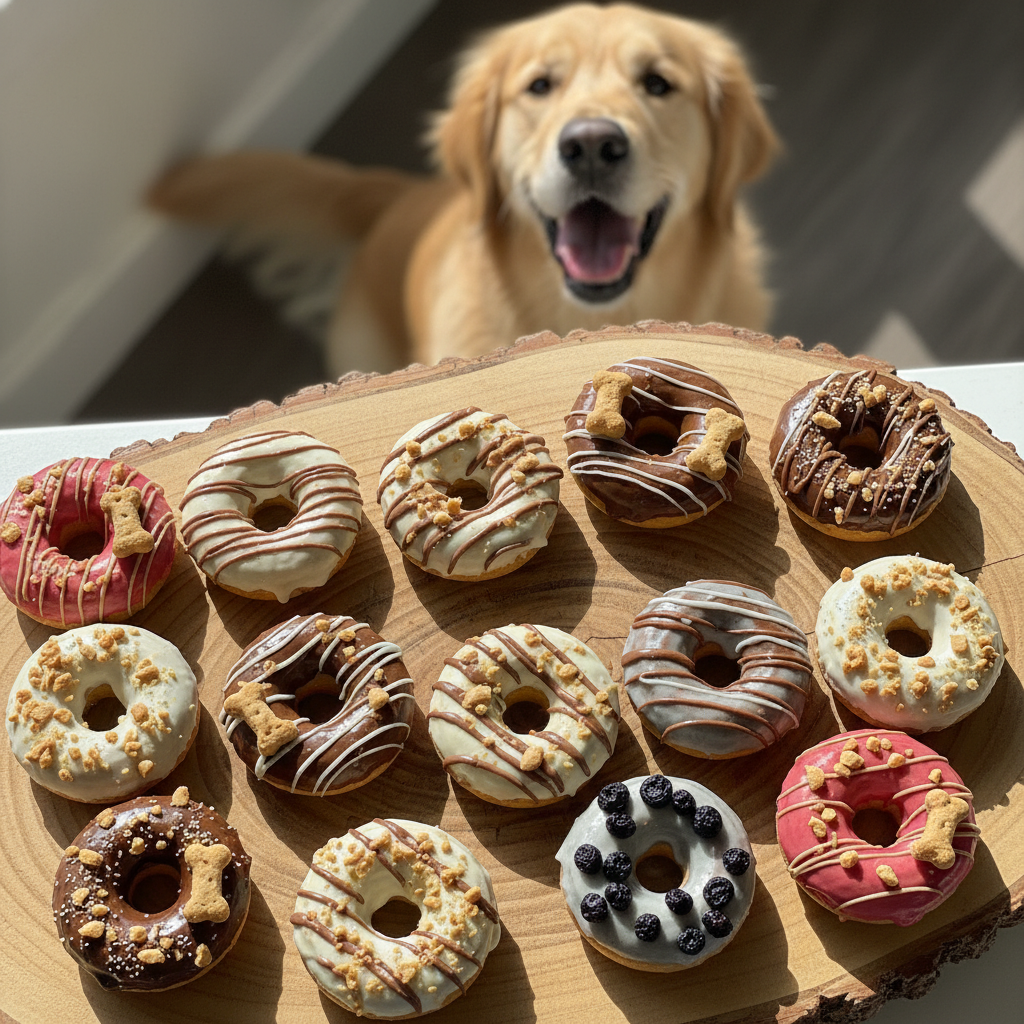
Decorate & Snap! Making Your Donuts Instagram-Worthy
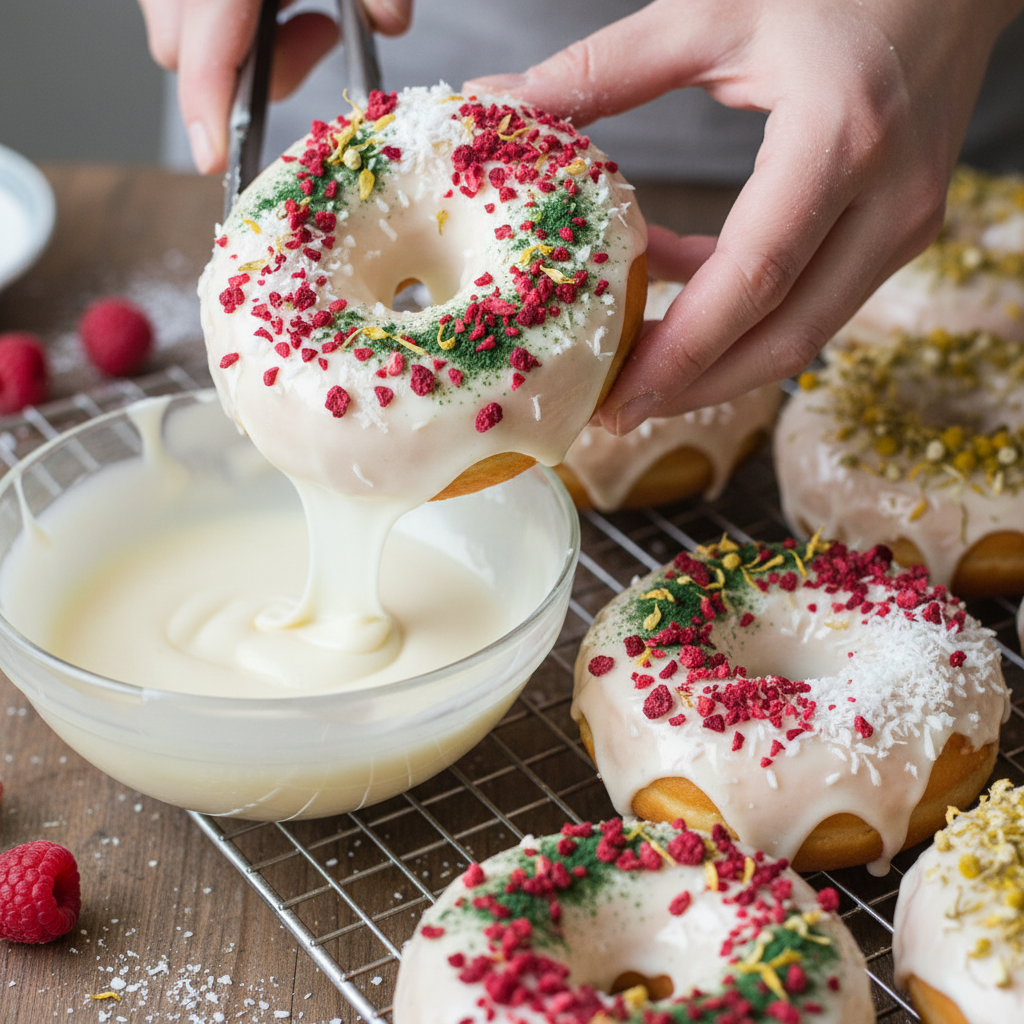
Now for the most creative part: decorating! Once your donuts are completely cool, it’s time to make them picture-perfect. You can either dip the tops of the donuts directly into the glaze or use a spoon to drizzle it over them for a more artistic look.
Want to add a little extra flair? Sprinkle on some dog-safe toppings before the glaze sets. Here are a few ideas to get you started:
- Finely chopped fresh parsley (great for breath!)
- Shredded, unsweetened coconut
- Crumbled freeze-dried berries (like raspberries or blueberries for a pop of color)
- A tiny dash of carob powder (a safe chocolate substitute for dogs)
- Crushed unsalted peanuts or other dog-safe nuts
Once they’re decorated, arrange them on a nice plate or cutting board, find some good natural light, and call your furry model over. A shot of your pup patiently (or not-so-patiently) waiting for their special treat is guaranteed to get all the likes. Get creative and have fun with it!
Conclusion
And there you have it! Beautiful, delicious, and gut-healthy donuts that your dog will absolutely go crazy for. You’ve not only created a tasty treat but also a moment of joy and a healthy boost for your best friend. Storing them is easy, too—just pop them in an airtight container in the fridge for up to a week.
We hope you have a blast making this recipe. There’s nothing quite like the satisfaction of seeing your dog enjoy something you made with love. Don’t forget to share your amazing creations with us online—we’d love to see your pup enjoying their Instagram-ready donuts! Happy baking!